Monday, May 10, 2010

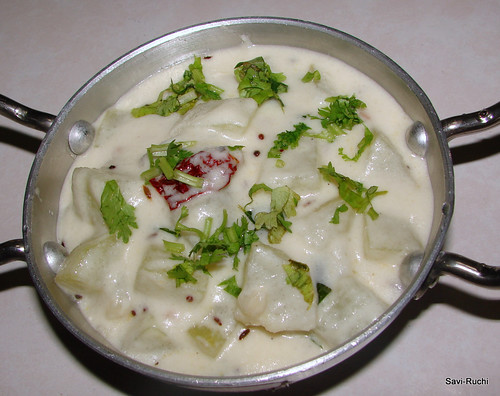
Boodu kumbalakai majjige Huli:Type 2(Wintermelon in Yogurt Sauce)

This is one of the oldest posts in my 'drafts' folder. This photo was taken in Jul'09 & the recipe was drafted by my mom-in-law. When she was here, my mom-in-law was so excited about my blog & she wanted her son to publish this recipe (on her behalf) !!!. But, somehow, this activity went on the back-burner. Finally, this recipe is seeing the light of the day. So, here goes the majjige huli (mor kolambu or yogurt curry) from my mom-in-law.

You can see my mom's version here.

Ingredients:
Fenugreek seeds: 1/4 tsp
Winter melon: 2 cups (chopped into 1 inch cubes)
Raw rice: 1 tsp (soaked in water)
Grated coconut: 3/4th cup
Buttermilk: 2 cups (do not use thick yogurt)
Green chilli: 3-4nos (adjust according to your family needs)

For tempering:
Oil: 1 tsp
Mustard Seeds: 1/2 tsp
Cumin seeds: 1/2 tsp
Broken red chilli: 1 no (optional)
Curry leaves: a string
Asafoetida: a pinch

Coriander leaves: 1 tbsp (for garnishing)

Method:
  • Soak the fenugreek seeds in warm water for an hour. 
  • Add 1 cup water, soaked fenugreek seeds to the chopped winter melon & cook the vegetable on a medium heat. The winter melon must be soft yet crunchy (do not overcook the melon).
  • Meantime, make a smooth paste of coconut, green chillies & rice (soaked in water). 
  • Add the coconut paste & salt to the cooked melon. Heat it for 2-3mins.
  • Now pour the buttermilk to the melon mixture & boil the curry on medium heat.
  • Prepare the tempering, Heat oil in a small pan. When oil is hot, add mustard seeds & cumin seeds. When seeds crackle, add curry leaves, broken red chilli & asafoetida. Pour this tempering to the boiling curry mixture. 
  • Finally garnish it with coriander leaves, mix well & serve it hot with rice. 


Tips:
  • For preparing the buttermilk, add 1 cup water to 1 cup yogurt (natural yogurt) & whisk well. 2 cups buttermilk is ready.
  • Be cautious after adding the buttermilk to the mixture. The buttermilk may spill from the container as it comes up.
  • Vegetables like ladies finger, cucumber, chayote squash(chow chow), snake gourd, capsicum can also be used for preparing this dish. 
  • Do not boil this dish many times (as we do for normal sambar). It is best to finish it off when it is fresh. If the dish is left over, transfer it to the fridge immediately & just heat it the next day & consume.
  • Refer here to know more.

Monday, May 3, 2010

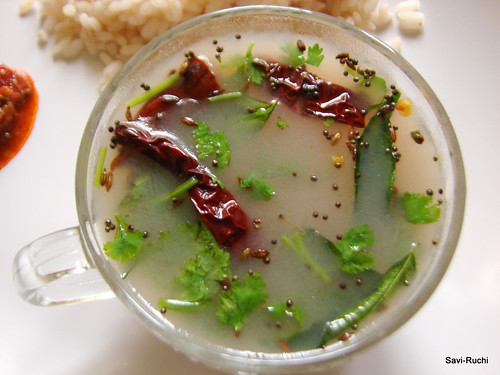
Ganji Saaru (Porridge Soup!!)

My mom always calls her mom (ie, my grandmom) whenever we visit her. Reason being, my grandmom can spend time with her children, grand children, great grand children & also we all can relish her cooking (my mom too!). Though my granny is 75+ years old, her zeal for cooking is what I admire in her. She learns & also at the same time shares a lot of dishes. Infact, we both keep exchanging recipes & I do get appreciation from her for my cooking. During these days, my mom hardly cooks as my grandmom would take care of cooking.


So sometimes, I plead my mom to cook as I would want to eat mom-cooked food too. I would have listed few trademark dishes of my mom & would always relish them whenever I visit her, however short my visit is.This ganji saaru is one such dish from my mom & we both sisters used to fight for this rasam. Once in a bluemoon this would be cooked & we would lick our plates clean on that day.


Ganji(Water drained from cooked rice) is needed to prepare this. My mom normally uses white rice(sona masuri rice) & I always do it with brown rice(Kerala rice or Rosematta rice could be used too). Ganji saaru is a very simple & humble dish that cannot disappoint anyone. Enjoy !!


------------------------------------------------------------------------------------
Ganji preparation:

For white rice:
Rice: 1 cup
Water: 3 to 3.5 cups (adjust according to the rice)
   ....OR......
For brown rice or rosematta rice:
Rice: 1 cup
Water: 4 cups

Wash the rice 2-3 times thoroughly in running water. Soak the brown rice (if using) for 30-45mins. No need to do it for white rice. Add water & cook on a low-medium heat until the rice is well cooked & not mushy. Press the rice grain in between your thumb & first finger. If rice gets mashed easily, it is an indication that rice is cooked. Even after the rice is completely cooked, there will be water as more water is added while cooking rice.Drain the water & keep aside. This water or ganji as we call in Kannada is the basic ingredient for the rasam/ssaru. Keep the rice on a low heat for another 1-2mins so that the moisture in the rice is gone. Now, you have rice ready to be consumed with ganji saaru!
-------------------------------------------------------------------------------------


Ingredients for ganji saaru:
Ganji/Water drained from rice: 1 cup (refer above to know how to obtain ganji)
Water: 1/2 cup
Ghee/Clarified butter/Oil: 1 tsp
Red chilli: 2 nos (broken)
Curry leaves: 1 string
Asafoetida: a pinch
Mustard seeds: 1/4 tsp
Cumin seeds: 1/4 tsp
Lemon juice: 2 tsp
Coriander leaves: 1 tsp (finely chopped)


Method:
  • Add salt, water to ganji & heat it again (no need for a rolling boil).
  • Prepare the tempering. Add ghee/oil to a small pan. When ghee/oil is hot, add mustard seeds, cumin seeds. When cumin seeds turn brown, add curry leaves, broken red chillli, asafoetida. Pour this tempering to the ganji. Add lemon juice, coriander leaves & mix well.
  • Serve it hot with piping hot rice & pickle or stir-fry.
Notes:
  • The basic ganji preparation is very similar to the cooking of pasta. However, donot add too much water while cooking rice as the ganji/water drained from cooked rice needs to be thick. If your rice to water ratio is 1:2, make it 1:3 for getting nice ganji. My rice to water proportion is 1:2.5, hence while preparing ganji I make it 1:3.5!
  • The flavor of this rasam/soup could be make garlicy by adding garlic while tempering. If you decide to add garlic, skip asafoetida.
 
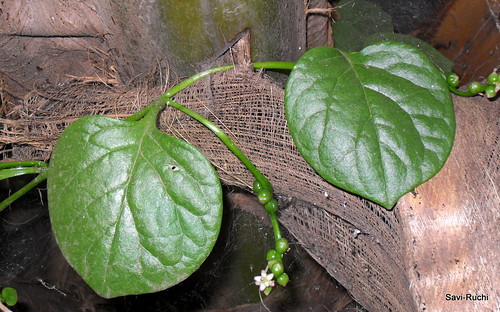
Thanks a lot for the good response on my last post. The correct answer is MALABAR SPINACH(Basella alba). Most of you guys have guessed it right !!!

Wednesday, April 28, 2010

Can you identify this...

..........leafy vegetable!

Do you need any hints?Here you go....,this is a creeper that is said to cure mouth ulcer & found in tropics.I have posted many recipes using this leaf.

Start guessing....

Monday, April 26, 2010

Open Semolina Sandwich

I owe the concept of this recipe to Purva. The day I saw her recipe, I was sure to try it out. I am preparing this from almost 10 months & each time I prepare this.., we all relish it thoroughly.  This is a great option for weekend brunch. You can see her recipe here. Here is my version of the same.
 

Ingredients: (For 8 slices)

Bread slices: 8 (I use whole wheat bread, but will taste great with white bread too)
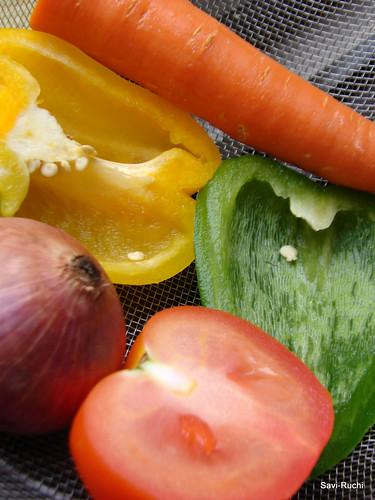
Finely chopped vegetables: 1.5 cups (I used shredded carrots, green & yellow capsicum, grated paneer, sweet corn kernels, onion & tomato)
Chiroti Rava/Small semolina: 2 tbsp
Thick Yogurt: 2 tbsp
Cilantro/Coriander leaves: 1 tsp (finely chopped) (optional)
Red chilli powder: 1 tsp (adjust accordingly)
Chaat masala: ¼ tsp (optional)
Italian dried herbs: 1 tsp (optional)
Rock salt: a big pinch (optional)
Salt: According to taste
Mozzarella cheese (shredded): 1 tsp for each slice
Butter: 1tsp for each slice

Method:
1. Combine the vegetables, semolina, Italian herbs, red chilli powder, chaat masala, rock salt, salt & yogurt in a large bowl.  Mix them well. (If needed, add few drops of water).
2. The mixture should look like a cutlet batter. See picture below.

3. Take a slice of bread & smear butter on both the sides. Spread the cheese on one side of the bread. To the same side, spread a tablespoon of vegetable-semolina mixture.
4. Heat the griddle. When griddle is hot, place the slice of bread. (Note: The vegetable-semolina mixture must be on top). Cover the griddle & cook on a low heat for a minute. Flip the bread & again cook for 30-45secs.
5. Repeat the procedure 3 & 4 for all the remaining slices of bread.
6. Serve it hot with a dip/sauce of your choice.
 Notes:
  • This sandwich is very flexible. Throw in whatever spices you need or just make it plain without any spices. It tastes great however you prepare it.
  • Red chilli powder could be replaced with finely chopped green chillies or even be skipped!
  • I am planning to prepare it with grated paneer only next time. Will let you all know the result.
Lastly, I have received awards from Suhaina of SingaporeKitchen. Phew.., I am again late in accepting & publishing the awards. Thanks a lot dear. It means a lot. I have mentioned more about me here. I will display the awards in side bar.

Wednesday, April 21, 2010

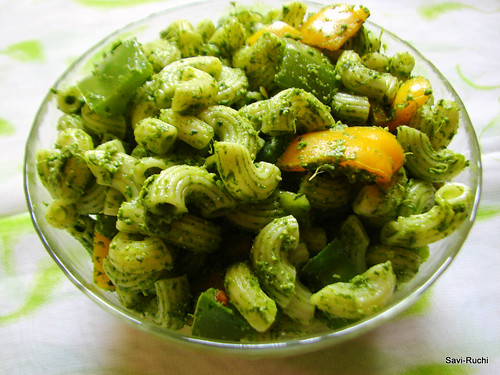
Macaroni in spinach-pumpkin seeds pesto

Although authentic pesto sauce calls for pine nuts & basil, I have tried creating pesto using Thai Basil (it has a strong aroma), Chinese spinach (Phuay Leng) & various seeds like pumpkin seeds, cashews & almonds. Whatever combo I tried became a huge hit at home. My hubby felt the aroma is very strong for Thai Basil but loved eating them. My son who is a big fan of pasta loves to eat this pesto sauce too (I'm happy that this way some leafy vegetables make way to his stomach :p)


 Ingredients: (Will serve 2-3)
Macaroni: 2 cups
Salt: According to taste
Capsicum: 1/2 cup (cut into 1 cm squares)
Olive oil: 1 tsp
Parmesan cheese: 1 tbsp (optional)

For pesto sauce:
Spinach : 1 bunch (around 200gms)
Pumpkin seeds: 2 tbsp
Garlic: 2 cloves
Green chillies: 2 nos (Authentic pesto sauce doesn't call for it, but to match our taste buds I add!)
Parmesan cheese: 1 tbsp (it is better to add it, if you can't find it add more of olive oil)
Olive oil: 2 tbsp
Salt: According to taste

Method:
  • Cook macaroni according to the package instructions. Drain the water & keep aside 1 cup of the boiled water.
Sauce preparation:
  • Blanch the spinach.Make a smooth paste of pumpkin seeds, blanched spinach, garlic, green chillies, Parmesan cheese, olive oil & salt. Finally add the lemon juice & keep it aside.
  • Heat  oil in a broad pan. When oil is hot, throw in the capsicum & cook on a medium-high heat for 2-3 mins. When the capsicum is cooked & yet firm, add the spinach sauce, cooked pasta & 1/2 cup of water. Mix them gently & cook on a low heat for 3-4mins. Adjust the salt (note: both the cooked pasta & the sauce has salt in it).
  • Finally garnish it with cheese & serve hot.

Notes:
  • Refer this if you are blanching the spinach for the first time.
  • Pumpkin seeds could be replaced with cashew nuts, almonds, walnuts or pine nuts.

Tuesday, April 13, 2010

Gorikayi Bhath (Spicy Cluster beans rice)

This is a traditional Karnataka dish which is a very similar to the famous 'Vangi bhath'. The spice powder mentioned here is also a close second to the vangi bhath powder. You can use the same powder for vangi bhath too.
Gorikai/Gorikayi/Javalikayi : Kannada
Cluster beans: English
Gawaar: Hindi & Marathi. For other language translations, refer here.


Ingredients:
Rice: 2 cups
Gorikayi/Gorikai/Cluster beans/Guar: 2 cups (finely chopped)
Peas: A fistful or approximately 1/2 cup (optional)
Jaggery: A big pinch (optional)
Tamarind: 1 or 1.5 tsp (extract thick juice)
Oil: 1 tsp
Salt: According to taste.

For spice powder:
Gram dal/Channa dal: 2 tsp
Urad dal: 1 tsp
Coriander seeds/dhania: 1/2 tsp
Red chillies: 4-5 (I normally use 2 spicier chillies & 3 Kashmiri chillies for color)
Cinnamon: 1inch stick
Cardamom: 1 no
Marati moggu: 1 no
Cloves: 3 nos

For tempering:
Oil: 2 tbsp
Mustard seeds: 1/2 tsp
Peanuts/Groundnuts: 1 tbsp
Curry leaves: 8-10 ( 2 strings)
Red chilli: 1 no (broken)
Asafoetida: A pinch

For garneshing:
Grated coconut: 2 tbsp
Coriander leaves: 1 tbsp (finely chopped)

Method:
Step 1: Prepare the rice by adding double the amount of water & allow it to cool.
Step 2: Meantime, heat oil on a broad pan. When oil is hot, add the finely chopped cluster beans & saute for a minute. Add few drops of oil & let it cook. When the beans are half cooked, add the peas & cook until both are soft yet crunchy.
Step 3: Paralelly when the beans are getting cooked, prepare the spice powder. Dry roast all the ingredients mentioned for the spice powder & allow it to cool. When it is cool, prepare a powder out of it & scoop out the powder.
Step 4: Boil the tamarind juice for a minute. This is done to remove the raw smell of the tamarind. The juice thickens. Keep it aside.
Step 5: When the beans are cooked, add the spice powder (around a tbsp of the powder should be sufficient) & salt. Mix well & turn off the flame.
Step 6: Prepare the tempering. Heat oil in a small pan. When oil is hot, add mustard seeds. When mustard seeds splutter, add peanuts. Roast till the peanuts are golden brown. Add the curry leaves, asafoetida, red chilli & cook for 3-5 secs. Turn off the flame.
Step 7: Spread the rice in broad vessel (the rice must have reached the room temperature). Add the cooked spicier beans (cooked at step 5), tamarind paste (step 4), tempering (step 6) to the rice. Adjust the salt (note you have added salt to the beans already). Add the grated coconut, coriander leaves & mix the rice thoroughly. Serve it warm or at room temperature. Enjoy it with a raitha/papad or as is.


Tips:
  • Tamarind extract can be replaced with lemon juice too, however the authentic taste comes from the tamarind.
  • Replace fresh grated coconut with dry coconut/copra, if you wish to preserve this rice for a day or two.
  • Excess spice powder can be preserved in air tight containers for later use.
  • For quicker version, MTR vangi bhath powder can be used to prepare this dish.

Thursday, April 8, 2010

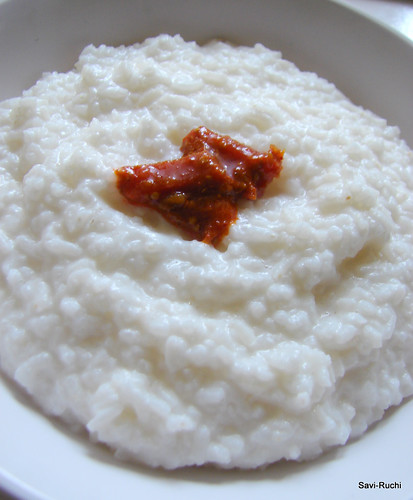
Perganji/Kayihalu ganji(Coconut milk porridge)

Per is a Tulu word for milk. The name of this dish is unlike its ingredients. Here milk refers to coconut milk. This is one special dish that can be consumed for breakfast, lunch or dinner. Very easy to prepare & tasty to eat. Coconut lovers can hook on to this dish for ever.

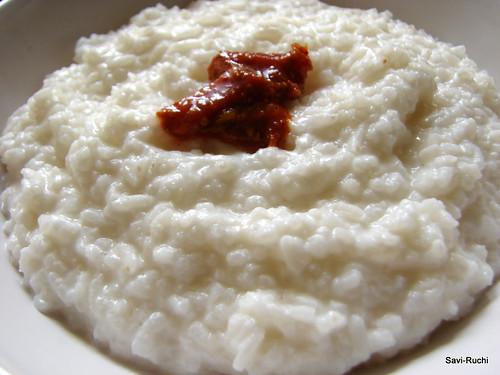
                                                                      (Pic: Porridge served with carrot pickle)
 I got this recipe from hubby's aunt during my last visit to India. I tried using store bought coconut milk, but somehow didnot like the taste of it. Freshly extracted coconut milk would taste & smell many times better than the store bought coconut milk.

Ingredients:(Serves 1-2)
Rice: 1 cup (Use ponni rice, raw rice or sona masoori)
Water: 3 cups
Coconut milk: 1/2 cup (thick)
Coconut milk: 1 cup (thin)

Method:
  • Soak the rice for 30mins.
  • Meantime bring water to a boil. When water starts boiling, add the rice & cook it on a low heat until rice is 3/4th done. Add the thin coconut milk & cook again. When rice is completely done, it becomes mushy.
  • At this point, add thick coconut milk & cook for another 3-5mins.
  • Perganji/Coconut milk porridge is ready. Serve it with pickle or chutney or palya/stirfry/poriyal.

 Tips:
  • Donot add ghee while serving this porridge as coconut milk & ghee donot go hand-in-hand.
  • Salt is not generally added to this porridge, but if your family prefers, go ahead & add. 

Featured Post

Noodles and Vegetables with Honey Ginger Sauce

Am I the only one who crave for noodles when sick with cold and sore throat? I love this noodles with honey-ginger sauce and it is perfe...