Thursday, May 31, 2012

Plain Rava Dosa/Crispy cream of wheat crepes: Restaurant Style

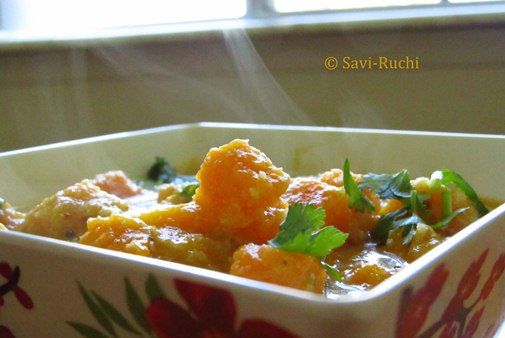
Here is my first attempt on adding a video to my post. Hope you all find it useful.

The best thing about rava dosa is, it does not have to be fermented. So, no more waiting for hours to relish a dosa. Handy availability of ingredients in pantry is an added bonus. This dish comes to the rescue when you haven't planned anything for breakfast or for dinner.


Preparation Time: 3 mins
Resting Time: 15 mins
Cooking time: Around 2 mins for each dosa

Ingredients:
For the batter: (Makes around 16-18 dosas)
Fine sooji/Chiroti rava: 1 cup
AP Flour/Maida: 0.75 cup
Rice flour: 1.25 cups
Butter milk: 0.5 cup
Water: 5 to 5.5 cups
Salt: As needed

For cooking the dosa:
Oil: 1 tsp or more on each dosa

Method:
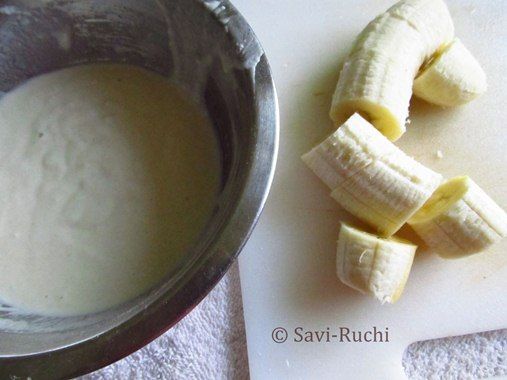
  • Mix all the ingredients mentioned (except water) & whisk well.
  • Slowly add 4 cups of water & keep whisking. Allow it to rest for 15 mins.
  • The semolina/rava will absorb the water & the batter becomes thick after the resting time. 
  • Add a cup of more water & mix well. Video below shows the consistency of the batter.
  • Heat the griddle/dosa tava on a medium flame. When the griddle is hot, pour in the batter. See the video below to understand how to spread the batter. (This is only for rava dosa!)
  • Sprinkle oil on the edges of the dosa & around 1/2 tsp on the center of the dosa. Cook on medium heat for 60-90 secs uncovered. Then increase the heat to high & roast the dosa for another 20-30 secs. 
  • Fold the dosa & remove the dosa from the heat (there is no need to flip & cook on the other side of the dosa for this).
  • Serve the crispy dosa with a dip/sauce/chutney of your choice.

Notes:
  1. I have heard people make this with upma rava/semolina. However I have never tried the dosa with it. So, I am not sure how it turns out. 
  2. You could add finely chopped onions, green chilli, curry leaves, a dash of pepper powder & coriander leaves to make onion rava dosa. 

Monday, May 28, 2012

Rainbow guliappa | paddu | Colorful paniyaram recipe

...or Color color guliappa as my son calls it :)

Guliappa is a bite sized snack or a breakfast item. It is usually made with left over dosa/dosai batter & is known by many other names like paddu, gundpongalu, paniyaram, gulittu or appe. Aebleskiver pan or paddu pan is used for making this delicacy.

In order to add more nutrition to my son's tiffin box, I try adding various vegetables to it. Here is one such simple effort of mine & my son loves this rainbow guliappa. It is just a fancy name to attract my little one to eat his dose of vegetables :)


Ingredients:
Left over dosa batter: 2 cups
Finely minced vegetables: 2 cups (Refer notes # 1)
Salt: According to taste.
Finely grated ginger: 1/2 tsp

Special utensil:
Aebleskiver pan

Oil: few drops on each mould.


Method:
  • Mix the finely minced vegetables with the left over dosa batter, adjust the salt & mix thoroughly.
  • If needed, add a couple of tablespoons of water to the batter.
  • Throw in the ginger & mix well.
  • Heat the pan, add few drops of oil on each mould.
  • When the pan is hot enough, add 1.5 tbsp of batter on each mould & cook it covered. Since, we have added loads of vegetables, it is very essential to cook it on a low-medium heat to ensure the vegetables are completely cooked. Takes around 2 mins to cook. Flip the guliappa & cook on the other side too.
  • Serve it hot with a dip of your choice. 


Notes:
  1. Choose varieties of vegetables for this. Since it is called rainbow guliappa, you should see an array of colors. I add whatever I have handy & I don't miss on beetroot. Most of the times, I add carrots, cauliflower, cabbage, red onion, jalapenos (only a half or less!), capsicum, beetroot & potato!
  2. Never seen an aebleskiver pan, you can find them in one of my previous posts here.

Wednesday, May 23, 2012

Avalakki unde/Avalakki pundi gatti/Steamed flattened rice balls

I cook three times a day & I try not to keep the left overs from the previous meal. Even after making so many varieties of food, sometimes my family exclaim"not again" & I find it a challenging task to plan my daily menu. I keep looking for interesting alternatives every day & during one such days, the avalakki pundi gatti came to my rescue.
Quick language translation:
Avalakki (Kannada)/Poha (Hindi)/ Aval (Tamil & Malayalam)/Pohe (Marathi)/Flattened rice (English)


Preparation time: 15 mins
Cooking time: 50 mins


Ingredients: ( Got around 28 lime sized balls with this measurement)
Coarsely grounded flattened rice: 2 cups or 2.5 cups of thick flattened rice (Refer notes below # 1).
Water: 4 cups
Oil: 1 tbsp
Mustard seeds: 1 tsp
Urad dal: 2 tsp
Channa dal: 1 tbsp
Curry leaves: 6-8 nos
Salt: As needed


Special utensils needed:
A steamer or a pressure cooker without the whistle.


Method:

  • Coarsely powder the flattened rice.
  • Boil water in a sauce pan.
  • Meantime, add the oil to a broad vessel. When oil is hot, add mustard seeds followed by urad & chana dal. When dal turns golden brown, add curry leaves. When curry leaves wilt, add the boiling water to it. Add the salt. Reduce the heat to medium low.
  • Add the coarsely powdered flattened rice to the boiling water & start mixing thoroughly until the flattened rice is completely cooked. It will form a single mass & starts leaving the edges & the bottom of the vessel. (Refer notes below # 2). Mine took around 5-7 mins.

  • Add sufficient water to the steamer & keep the steamer on medium-high heat.
  • Grease the plate on which these balls will be placed.
  • Keep cold water next to you & start making balls using the hot dough ready. Dip your hands in cold water, take lime sized dough & form either a fist or a ball with that dough. Keep the ball on the greased plate & repeat the procedure for the remaining dough. 
  • Place the plate/thali in the steamer & reduced the heat to medium. Cook for 30-40 mins.
  • Let them cool for a couple of minutes & then serve them with a chutney of your choice.


Notes:

  1. For 2.5 cups of flattened rice, I got 2 cups of the coarsely grounded flattened rice. The idea is to use 1:2. For every 1 cup of coarsely grounded flattened rice, use 2 cups of water. 
  2. Gently wet your fingers & touch the hot dough. If the dough isn't sticky, then you are done.
  3. If you do not have a steamer, use a pressure cooker like I did !

Friday, May 18, 2012

Pisang Goreng/Deep fried bananas: An Indonesian Delicacy

We had Pisang Goreng when we visited Yogyakarta, Indonesia. My hubby loved it. I could smell the egg in the dish & avoided eating them. I do eat cakes made out of egg, but cannot bear the smell of it. I avoid pancakes & muffins for the same reason!

After many years, I thought of making them at home. I had the vague idea of what went in it & tried to reproduce it. I did not add eggs. I replaced eggs with buttermilk & baking soda.


Preparation Time: 10 mins
Cooking time: 10-15 mins
Serves: 3-4


Ingredients: (Makes around 12 fried bananas)
For the batter:
Rice flour: 3/4th cup
Plain flour: 1/4th cup
Baking powder: 1/4th tsp
Butter milk: 3 tbsp
Baking soda: a pinch
Sugar: 1-2 tbsp, adjust according to your needs
Salt: a pinch
Water: As needed.


Bananas: 2 large, cut into 1 inches
Oil: For deep frying


Method:
Sieve the rice flour, plain flour, baking powder, baking soda & salt twice.
Add the flour mixture to a bowl. Add the sugar, buttermilk & whisk well.
Add few teaspoons of water at a time & mix until a thick batter is formed (Batter should be similar to pakora/bajji/bonda batter).


Heat the oil in a kadai/pan. When oil is hot, dip the cut banana slices into the batter & drop them gently onto the hot oil. Repeat the dipping & dropping procedure for the remaining banana slices. 


Flip & cook the bananas on all the sides until light golden in color. 
Remove from heat & drop them on kitchen towel & let them rest for a while. 
Serve them hot with a dip. Honey or maple syrup should taste great as a dip for these fried bananas.


Notes:
Use firm & just ripe bananas while making these. If you use over-ripe bananas, the deep fried bananas will become too soft.

Tuesday, May 15, 2012

Sun dried tomato pesto!

Ours is a pasta-fanatic family. So, I keep trying different variants of pasta. Sun dried tomato pesto was one such item, on my to-do list for a long time.
I happened to see a pack of sun dried tomato in Walmart on Saturday & tried it the very next day. We loved it & I will add it to my monthly menu from now on!

Preparation time: 10 mins (except soaking time)
Makes around: 1.5 cups of pesto

Ingredients:
Sun dried tomatoes*: 1/2 cup, tightly packed
Melon seeds: 1/4th cup (pine nuts are normally used)
Baby spinach: 1/4th cup
Garlic: 1 clove
Olive oil: 4 tbsp
Parmesan cheese: 1 tbsp
Salt: According to taste


* I used dried tomatoes available in packets & not the sun dried tomatoes soaked in olive oil. If you are using sun dried tomatoes soaked in olive oil, there is no need to soak the tomatoes in hot water. Just drain out the olive oil & use it.


Method:
Soak the sun dried tomatoes in hot water for 20 mins.
Toast the melon seeds in microwave for 30 secs & keep them aside.
Drain the water from the sun dried tomatoes.
Add sun dried tomatoes. melon seeds, garlic, olive oil to a food processor/mixer & pulse till they are coarse.
Finally throw in the spinach, Parmesan cheese &  pulse again couple of times.
Scoop out the pesto & use it as needed.


Notes:

  • I use the sun dried tomato pesto for pasta, sandwiches & sometimes on boiled vegetables too.
  • You could replace melon seeds with pine nuts, soaked almonds or walnuts.

Tuesday, May 1, 2012

Sui/Butternut Squash Stew: Beginner Series

How do you feel when somebody calls you or mails you to get the recipe of a dish that he/she had tasted 5 years back? That is what I did to my hubby's aunt for the Sui recipe!I happened to eat Sui, a South Canara dish made with pumpkins many years before at my hubby's aunt's place. I loved it so much & after few days I completely forgot about it. After around five long years, I recalled about that dish & immediately called his aunt for the recipe. She was kind enough to give the recipe. I have made this many times after getting the recipe from her.

Don't go by the complicated name. Sui is a very simple yet amazingly flavorful dish. It is a perfect example of less is more! I do not know why it is called so. May be I should check with her again! 

Generally Sui is made with pumpkin, but I replaced with Butternut Squash.


Preparation Time: 10 mins
Cooking Time: 20 mins

Ingredients:
Butternut Squash: 3 cups, 1 inch cubed (peeled & de-seeded)
Water: 2 cups
Jaggery/Brown sugar: 1 to 1.5 tsp
Salt: According to taste
For spice paste:
Coconut: 3/4th cup
Raw rice: 1 tsp, optional (I did not add any!)
Cumin seeds: 1.5 tsp
Green chillies: 2-3 nos
For tempering:
Cooking oil: 1 tsp, preferably coconut oil
Mustard seeds: 1/2 tsp
Curry leaves: a sting
Asafoetida/Hing: a pinch
For garnish:
Coriander leaves/cilantro: 1 tbsp, finely chopped (optional)


Method:
Boil the cubed squash in 2 cups of water. Cook until tender & yet firm.

Meantime, make a fine paste of the ingredients mentioned for the spice paste. Add few tablespoons of water to make a smooth paste.


When the squash is almost done, add in the spice paste, salt & jaggery.


Reduce the heat to medium & cook for another 5-7 mins, until the flavors set in. Remove from heat.
Prepare the tempering. Add oil to a small sauce pan, when oil is hot, throw in the mustard seeds followed by curry leaves. When leaves turn crisp, turn off the heat & add the asafoetida. Pour this tempering over the stew prepared & cover the stew with a lid. This is to ensure that the aroma of the tempering is held inside the stew
Let is sit for a minute or two. 
Garnish with coriander leaves & serve with rice or roti.


Notes:

  • Adjust the consistency of the stew according to your needs.
  • Rice is added for the spice paste to make the stew thick.
  • If you feel the stew has turned thin, add 1.5 teaspoons of rice flour to 2 tbsp of water. Mix thoroughly & add it to the boiling stew. Reduced the heat to low & cook for another couple of minutes. 

Featured Post

Noodles and Vegetables with Honey Ginger Sauce

Am I the only one who crave for noodles when sick with cold and sore throat? I love this noodles with honey-ginger sauce and it is perfe...