Tuesday, December 13, 2011

Oats Khara bhath/Spiced oats with vegetables

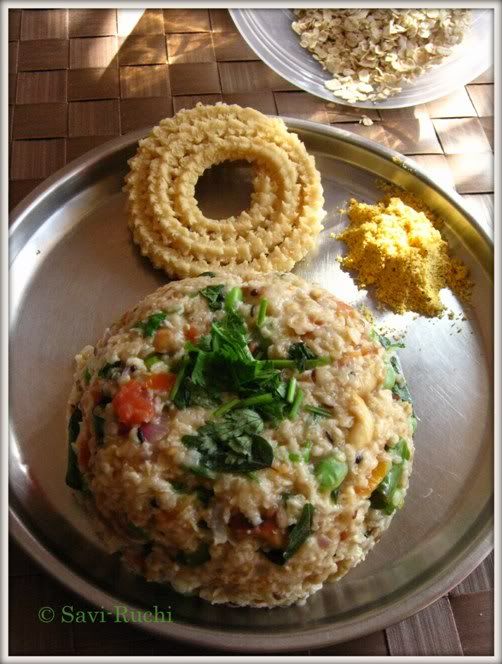
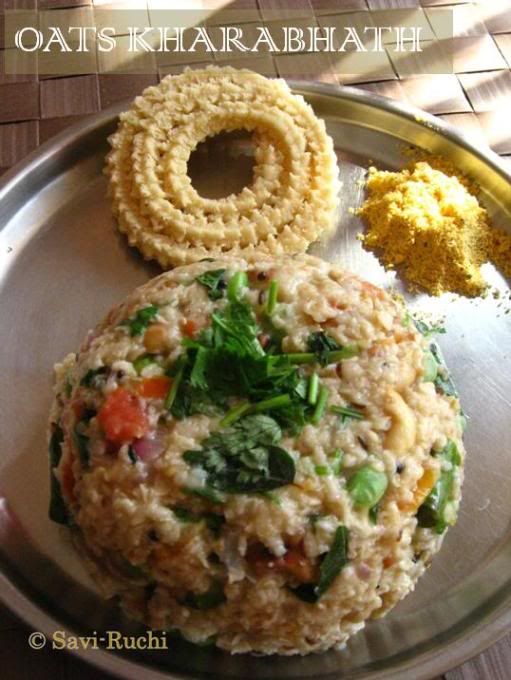
People are crazy about eating healthy food these days (I am no exception!). I generally buy a kilogram of oats every alternate month & look out for dishes to satisfy my taste buds. I, being a "not-so-big-fan" of oats, look for smart ways of consuming the oats. During one such search, I found the oats upma recipe in Saffola Oats book.

Don't get alarmed by the exorbitant list of ingredients. They are all common ingredients & always stored at your pantry!

Preparation time: 10mins
Cooking time: 15mins
Serves: 1 hungry me (my hubby is always "no" to oats. Hoping to change him soon :D)

Ingredients:
Quick cooking oats: 1 cup
Water: 1.5 cups
Avarekai/Surtipapdi/Flat beans: 1 tbsp, optional ( I had them handy, then used them)
Chopped capsicum: 1 tbsp
Finely chopped onion: 1 tbsp
Tomato: 1 no(small one), chopped
Green chillies: 2-3 nos
Ginger: 1/4th tsp, grated
Curry leaves: 6-8 nos
Ghee/Clarified butter: 2 tsp
Oil: 1 tsp
Mustard seeds: 1/4 tsp
Cumin seeds: 1/4 tsp
Urad dal: 1 tsp
Cashew nuts: 1 tsp, broken
Turmeric: a pinch
Salt: Adjust to taste
Sugar: 1/2 tsp

For garnish:
Coriander leaves: 1 tsp, chopped


Method:
  • Toast the oats for 1-2 minutes in the microwave |OR| use the stove top to roast the oats lightly. Keep it aside.
  • Boil the water.
  • Meantime, prepare the tempering. Heat oil + ghee in a kadai. When oil is hot, throw in mustard & cumin seeds, urad dal & cashew nuts. When nuts turn golden brown, add the curry leaves & green chillies. 
  • When curry leaves become crisp, add the onion & ginger. Saute for 2-3 minutes, until the onion changes its color (no need to brown the onions!).
  • Add the tomato & saute for another 30 secs.
  • Throw in the capsicum & saute again.
  • Add the boiling water to the tempering. Follow with turmeric, salt & sugar.
  • Finally add the toasted oats & cook the oats covered on a low heat for 2 minutes. 
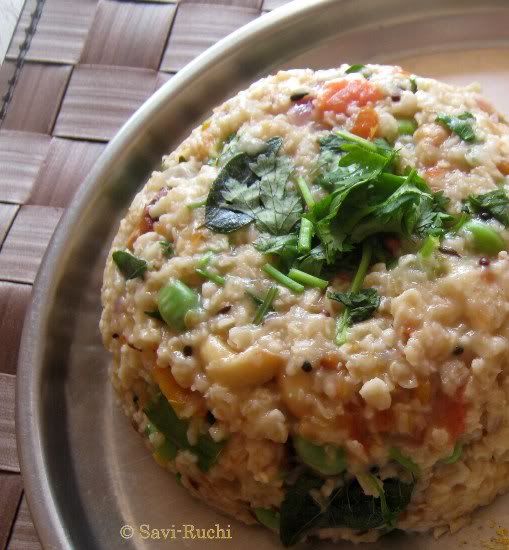
  • Turn off the flame. Garnish with coriander leaves & enjoy.


Notes:
  • It is very important to serve this dish hot, since it becomes goo-ey when it turns cold.
  • Other vegetables like carrots, peas, french beans & potatoes could be added.
  • Add a teaspoon of ghee just before serving for the extra richness.

Thursday, December 8, 2011

Masoppu Recipe: A Mandya/Mysore specialty

Masoppu means mashed greens. Masoppu is a South Karnataka specialty dish. It is made using many different leafy vegetables & lentils. At least 3-5 different leafy vegetables are used to prepare this.There is another north Karnataka dish called muddipalya, which again loosely translates to mashed greens! The preparation of the two is also similar but the tastes are entirely different. Muddi palya uses more lentils where as masoppu dominates with more greens!

Being spent the half of my life in Mysore/Mandya, I wanted to try Mandya/Mysore style masoppu for a long time, but never got the recipe. I recently got it from my aunt. I cannot vouch about the authenticity of this recipe, but this sure satisfied my craving!


Here is my aunt's recipe in my words!

Ingredients:
Set 1:
Mixed greens: Around 250gms (I have used a mix of dill, amaranth, fenugreek, Indian spinach, huli soppu*)
Toor dal/Split pigeon peas: 1/3rd cup
Onion: 2 medium sized
Tomato: 2 medium sized
Garlic: 4 pods
Green chilies: 6-8 nos, more or less
Brinjal: 1 no, optional
Turmeric: a big pinch

Seasoning:
Salt: According to taste

For spice paste:
Coconut scraped: 1-1.5tbsp, fresh or frozen
Chilli powder: 1 tsp, optional
Tamarind: a big grape sized
Cumin seeds: 1 tsp

For tempering:
Oil: 1 tbsp
Mustard seeds: 1/2 tsp
Cumin seeds: 1/2 tsp
Garlic: 3 pods, minced
Curry leaves: 6-8 nos

* I do not know what is it called in other regional languages or in English


Method:

  • Wash the greens thoroughly in water. Chop them & keep aside.
  • Chop the onions, tomato & brinjal(if using) into 1 inch cubes.
  • Wash the dal in running water.
  • Mix all the ingredients mentioned in set 1 along with 2 cups of water.
  • Pressure cook it for 2-3 whistles. Reduce the heat after 3 whistles & cook for another 3-5 minutes.Turn off the heat.
  • Let the pressure cooker cool.
  • Warm the cumin seeds/jeera for a minute.
  • Blend together the ingredients mentioned for spice paste. Make a smooth paste & scoop out the paste to a clean bowl.
  • When the pressure is released from the cooker, remove the greens mixture & mash it well using a masher/hand blender or using a mixer.
  • Heat a big pot. Add oil to the pot,  followed by the ingredients mentioned for the tempering. When garlic gives out the aroma, add the spice paste to it & cook it for a minute.
  • Throw in the mashed dal-greens mixture, followed by salt. Boil it on a medium heat for about 10minutes.
  • Serve it hot with rice, papad or ragi mudde/finger millet balls.


Notes:
  • Generally the greens that are added for making masoppu are dantina soppu (amaranth leaves), menthe soppu (fenugreek leaves), harive soppu, palak soppu (spinach), sabsige soppu (dill leaves). If you are in Karnataka, you can ask the vegetable vendor to give you mixed greens to make masoppu. They will mix some 6-7 kinds of leafy vegetables.
Last note: Updated the previous post. Want to check if you guessed it right?!

Saturday, November 26, 2011

The usual paper plain & set dosa with not the usual ingredients!

The title says it all! Without wasting your time, here I go with the recipe.


Ingredients:
Horse gram/hurali kalu: 1/2 cup
Split green gram/hara moong/odeda hesaru kalu: 1/2 cup
Boiled rice/kusubalakki: 3 cups
Fenugreek seeds: 1/2 tsp

Method:

  • Wash all the above ingredients thoroughly in running water for 3-4 times & soak them all together for 5-6 hours.
  • Grind them & prepare a smooth batter out of the soaked dals & rice. Adjust the water such that the batter consistency should be like a thick milkshake.
  • Let the batter ferment overnight (around 6-8 hours, depending on outside temperature).
  • Add salt & mix the fermented batter.
  • Heat a griddle. When the griddle is hot, add a ladle full of batter to the center of the griddle & spread the batter clockwise using the back of the ladle.(like a pancake)
  • Add 1/2 tsp of oil,cover a lid & cook the dosa on a medium heat for 30secs. Remove the lid, turn the dosa & cook the other side for 10 secs. Remove the dosa from griddle. Repeat the same for the remaining dosas.
  • Serve the dosas hot with a chutney/dip/side dish of your choice. 

Thursday, November 10, 2011

Menthyada hittu/ Fenugreek seeds powder

Though this powder is a tad bitter, it tastes too delicious that the bitterness goes unnoticed. This powder is made with lentils & is rich in proteins.It is considered beneficial during both pregnancy & post pregnancy. None the less, you can include it as part your daily intake too. The shelf life of this powder is 2-3 months (without refrigeration). Preparing this one is like, putting the effort one time & reaping the benefits many a times :)

I have been waiting to put up this recipe from the last year or so. I have told this recipe to a dozen of my friends & most of them have been making this powder since then. My son & hubby can happily finish their dinner/lunch with this powder, rice & ghee.

Ingredients: (For about 3 cups of powder/hittu).
Toor dal: 1 cup
Channa dal/Gram dal: 1 cup
Moong dal: 1 cup
Urad dal: 1 cup
Coriander seeds/dhaniya: 2 tsp
Fenugreek seeds: 2 tsp
Dried red chillies: 4-5 nos(non spicy chillies like Kashmiri or byadgi chillies)
Asafoetida: a big pinch
Turmeric: A big pinch
Salt: 1/2 tsp


Method:
  • Dry roast the toor dal, channa dal, moong dal, urad dal, coriander seeds, fenugreek seeds seperately. The dals should slightly change the color & leave out the aroma. 
  • Dry roast the chillies at the end & allow the lentils/dals to cool. 
  • Once the dals are completely cooled, mix them & make a fine powder of the dals & chillies together. Use a spice blending jar to make the job easier.
  • Add turmeric, asafoetida, salt to the powder. Mix well & allow the powder to cool for an hour. 
  • Store in air tight container & enjoy whenever needed or daily!
(Serving suggestion: For a cup of cooked steaming hot rice, add a tbsp of this powder, a tsp of ghee & salt (according to your taste). Mix well & enjoy the rice)


Notes:
  1. For this recipe alone, I have used a smaller cup. 1 cup holds 100 ml of water.

Thursday, November 3, 2011

My blog completes it's third year. A game for its celebration!

My blog completed THREE years this August & I failed to remember it. My bad :(
                                                                              (Photo courtesy: here)

Let me repeat it for the last time, promise! I have become damn lazy after moving back to India. Easy availability of my favorite food is one of the major reasons for my blog to take a back seat. I repent for it! Let me say it honestly, I am trying to get back to blogging, but I can't promise when I can kick start it again in full action. Sorry folks!

My dear blogger friend Prathibha, had tagged me in a 7 links game. She has given a beautiful write up about it too. Thought it would be apt to celebrate my blog's birthday by playing a game of revisiting the past. 

My most beautiful post: Broccoli ka kheema
I love the simplicity of this dish. This one is healthy, quick & a versatile side dish.

My most popular post: Tomato Bhath: Karnataka Style
It is undoubtedly the most popular recipe of my blog. Thanks to all of you for making it so popular!

The post I'm most proud of: Breakfast Burittos
I never dream't I would try any other non-Indian dishes. I am proud that I tried Mexican at home & addicted to it :)

My most useful post: Idli/Idly

Most of my beginner series posts are appreciated & found useful by many. However my personal choice would be idli.

Surprise success post: Hotel sambar
This is my own experimental sambar. Two of my friends tried it the same day & gave a thumbs up. Felt so good.

Most controversial post: None
Happy that none of my got into controversies.

Posts which deserves attention, but did not get as much:
My posts in the early blogging years have not got much attention, partly because of poor pictures. So, request the readers to have a look at my older posts whenever possible. Thanks.


Wednesday, October 12, 2011

Nimbe appehuli saaru/Lemon soup: A Havyaka Speciality!

Haven't visited this space for a month? Alas, can't believe!!
Was I busy? Not really. The fact is I was/am enjoying all the family functions & festivals that I missed for four long years.  I am not in a mood to cook any elaborate meals & most of the days, try to whip up something under 20 mins. During one of those quick cooking sessions, I spoke to my co-sis & learnt this nimbe appehuli.  A saaru/rasam that is ready in less than 10 minutes!
Preparation Time: 5 mins
Cooking Time: Nil (Can count 1 minute for tempering the rasam!!)

Ingredients: (Serves 3)
Juice extracted from 2 lemons(Around 2-3 tbsp)
Water: Around 500ml
Salt: 1 tsp, more or less
Sugar: 1 tsp, optional
Finely chopped green chilli: 2 nos

For tempering:
Coconut oil: 2 tsp, preferred
Mustard seeds: 1/2 tsp
Asafoetida: a pinch
Dry red chilli: 1 no, broken

Method:

  • Add salt, sugar, finely chopped green chilli & lemon juice to a vessel. Mix them well. 
  • Add 400ml of water & mix well. Adjust the water according to the sourness level preferred! 
  • Prepare the tempering. Heat oil in a small pan. When oil is hot, add mustard seeds. When seeds splutter, throw in broken red chilli & asafoetida.
  • Pour the tempering over the lemony water. Let it sit for 10-15mins for the flavors to soak in!
                                               (PS: Before crushing the red chilli)
  • Crush the red chilli using your hand & mix it again.
  • Enjoy the cold appe huli saaru with steaming hot rice, pickle & papad. 

Notes:
My co-sister suggested me not to add any curry leaves or garlic for the tempering!. She says, curry leaves don't go well with this appehuli & hence her aunties prepare it this way. I just followed her words. If you want to add curry leaves, feel free to add. But, never add both asafoetida & garlic to this. Go with either one!

Last but not the least:
Prathibha of Chefandherkitchen has tagged me in a 7 links game. It sounds fun. Thanks for thinking of me Prathibha. Will do it shortly.

Monday, September 19, 2011

Mandakki Oggarane / Spicy puffed rice: Beginner Series

I am back with a beginner series recipe. Watch out for more beginner series recipes from now on!

Puffed rice language translations:
Kannada: Mandakki/Puri/Kadle puri
Telugu: Maramaralu
Tamil: Pori
Marathi: Chirmure


Preparation Time: 10mins
Cooking Time: 10 mins

Ingredients: (Serves 2)
Puffed rice: 5 cups
Roasted gram dal powder/hurigadale pudi/kadala pappu powder: 2 tsp
Salt:According to taste
Sugar: 1/2 tsp, optional
Lemon juice: 2 tsp

For tempering:
Oil: 1 tsp
Mustard seeds: 1/2 tsp
Cumin seeds: 1/2 tsp
Urad dal/Skinned black dal/uddin bele: 1 tsp
Gram dal/Channa dal/kadalebele: 1 tsp
Ground nuts/peanuts: 2 tsp
Curry leaves: 6-8 nos
Onion: 1 no, finely chopped
Turmeric: a pinch
Green chillies: 2 nos, chopped

For garnishing: 
Scraped coconut: 2 tbsp, fresh
Coriander leaves/cilantro: 1 tbsp, finely chopped


Method:

Soak the puffed rice in water for 5 mins.


Meantime, prepare the tempering. Add oil to a broad pan. When oil is hot, throw in mustard seeds, cumin seeds, urad & gram dals. When dals turn golden, add peanuts & saute till peanuts turn golden brown.


Throw in the curry leaves & green chillies, followed by onion & turmeric.


Saute till the onion becomes transparent & changes color. 
Squeeze out the water from the puffed rice (Just draining the water isn't sufficient, try to squeeze as much water as possible). Puffed rice would have become soft by now.


Add the puffed rice to the tempering. Mix in salt & sugar.Let it cook on a low heat for a minute or two.


Add the roasted channa dal powder/hurigadale pudi to it & mix it well.

Turn off the heat. Add lemon juice, grated coconut & coriander leaves. Mix well & serve it right away!


Notes:
Soak the puffed rice for a maximum of 5 minutes & squeeze out the excess water from it.

Monday, September 12, 2011

Hotel Sambar Recipe

Have you tried eating idli-sambar/dosa-sambar or vada-sambar in any of the fast food joints in Bangalore? If yes, you must have gone gaga over their sambar. The sambar provided would be more on the sweeter side & considerably thick. I have tried to recreate their sambar over years & now I can say, I make somewhat similar to what is served in the restaurants!

Here is my version:


Preparation Time: 20mins
Cooking time: 40mins (Including pressure cooking time)

Ingredients: (Yields around 2 litres of sambar).
Moong dal/Split & skinned green gram: 1/2 cup
Salt: According to taste
Turmeric: 1/4 tsp
Finely chopped potato: 1/2 cup
Finely chopped veggies: 1/2 cup (I normally add raddish, carrots, french beans & yam)
Finely chopped onion: 1/2 cup
Tamarind: 2 tsp, thick extract of the pulp.
Jaggery: 2 tbsp

For spice paste:
Gram dal/Channa dal: 2 tsp
Urad dal/Skinned black dal: 1 tsp
Cumin seeds: 1 tsp
Coriander seeds: 2 tsp
Fenugreek seeds: 1/4 tsp
Dry red chili: 8-10 nos ( non spicy ones like Kashmiri chilli)
Curry leaves: 10-12 nos
Oil: 1 tsp
Coconut: 1/2 cup, scraped
Asafoetida: a pinch

For tempering:
Oil: 1 tbsp
Mustard seeds: 1/2 tsp
Cumin seeds: 1/2 tsp
Curry leaves: 4- 6 nos
Tomato: 1 no, finely chopped


Method:
  • Wash the moong dal thoroughly. Add the finely chopped vegetables, potato & onion to the washed dal. 
  • Add water, turmeric & 1/2 tsp of salt to the vegetables. Pressure cook the dal & vegetable together for 2-3 whistles. Allow the cooker to cool.
  • Meantime, heat a pan. Add oil & roast all the ingredients mentioned for the spice paste (except coconut & asafoetida). No need to roast each ingredient separately. Add channa dal & urad dal first, roast it lightly. Follow it by cumin seeds, fenugreek seeds, dry red chilli. Roast it till the dry red chilli become crisp.Finally throw in curry leaves & coriander seeds.  Toss for another minute. The kitchen will smell heavenly by now. Turn off the heat, add coconut & asafoetida to the roasted spices & mix well. Allow the spices to cool down.
  • Make a fine paste of the roasted spices by adding little water. 
  • Heat a broad vessel. Add oil to it. When oil is hot, throw in mustard & cumin seeds. When seeds turn brown, add curry leaves & finely chopped tomato. Saute the tomato until it is mushy & oil separates from it.
  • Add the cooked lentils & vegetables to it. Adjust the salt, add the tamarind extract, jaggery & the prepared spice paste. Allow it to boil for another 10-12 mins. 
  • Yummy hotel sambar is ready. Serve it with vada, idli, dosa or even plain rice!

Notes:
My sis's mom-in-law adds a tablespoon of roasted gram dal/roasted channa dal/hurigadale/kadala pappu while preparing the spice paste & adds only 1 or 2 tbsps of grated coconut. I have tried the sambar this way too! It taste's good.

Sunday, September 4, 2011

Radish greens salad: A bowl of good health!

Savi-Ruchi crossed 250 recipe mark with this post & yet this is my first salad recipe!! Unbelievable but true. Now you know my family's craving for salads :( However I & my sister are an exception. We both love salads. Recently my sis joined me for lunch & we both enjoyed eating salads. I prepared this radish salad & the bowl of salad was over in less than 15mins.

Though the radish leaves are a little bitter & a tad pungent ,they are edible & tasty too. Radish greens are the most nutritious part of the plant

Serves: 3-4 
Preparation Time: 10mins

Ingredients: 
Tender radish leaves: 2.5 cups, finely chopped
Red onion: 1, medium sized, finely chopped(Around 1/3rd cup)
Cucumber: 1/2 cup (Finely chopped)
Salt: According to taste
Pepper: 1/4 tsp, optional

For the salad dressing:
Olive oil: 1 tsp
Lemon juice: 2 tsp

For garnishing: 
Roasted sesame seeds: 2 tsp


Method: 
Mix together the raddish leaves, red onion & cucumber & refrigirate.
Just before serving, sprinkle the salt, pepper, olive oil, lemon juice & toss well.
Garnish with roasted sesame seeds & dig in!


Notes:

  • Go ahead & add other veggies like grated carrots, grated radish or even some grated raw mango!
  • To add crunchiness to the salad, add roasted nuts or sweet corn.
  • There is no hard rule as to what proportion should the veggies be. Throw in whatever you like & enjoy.

Thursday, August 18, 2011

Palak Bajji/Spinach Curry/Palak Gojju: Tangy, Spicy & Garlicy

Want to enjoy a meal during sore throat, cold & cough? Prepare palak bajji & enjoy any boring meal. It has the perfect ingredients to give a high to your taste buds. Great news about this curry is, when refrigerated it stays up to a month.


Ingredients: (For around 2 cups of curry)
Spinach/Palak: 3 big bunches (Around 300 grams)
Garlic: 5 pods
Amtekayi: 3 nos (Since this is not available outside India, substitute with a medium grape sized tamarind).
Green chillies: 6 nos, more or less
Salt: According to taste

For tempering:
Oil: 1 tbsp, preferably coconut oil
Mustard seeds: 1 tsp
Garlic: 4 pods, minced or sliced
Curry leaves: 8-10nos


Method:
  • Wash the spinach leaves along with the stem thoroughly in water. Chop the leaves & the tender stem coarsely. 
  • Add less than 1/2 cup of water to the chopped spinach leaves. To this add garlic, amtekayi or tamarind, green chillies & salt. 
  • Boil on medium-high heat for 10mins or pressure cook for 1 whistle.  Allow them to cool. 
  • Once cooled, puree the mixture. 
  • Heat oil in a pan. When oil is hot, throw in mustard seeds followed by garlic & curry leaves. Saute till the leaves wilt & garlic turns golden brown.
  • Add the spinach puree & adjust the seasoning. Boil on a medium-low heat for 10-15mins until the flavors blend in.
  • Enjoy with ganji/porridge, rice or dosa.

Notes:
  • If amtekayi is used: After boiling the amtekayi, squeeze out the juice & discard the hard portion.
  • Ganji/Kanji/Porridge & this curry is a classic combination. 

Tuesday, August 9, 2011

Taiyo Meat Chopper

Are you wondering that how come a vegetarian blog is writing about meat? That is the name of the chopper that I recently invested in chopping vegetables. Sounds contradicting!! I went with the words of my friend here & bought this chopper. I am so far happy with it.

When I wrote about my chopper here, many of my friends asked me to share the information. So, here I am writing about it.

 (Pic Courtesy: http://www.courts.com.sg/Products/CourtsStoreOnlineCatalog/PID-IP010943(Courts).aspx)


Name: Taiyo Meat Chopper
From: Courts Megastore
Price: Usual price S$39.90(I bought for S$29.90, during some sale)
More details:Refer here.

Now coming to my listed pros & cons.

Pros:
  • Slicing + grating of carrots, cucumbers: very good & can be done within seconds.
  • Mincing + shredding + chopping very fine, great.
  • Watery vegetables like tomato & cucumber could also be chopped.
  • Small in size.
  • Cleaning of the jar is very easy.
Cons:
  • Was not able to chop green leafy vegetables.
  • I did not find it useful for making stir-fry/poriyal/palya because it doesn't cut the way we need. 
Note: This is not a paid review. My friends asked for the details of the chopper, so I wrote it for them. 

Tuesday, August 2, 2011

Popular Rasam Recipes

My blog is getting a back seat because of other higher priority tasks. I really want to get back to blogging in full swing. Hoping to settle all the other tasks in another couple of weeks.

So, thought of taking a sneak-peak of some of my popular rasam recipes. Do try if you haven't tried them yet!

Friday, July 29, 2011

Nylon khaman/Instant khaman dhokla recipe/Steamed gram flour cakes

After moving back to Bangalore, life has become more hectic than what I expected it to be. Setting up a home is taking all of my time & leaving me exhausted at the end of the day. Though we are settling down slowly, there are many tasks yet to be completed. In this tiresome schedule, one of the things that I am thoroughly enjoying is the FOOD. I get to eat all those I craved for. I have visited so many food joints that I feel I should start giving my reviews about them. Anyway, I'll keep that in the back of my mind & plan to kick it off on a rainy day!

Okay!,from now on I'll try to be regular (hopefully!) in putting up my experiments & also try to take a peek into the blogs I admire.

Coming to the recipe now. This is my son's yellow idli & I prepare it whenever he asks/requests/demands for it. It is super easy & can be prepared in less than 20mins time.

Here is my version of the nylon khaman or khaman dhokla.


Preparation time: 5-10mins
Cooking time: 10 mins

Ingredients: (Serves 3-4 as a snack or starter)
Besan/Gram flour/Kadale hittu: 1.5 cups (1 cup holds 250ml of water).
Water: 1.5 cups
Citric acid crystals: 1/2tsp, or 2 tbsp lemon juice.
Sugar: 1.5 tbsp
Salt: 1/2 tsp or a little more
Turmeric: 1/4 tsp
Green chilli-ginger paste: 1/2 tsp
Oil: 1.5 tbsp
Fruit salt: 1.5 tsp or 7gms approximately.

For tempering:
Oil: 1 tbsp
Mustard seeds: 1 tsp
Sesame seeds: 1 tsp
Curry leaves: 10-12 nos
Green chillies: 2 nos, split into 4 sllices

For garnishing:
Coconut: 1 tbsp, optional

Special utensils:
Steamer or a pressure cooker
stainless steel plate/thali (something similar to this one)


Method:
  • Mix all the ingredients(except fruit salt & water) mentioned in the ingredients section. Add few tablespoons of water at a time & make a lump free batter. The batter has to be very smooth with the consistency similar to that of an idli batter or a thick milk shake.
  • Let the batter rest for 2-3 mins.
  • Meantime, prepare the steamer. Add water to it & allow it to boil. 
  • Grease the plate with few drops of oil or spray.
  • Add the fruit salt to the gram flour batter & mix. The batter will become frothy, light & increases its volume.
  • Immediately pour it on to a greased plate/thali. 
  • Place the plate in the steamer & steam it for 10mins. A skewer inserted should come out clean.
  • Prepare the tempering. Heat oil in a pan. When oil is hot, add mustard seeds. When seeds splutter add sesame seeds followed by curry leaves & green chilies. Keep the tempering aside.
  • Allow the cooked khaman to rest for a minute. 
  • Sprinkle few drops of water over the cooked cake to keep it moist.
  •  Cut the steamed cake into desired shape (when it is still warm), pour the tempering over the steamed cake.
  • Garnish it with coriander leaves & serve it hot with any dip of your choice. Green chutney is a great combination with nylon khaman.

Notes:
  • Do not try to cut down on the oil used while making the batter. The dhokla might turn hard.
  • Use good quality fruit salt. Fruit salt that is stored for a long time will not give desired results.  Use 1 packet of Eno's fruit salt(5gm packet available in India) for 1 cup of gram flour.
  • You can make this khaman sweet n sour or khatta meeta by adding 2 tbsp of sweet n sour water. (Add 1 tbsp of lemon juice + 1.5 tsp of sugar to 2 tbsp warm water). Dissolve the sugar & sprinkle the water over the hot steamed cake. 
  • The gram flour to water ratio is 1:1. 
  • In case, you do not have a steamer, use the pressure cooker to prepare the khaman dhokla. Do not add the weight, instead place a steel tumbler (as shown below).
  • If you are planning to prepare the khaman in bulk, it is better to invest in a khaman dhokla stand. Refer picture here.

Featured Post

Noodles and Vegetables with Honey Ginger Sauce

Am I the only one who crave for noodles when sick with cold and sore throat? I love this noodles with honey-ginger sauce and it is perfe...