Showing posts with label non-indian. Show all posts

Tuesday, March 19, 2013

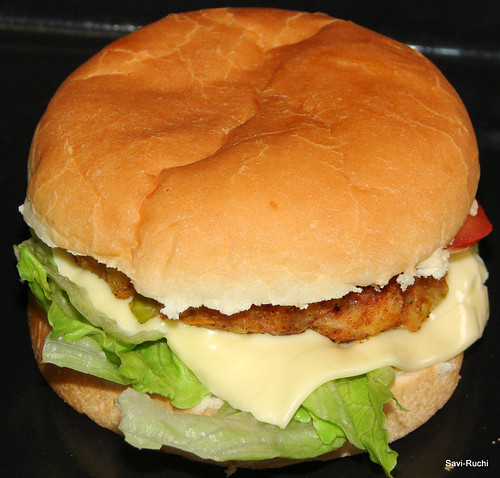
Kidney bean patty burger | Vegetarian Burger | Bean burger | Spicy burger

I'm introducing burgers to my son. Though he is staying in the States from the last one year, he is totally off to American food. He prefers Indian anytime. Although it is good for his health, it becomes extremely difficult when we travel. To make him get used to the burgers, I keep making burgers often.

Instead of the regular potato patty, I try with different patties each time. This time it was a kidney bean burger. Kidney bean is a great protein source. Although you could use canned beans, I prefer to use dried beans for obvious reasons.


Preparation Time: 20 mins
Cooking Time: Around 10 mins
Makes around 7-8 burgers


Ingredients:

For the patty:
Kidney beans : 1 cup, raw or 3 cups of cooked beans
Finely chopped bell pepper: 2 tbsp
Onion: 1 med sized, finely chopped
Finely chopped coriander leaves: 2 tbsp
Bread crumbs: from 2 slices of bread (about 1/4th cup)
Carom seeds | Om kalu: 1/2 tsp
Red chili powder: 1 tsp
Lemon juice: 2 tsp
All purpose flour/Maida: 2 tbsp, optional
Salt: As needed
Oil: About a teaspoon for each patty

For assembling the burger:
Burger buns: 7-8
Slices of tomato: 2 on each burger
A slice of cheese on each buger
Lettuce or baby spinach
Any dressing of your choice (refer notes below)

Method:
Soak the kidney beans overnight. Drain the water.  Add the kidney beans + water + 1/2 tsp of salt to the pressure cooker and cook it for about 4-5 whistles.Let the cooker cool down.
Once the pressure is released from the cooker, remove the lid & drain the water from the beans. You get approximately 3 cups of cooked beans.
Mash the beans gently. To the mashed beans, add in the ingredients mentioned for the patty (except oil & AP flour).
If the mixture is gooey & sticking to the hands, add in a tablespoon of flour at a time to adjust the consistency.


Heat a griddle. Make the patties & shallow fry the patties on both sides on a medium heat.


Remove the patties from the griddle & immediately arrange the burger.


Cut the burger bun in half. Add a layer of  greens first (I have used baby spinach here).
Follow the greens with the cheese slice (I did not have the slices, hence used grated mozzarella. What matters is the cheese & not the form, isn't it ;)  )
Place in the patty. Add a tablespoon of dressing.
Finally a slice of tomato, and cover with another slice of the burger bun.
Press in the burger & serve immediately.


Notes:

  • The above mentioned ingredients are a just a guideline. You could vary accordingly & it will be delicious anyways :)
  • Any dressing of your choice could be used. I prefer mustard while my family loves mayo. 
  • For the above burger, I have mixed equal quantities of mayo + tomato ketchup as dressing!

Friday, May 18, 2012

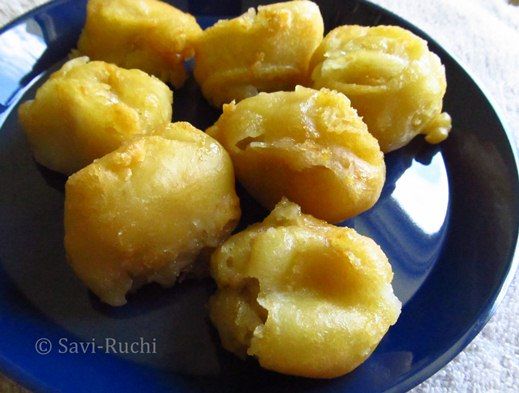
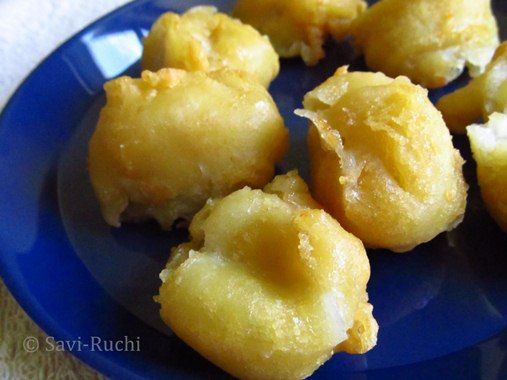
Pisang Goreng/Deep fried bananas: An Indonesian Delicacy

We had Pisang Goreng when we visited Yogyakarta, Indonesia. My hubby loved it. I could smell the egg in the dish & avoided eating them. I do eat cakes made out of egg, but cannot bear the smell of it. I avoid pancakes & muffins for the same reason!
After many years, I thought of making them at home. I had the vague idea of what went in it & tried to reproduce it. I did not add eggs. I replaced eggs with buttermilk & baking soda.


Preparation Time: 10 mins
Cooking time: 10-15 mins
Serves: 3-4


Ingredients: (Makes around 12 fried bananas)
For the batter:
Rice flour: 3/4th cup
Plain flour: 1/4th cup
Baking powder: 1/4th tsp
Butter milk: 3 tbsp
Baking soda: a pinch
Sugar: 1-2 tbsp, adjust according to your needs
Salt: a pinch
Water: As needed.


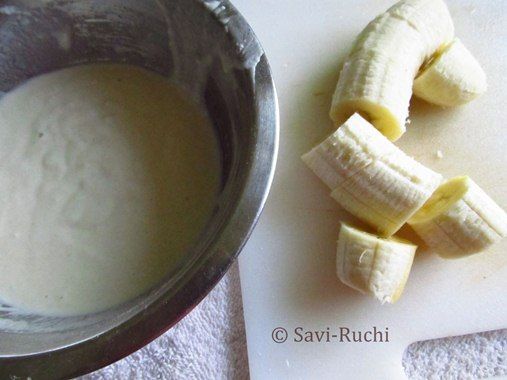
Bananas: 2 large, cut into 1 inches
Oil: For deep frying


Method:
Sieve the rice flour, plain flour, baking powder, baking soda & salt twice.
Add the flour mixture to a bowl. Add the sugar, buttermilk & whisk well.
Add few teaspoons of water at a time & mix until a thick batter is formed (Batter should be similar to pakora/bajji/bonda batter).


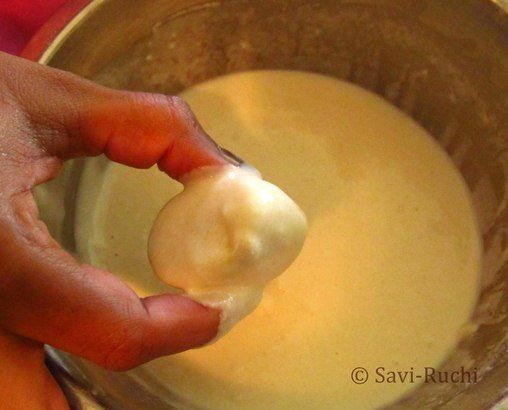
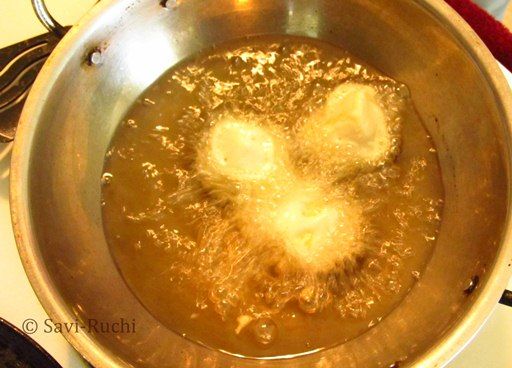
Heat the oil in a kadai/pan. When oil is hot, dip the cut banana slices into the batter & drop them gently onto the hot oil. Repeat the dipping & dropping procedure for the remaining banana slices. 


Flip & cook the bananas on all the sides until light golden in color. 
Remove from heat & drop them on kitchen towel & let them rest for a while. 
Serve them hot with a dip. Honey or maple syrup should taste great as a dip for these fried bananas.


Notes:
Use firm & just ripe bananas while making these. If you use over-ripe bananas, the deep fried bananas will become too soft.

Wednesday, January 19, 2011

Breakfast Burritos - A Mexican Recipe: Step-by-Step


Every article we read about fitness suggest us to eat healthy morning breakfast. Never skip your breakfast! A fruit, vegetable & a source of protein plays a very important role for morning breakfast, but how many of us follow it? (I see many hundreds of nodding heads, including mine!) They are worth reading, nodding & advising :D

Burritos are one such breakfast item for our weekends. While vegetables provide the essential vitamins & fibre, whole meal tortillas & cheese provides the necessary  protein & energy. Here is the recipe for you.

This recipe is inspired from showmethecurry.

Serves: 2
Preparation time: 5mins
Cooking time: Maximum 10 mins

Ingredients:
Tortillas: 4 nos, whole meal (For more information about tortillas, refer here).
Grated cheese: 1.5tbsp, more or less (for each burrito)
Oil/Butter: 1 tsp each (for shallow frying)

For the filling:
Shredded vegetables: 1/2 cup (I have used cauliflower, baby corn & carrots).
Olive oil: 1 tsp
Garlic: 1 small pod, minced
Ground pepper: according to taste
Pickled jalapeƱos: 1 tsp, chopped fine (optional)
Salt: According to taste
Dried or fresh basil: 1 tsp

Method:
For the filling:
Shred or coarsely mince the vegetables.
Heat the olive oil in a small pan, when oil is hot, add minced garlic & saute for 30secs.


Throw in the vegetables to the pan & saute. Cook the vegetables on medium flame for 2-3mins.

Add the ground pepper, salt, basil leaves, jalapeƱos & mix well. Turn off the heat.

For burritos:
Heat a griddle.Warm the tortillas.
The griddle must be on low heat. Place one tortilla on the griddle.

Spread the cheese all over the tortilla.

Follow it by spreading the vegetable filling.

Place another tortilla on the filling. Seal the edges. (Melted cheese helps to seal the two tortillas wonderfully).
Carefully flip. Sprinkle the oil. Cook on medium heat, until both the sides are nicely brown.

Repeat the same with the remaining two tortillas.
Cut the burritos & serve them hot with tomato salsa or any dip of your choice.


Notes:
  • For those who are new to tortilla, here is a brief. Vague definition for tortilla, it is very similar to Indian chapathi. Tortillas are made using corn flour(makki aata), plain flour(maida), whole wheat flour. I am sure you can easily find the tortillas in any supermarkets in India. I have seen them during my last visit. If you really cant find tortillas & want to prepare these burritos, go ahead making them using your chapathi dough. Roll 2 chapathis (same size) & lightly toast them. Keep them aside. Prepare burritos! For people in Singapore, you get them at Mustafa, Fair price & other shops too. Here is how they look.
  • Any vegetable of your choice could be added to make these burritos. I have made burritos with grated potato  filling, paneer filling & many more.Scrambled egg could also be added as a filling.
  • Basil leaves could be replaced with fresh & finely chopped coriander leaves.
  • If you don't prefer Garlic, replace it with ginger

Friday, October 29, 2010

Grilled cheese tomato sandwich: Beginner Series

Here goes my second post for the beginner series that I started last month. Though I have an electric griller, I always prefer to grill these sandwiches on my griddle/tawa/kavali. 

I know most of my cousins (including my brother, sister) prefer these without garlic. So, if you do not want to use garlic butter, go ahead & use the plain butter instead. This sandwich tastes great either ways :)
Serves: 1
Preparation time: 5 mins
Cooking time: 2-3 mins

Ingredients: (For 2 sandwiches)

Wholewheat bread slices: 4 nos (White bread could also be used)
Finely chopped tomatoes: 3 tbsp (1.5tbsp for each sandwich)
Shredded/Grated cheddar cheese: 2 tbsp (1tbsp for each sandwich)
Butter: 1 tsp
Garlic: 1 pod (minced)
Salt: According to taste
Mixed & dried herbs: 1/2 tsp (1/4th tsp or a dash for each sandwich) 
Pepper powder: 2 big pinches (1 for each sandwich)


Method:

  • Mix the butter & the minced garlic & keep them aside. 
  • Take a slice of the bread. Spread the finely chopped tomato(1.5tbsp) on the bread.
  • Sprinkle the salt, pepper & dried herbs.
  • Spread the cheese on top of the tomatoes.
  • Take another slice of bread & place it on top of the cheese.
  • Heat the griddle. When the griddle is medium hot, add few drops of garlic butter to the griddle. Reduce the heat. (The sandwich must be grilled on a low heat).
  • Place the sandwich on the garlic butter & let it brown for a minute. Repeat the same for the other side of the sandwich too.
  • Repeat the above steps for another sandwich. Cut them & serve them hot with a dip of your choice.

Notes:
Garlic butter enhances the taste of the sandwich. If you do not prefer them with garlic, go ahead & add normal butter. 
If you cannot find mixed herbs, then add finely chopped coriander leaves or mint leaves. These leaves add a nice flavor too.

Wednesday, April 21, 2010

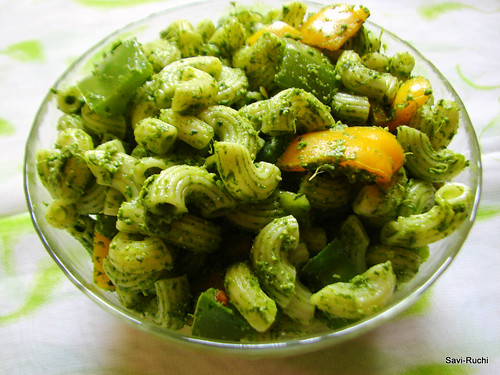
Macaroni in spinach-pumpkin seeds pesto

Although authentic pesto sauce calls for pine nuts & basil, I have tried creating pesto using Thai Basil (it has a strong aroma), Chinese spinach (Phuay Leng) & various seeds like pumpkin seeds, cashews & almonds. Whatever combo I tried became a huge hit at home. My hubby felt the aroma is very strong for Thai Basil but loved eating them. My son who is a big fan of pasta loves to eat this pesto sauce too (I'm happy that this way some leafy vegetables make way to his stomach :p)


 Ingredients: (Will serve 2-3)
Macaroni: 2 cups
Salt: According to taste
Capsicum: 1/2 cup (cut into 1 cm squares)
Olive oil: 1 tsp
Parmesan cheese: 1 tbsp (optional)

For pesto sauce:
Spinach : 1 bunch (around 200gms)
Pumpkin seeds: 2 tbsp
Garlic: 2 cloves
Green chillies: 2 nos (Authentic pesto sauce doesn't call for it, but to match our taste buds I add!)
Parmesan cheese: 1 tbsp (it is better to add it, if you can't find it add more of olive oil)
Olive oil: 2 tbsp
Salt: According to taste

Method:
  • Cook macaroni according to the package instructions. Drain the water & keep aside 1 cup of the boiled water.
Sauce preparation:
  • Blanch the spinach.Make a smooth paste of pumpkin seeds, blanched spinach, garlic, green chillies, Parmesan cheese, olive oil & salt. Finally add the lemon juice & keep it aside.
  • Heat  oil in a broad pan. When oil is hot, throw in the capsicum & cook on a medium-high heat for 2-3 mins. When the capsicum is cooked & yet firm, add the spinach sauce, cooked pasta & 1/2 cup of water. Mix them gently & cook on a low heat for 3-4mins. Adjust the salt (note: both the cooked pasta & the sauce has salt in it).
  • Finally garnish it with cheese & serve hot.

Notes:
  • Refer this if you are blanching the spinach for the first time.
  • Pumpkin seeds could be replaced with cashew nuts, almonds, walnuts or pine nuts.

Saturday, November 7, 2009

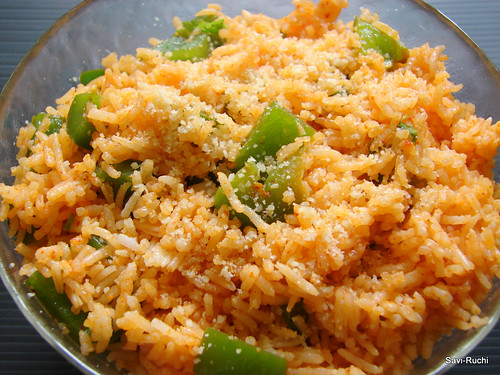
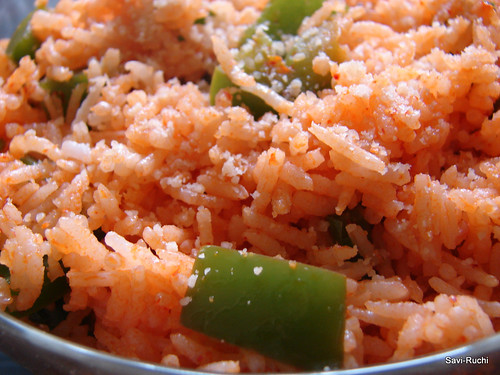
Spanish Rice: My version

I am one of those nuts who watch all cookery shows without a book & pen in hand. I just enjoy watching the show. Sometimes, few dishes attract me soo much that I start memorizing the ingredients & prepare it on the same day or the very next day. I note the ingredients in a small chit & prepare it.. One can see soo many such chits floating in my home; hubby keeps wondering as to what those chits are for!!

Spanish rice is one such dish I saw in Zee Kannada Channel. I found it to be a very simple dish. It was prepared the very next day at my home & since then this recipe is treasured in my list. Cook it & relish it to believe me. It is very tasty & filling.

Ingredients:

Long grain rice: 3 cups (I used basmati)
Water : 6 cups
Onion: 1/2 cup (finely chopped)
Capsicum: 1/2 to 3/4th cup ( chopped into 1 inch cubes)
Tomato paste: 1 tbsp
Garlic: 2 tbsp (finely chopped)
Red chilli: 8-10 (adjust according to your needs)
Cheddar cheese: 3tbsp (grated)
Butter: 1 tbsp
Cilantro: 2tbsp (finely chopped)
Lemon juice: 1 tsp (optional)
Parmesan Cheese: a big pinch (for garnishing, optional)


Method:
  1. Wash the rice 2-3 times in running water & cook it by adding 6 cups of water. Allow it to cool.
  2. After the rice is warm, spread the rice & let it cool completely.
  3. Meantime, make a fine paste of red chillies & garlic. Add a tbsp of water if required while grinding.
  4. Heat the butter in a broad pan, when butter is hot, add onions & saute till turn soft (need not wait for it to turn golden brown). Add capsicum & cook it on a medium-high heat for 2 mins.
  5. Add the chilli-garlic paste, tomato paste & saute for a minute.
  6. Add the cooked rice, salt, cheese, mix well & cook till the cheese melts.
  7. Add lemon juice, mix & garnish it with cilantro
  8. Serve it hot/warm with wafers or papad

Awards:

Asha of "Asra Ashaon Ka"has showered me with a lot of awards. Thanks a lot Asha. It means a lot. Here is a quick peek into the awards.I'll put them soon in my sidebar too.


Monday, September 14, 2009

Veg Burger

I was clean bowled by her pictures & step-by-step procedure. I went to NTUC & bought all the things required to prepare the burger. Thanks a lot Nags for inspiring me to prepare veg burger.
I modified her patty recipe to suit our taste. Also, I used iceberg lettuce instead of the baby greens. Rest of the procedure remains same.

I offered this to my maid. She was tasting this for the first time. She struggled to bite the burger. The lettuce & onions started peeping out. She kept the vegetables aside. Just ate the bun + patty, later ate her greens :) I asked whether she liked the burger. Her answer was "this burger tastes good, but cannot be eaten outside". Me & my hubby laughed for 5 mins at her sincere & innocent answer. Ha ha...

Ingredients for the patty(This makes around 8 patties)
Potatoes: 4 medium sized (boiled)
Cottage cheese: 3 tbsp (grated)
Carrot: 1 medium sized (grated)
Green peas: 1 fistful (boiled)
Garam Masala: 1 tsp
Chat masala: 1 tsp
Red chilli powder: 1 tsp
Lemon juice: 1 tsp
Corn flour: 1 tbsp
Bread: 2 slices (Used whole wheat bread)
Salt: According to taste
Oil : 1-1.5 tbsp for each patty
Ingredients for burger(For 8 burgers)
Ham burger buns : 8
Iceberg lettuce: 8 big leaves
Tomato Sauce : 1 tsp for each burger (Use any spread/dressing of your choice)
Onion: 2 slices for each burger
Tomato: 1-2 slices for each burger
Cheese: 8 slices ( One for each burger)

Patty preparation:
Mash the potatoes ensuring no lumps are left. Add all the ingredients mentioned (except bread). Soak the bread in water for 5 secs. Squeeze out the water from the bread. Mash the bread & then add it to the mixture. Mix them thoroughly. Prepare 8 equal sized balls (around the size of a ping pong ball). Pat them gently. Heat the oil on a griddle/tawa. When oil is hot, place the patties & shallow fry them on a medium/slow heat for 5 minutes on each side. Remove the patties from the griddle.
Assembling the burger:
Cut the burger bun (There would be an indication in the burger bun itself. Use this to slice the burger bun). Tear the lettuce leaf & place them on the lower portion of the burger bun.
Place the cheese slice above the lettuce. Now, place the hot patty over the cheese.
Smear some sauce/spread over the patty. Place the slices of onion & tomato over the patty. Finally close the other slice of bun over the slices of tomato & onion & enjoy!!


Tips:
  • Place a relatively hot patty over the cheese slice as it helps to melt the cheese a little. This adds an extra zing to the burger.
  • Donot skip the usage of iceberg lettuce. The crunchiness of iceberg lettuce takes the burger to another level.

Thursday, May 28, 2009

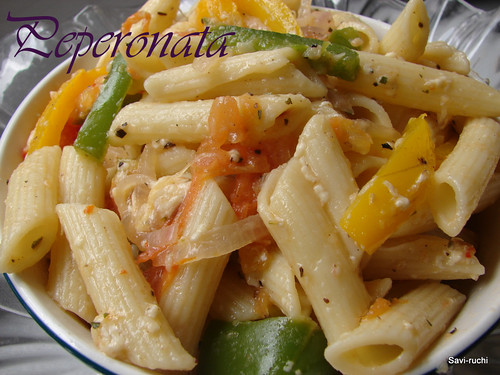
Peperonata: Pasta in Sugary-Peppery Sauce

Once upon a time, the name pasta was enough for me to skip the office party, as I used to hate it. May be I never felt like giving a try because of the ‘not so usual’ shapes of pasta & also because I tasted it at a wrong place first time. My first experience with pasta was in one of the restaurants in Central Mall, MG Road, Bangalore. It was pathetic. After that, I avoided all pasta parties. I repent my decision now after tasting delicious pastas here. I see a whole lot of change in myself within a year. I have not only started eating pastas, but started experimenting at home too.

All food bloggers love to blog hop. I’m not an exception to that; however my blog hopping is limited. My hubby takes control over my blog hopping & does not let me do it for more than 10 minutes. So, I always forget to bookmark the wonderful dishes that I dream to cook someday. One such recipe that I wanted to try from sometime was this pepperanata. I found this simple & delicious recipe at Madhuram’s place. I made few modifications to suit my needs & cooked it couple of weeks before. The sugary-peppery sauce with cheese makes you crave for third & fourth helping too. Thanks a lot for the nice recipe Madhuram.


Ingredients: (Serves 3)
Pasta: 250gms (I used whole wheat penne)
Yellow capsicum: 1 cup (cut into strips)
Green capsicum: 1cup (cut into strips)
Onion: 1 medium to big sized (sliced)
Green chilli: 2 nos (slit into 2)(Original recipe didnot have this)
Garlic: 4 pods (minced & finely chopped)
Sugar: 1 tbsp
Salt: According to taste
Pepper powder: 1tbsp
Parmesan cheese: 4 tbsp
Tomato: 2 nos (discard seeds, pulp & cut into strips) (Original Recipe didnot have this)
Water: 1/4th cup
Pasta Herbs: 1 tbsp
Olive Oil: 2 tbsp


Method:
  • Cook the pasta until soft by following the package instructions.
  • Add oil & salt while cooking. Drain the water & preserve some water to be used while sautĆ©ing the vegetables.
  • Heat a broad pan, add oil to it. When oil is hot, add minced garlic, and fry till it turns golden brown.
  • Add, onion, capsicum, water & cook it on a high flame for 2-3 minutes.
  • Reduce the flame, add sugar, pasta herbs & cook the capsicum, onions on a medium to low flame for 10-15 minutes.
  • Throw in the tomatoes & cook again on high flame for 1 minute only.
  • Add cooked pasta, salt, pepper powder, cheese & toss them well. Serve it hot/warm with a bread of your choice.

PS:
  • If available, use cherry tomatoes instead of tomato strips.
  • I followed Madhuram’s suggestion & did not skip the sugar. She was right, addition of sugar takes this pasta to a different level altogether.
  • I strongly recommend you to add cheese (this was not in the original recipe) as it blends quite well with the “sugary-peppery” sauce. However, you can be flexible on the quantity of cheese.

Update: Goes to MFT:Cheese hosted by Poornima Nair of tasty treats & started by Bindiya.

Tuesday, May 26, 2009

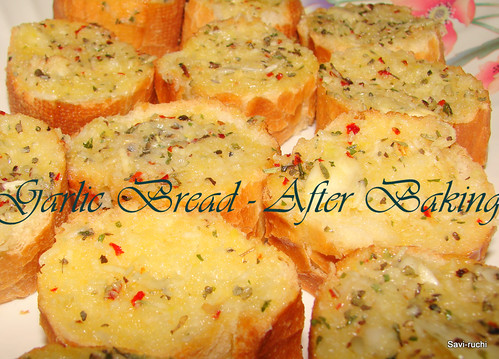
Garlic Bread (Microwave Version)

This starter played a major role in increasing the BMI of me & my hubby. We used to crave for Pizza Hut’s garlic bread. Aha!! It used to be lip smacking. My hubby knew my craving for garlic bread & he used to make sure we eat it at least once a week during my pregnancy days. I remember eating 1 & ½ portion (1 portion => 4 slices) of garlic bread with cheese 2 days before my delivery too ;)


I had almost forgotten the taste of garlic bread after I moved here. Recently, on one of the lazy saturday afternoon’s, I started looking for garlic bread recipe & I found something interesting here. I gave a try, but did not have high expectations as I did not have an oven & had to compromise with the microwave. It did not come out very well since I used more garlic & the end result became a little bitter. I tried 2-3 times again with small portions until I was happy with the result. However, it would taste better if baked in an oven, but microwave was also not a bad idea :)


Here is my first tried version of garlic bread. I served this with pasta.

Ingredients:
Baguette: 1/2 loaf
Mixed herbs: 1 small pinch on each slice
Margarine: 5 tbsp
Garlic: 3 pods
Salt: A pinch

Method:
  • Slice the baguette into 3/4th inch slices.
  • Roast the garlic on a medium flame till raw smell of garlic disappears & it turns slightly brown. Allow it to cool.
  • Grate the garlic or prepare a paste out of it, mix the garlic with margarine. Add salt, mix well.
  • Spread a pinch of herbs on the sliced baguette & spread the garlic butter/margarine generously over the slice.
  • Arrange it in a microwave safe tray & bake it for 8 minutes.
  • Allow it cool & serve the garlic bread with any dip or with pasta of your choice.


PS: My microwave does not have temperature indications on it. I tried 2 slices first by keeping it in medium power for 5 minutes. The crust became very hard. Hence, kept it on medium for 2 minutes & 6 minutes on low power. It turned out good. Hence, be prepared to perform few trials until you get a hang of your microwave.

Featured Post

Noodles and Vegetables with Honey Ginger Sauce

Am I the only one who crave for noodles when sick with cold and sore throat? I love this noodles with honey-ginger sauce and it is perfe...