Showing posts with label starters. Show all posts

Wednesday, January 8, 2014

Gobi Manchurian | Cauliflower manchurian : With step by step pictures!


Because of the terrible weather & wind chills, we are under house arrest. Hubby was working from home & my son is enjoying his extended holiday. Hope the weather gets better soon. To keep myself going & motivated, I am having a cooking marathon. Despite our diet, I cooked many unhealthy dishes. Good thing is that I made most of them during lunch & our dinner's are very simple even now.

Back to the recipe. Gobi Manchurian is a Indo-Chinese dish & a street food of India. Gobi manchurian can be served as a appetizer(dry version) or made like a gravy to go with Fried rice or other rice varieties. This post is a dry version & is served as a appetizer.

Preparation Time: 15 mins
Cooking Time: 30 mins
Serves: 3-4

Ingredients:
For the manchurian:
Gobi | Cauliflower : 1 small cauliflower (about 25-30 florets)
Corn starch: 1/4 cup
AP flour/Maida: 1/2 cup
Pepper powder: 1 tsp
Water: As needed (I used 1 cup + 2 tbsp)
Salt: As needed
Oil: For deep frying

For the manchurian sauce:
Corn starch: 1 tbsp
Water: 1/2 cup
Tomato ketchup: 2 tbsp
Red chilli sauce or sriracha: 2 tsp
Soya sauce: 2 tbsp
Vinegar: 1 tsp
Oil: 1 tbsp
Garlic: 1 tbsp, finely chopped
Finely chopped cabbage: 1/4 cup
Finely chopped onion: 1/4 cup
Bell peppers: 1/4 cup
Finely chopped green chillies: 1 tsp, more or less (I used 1/2 tsp of green chilli paste)
Salt: As needed (Be extra careful as all the sauces contain salt & in fact I do not add any extra salt)

For the garnish:
Spring onion greens: 2 tbsp, finely chopped


Method:
Wash the cauliflower florets & keep it aside.

Mix the corn starch, maida, pepper powder, salt in a medium bowl.

Add few tablespoons of water at a time & make a smooth batter. Whisk the batter well & ensure no lumps. Batter should be little thinner than the pakora batter or pancake batter. We want the batter to coat the cauliflower florets lightly.

Heat oil in a broad pan or kadai or deep fryer. When oil is hot, dip the cauliflower florets in the batter & deep fry the florets until lightly golden. Each batch takes about 3-5 mins.
Drain the deep fried cauliflower florets & place them on a paper towel.

For the Manchurian sauce:
Add the corn starch, water, tomato ketchup, red chilli sauce, soya sauce, vinegar to a small bowl & whisk well. Let the sauce mixture sit for 3-5 mins.
Heat oil in a wok. When oil is hot, add the finely chopped garlic & toss till garlic is golden brown. Follow garlic by onions & cabbage. Toss on high heat until the cabbage & onions are translucent, cooked & yet crunchy. It might take about 3-4 mins

Add the bell peppers, finely chopped green chillies & toss again.

Add the sauce mixture to the wok. Keep mixing until the sauce becomes thick.

Throw in the deep fried cauliflower florets & toss. Let the sauce coat the cauliflower florets.
Turn off the heat.

Garnish it with onion greens (I did not have them handy, so skipped adding!) & serve it immediately.

Notes:

  • You should mix the sauce & the florets just before serving. The manchurian does not stay crisp if you soak it for a long time.
  • If you plan to make it for a party, prepare the sauce & deep fry the florets in advance. Heat the sauce & toss in the florets just before serving.
  • Other manchurian ideas. Instead of cauliflower, you could use mushroom, cabbage, baby corn or paneer (Indian cottage cheese).

Monday, February 18, 2013

Palak Cabbage Pakora | Spinach and Cabbage Fritters

I made these pakoras on a cold snowy & a lazy Sunday afternoon. They are a breeze to make & absolutely delicious!! Go ahead...It's alright to indulge in these fried beauties once a while.


Preparation Time: 10 mins
Cooking Time: 15-20 mins
Serves: 4-5


Ingredients:
Shredded Spinach: 2 cups
Shredded Cabbage: 1 cup
Carom seeds/Ajwain/Om kalu: 1 tsp
Red chili powder: 1 tsp
Salt: As needed
Turmeric powder: 1/2 tsp
Gram flour/Besan: 1 cup
Rice flour: 2 tbsp
Fine Rava/Chiroti rava/Cream of wheat: 2 tbsp
Hot oil: 1 tbsp
Water: Approximately 1 to 1.25 cups

Other ingredients:
Oil for deep frying the fritters.


Method:

Mix in the shredded spinach, cabbage, carom seeds, red chili powder, turmeric powder & salt in a large bowl.

Let the mixture sit for 5-10 mins. The mixture will ooze out water.
Next, throw in the rice flour, cream of wheat, gram flour to it.

Pour in the hot oil & mix them all together.
Now, slowly add the water & make a thick batter. The batter should be of dropping consistency.

Heat enough oil in a kadai/wok for deep frying the fritters.
When oil is hot enough, drop in a tbsp of batter at a time to the oil.
Cook the fritters on med-high heat, on all the sides until the fritters are golden brown & crisp.
Remove the fritters using a slotted spoon & let them dry on a paper towel.
Serve these fritters hot with a dip/chutney or ketchup.


Monday, January 7, 2013

Palak Pakoras | Spinach Fritters: Carom seeds flavored!

"Wishing you all a very happy & a prosperous new year"

My son asks, who loves spinach more, me or Popeye? I answer back saying, " you are the greatest lover of spinach in the whole world". He happily & proudly asks for second serving of the spinach dish. Because of the above reason, I always have spinach lying in my fridge. I try to make as many dishes as possible using spinach. Some of my spinach delicacies could be found here.

During one of the festivals last year, I made this pakora instead of the cabbage pakora. We relished this with thick rice flakes bisi bele bath.


Preparation Time: 10 mins
Cooking Time: 10-15 mins
Serves: 3-4

Ingredients:
  • Spinach leaves: About 2 cups finely chopped
  • Gram flour/Besan: 1 cup, a little more or less.
  • Rice flour: 2 tbsp
  • Fine rava/Cream of wheat: 2 tbsp
  • Salt: As needed
  • Red chilli powder: 1 tsp, adjust according to your needs
  • Carom seeds/Ajwain: 1/2 tsp (Refer here for Language Translation to Kannada)
  • Hot oil: 1 tsp
  • Baking soda: a small pinch
  • Water: As needed
For deep frying:
Enough oil for frying the pakoras.


Method:

Wash the spinach leaves & chop them fine.
In a medium sized bowl, add all the ingredients mentioned (except the oil for deep frying!).
Mix them well.
Add few tablespoons of water at a time and make a thick batter. Consistency should be like that of a cupcake batter.
Heat oil in a wok. When oil is hot, scoop out a tablespoon of batter directly in the oil & deep fry in a medium heat.
After a couple of minutes, keep moving the fritters in the oil for even cooking. 
When the pakoras turn golden brown, remove them on a paper towel. 
Repeat the procedure with the remaining batter.
Serve the fritters, either with green chutney or with a dip of your choice!


Notes:
  • For extra crispness, add thinly sliced onions along with the spinach. 
  • Instead of carom seeds, these fritters could be flavored with cumin seeds or grated ginger.

Monday, October 22, 2012

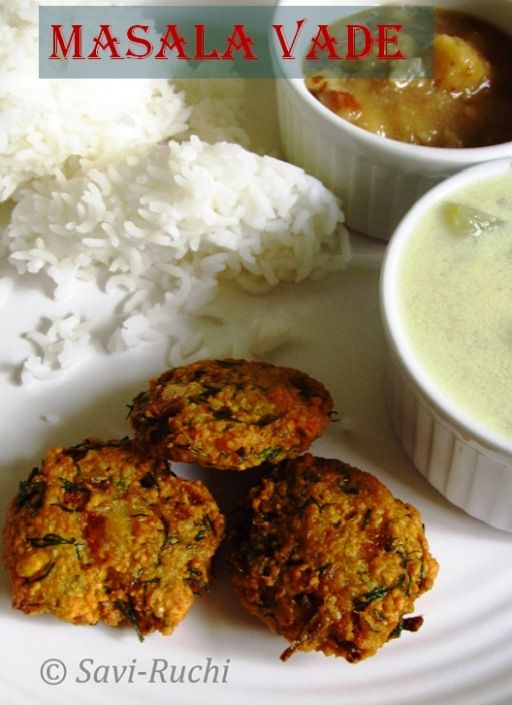
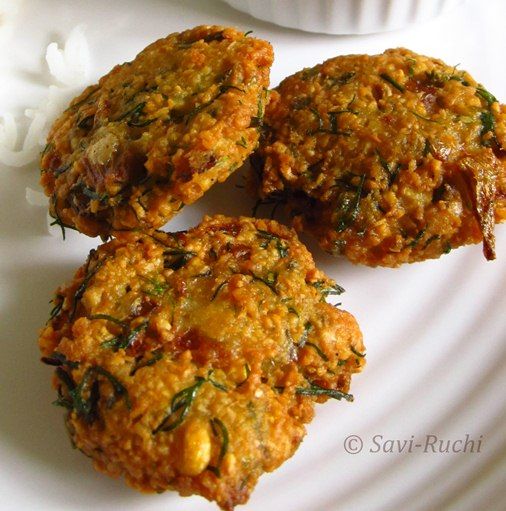
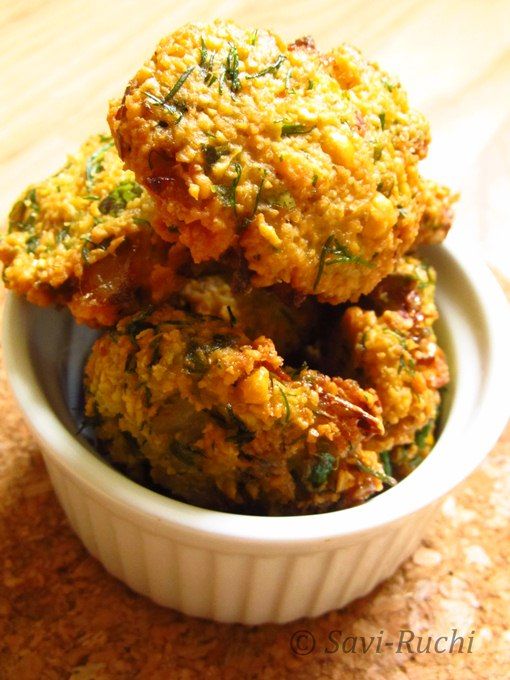
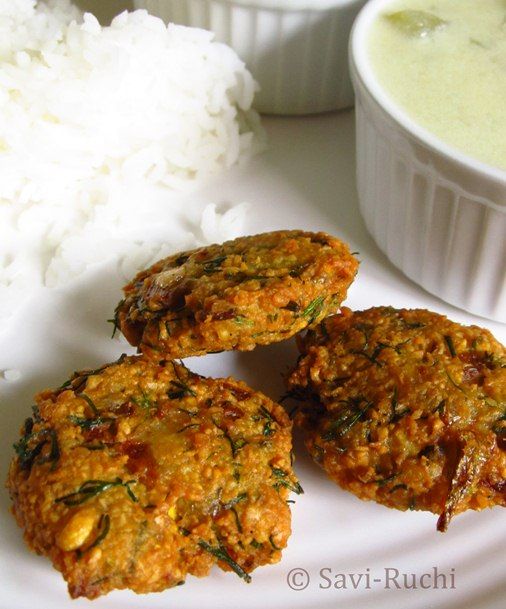
Ambode | Masala Vade | Dill leaves and Chana dal Fritters

Wishing all Savi-Ruchi readers a very happy and a joyous Navaratri. 

Was craving for ambode (also known as chattambade) with dill leaves from many months. Hence, made them couple of weeks before with Majjige Huli & relished it thoroughly!


Preparation Time: 20 mins
Cooking Time: 15 mins
Soaking Time: 2-3 hours


Ingredients: (Makes 20-22 vadas)

  • Gram dal/Channa dal/Kadale bele: 3/4 cup
  • Skinned black dal/Urad dal/uddina bele: 2 tsp, optional
  • Ginger: 1 inch piece
  • Green chillies: 5 nos
  • Onion: 1 medium sized
  • Dill leaves: 1 cup, finely chopped & loosely packed (refer notes)
  • Rice flour: 2 tbsp
  • Salt: As needed
  • Oil: For deep frying


Method:
Wash the channa dal & urad dal together. Soak it for 2-3 hours in sufficient water.
Drain the water from the dal/lentils.
Wash the dill leaves & finely chop them. 
Add the ginger, green chillies to the drained lentils. Throw it in the food processor & make a coarse paste out of them(Do not add any water).
Scoop out the coarse paste. 
Add the dill leaves, onion, rice flour, and salt to the coarse lentils paste. Mix it thoroughly. The consistency should be like a patty. 
Heat sufficient oil in a broad pan/kadai.
Prepare lime sized balls out of the paste. Pat them gently (just like a patty for burgers) using the fingers on a greased aluminum foil/butter paper/plastic sheet.
When oil is hot(check notes), remove the patties carefully from the foil & slide them in oil. 
Cook it on a medium heat until golden brown on both the sides. Drain it on a paper towel & repeat the procedure with the remaining dough balls. 
Serve it warm as a starter with chutney or with rice & a side dish.


Notes:

  • I'm repeating it again, just in case! Make a coarse paste out of the lentils without adding any water. The moisture in the lentils would be sufficient.
  • To check the readiness of the oil, drop a small ball of dough (say around the size of the lemon seed). If the dough ball floats in a couple of seconds, the oil is hot enough to drop in the patties.
  • Dill leaves could be replaced with coriander leaves. 
  • It is essential to cook the vada on a medium heat to ensure proper cooking of the lentils. 

Tuesday, August 28, 2012

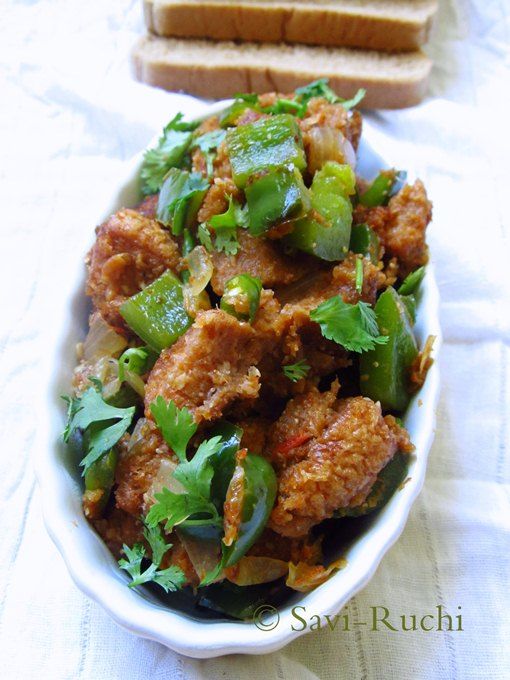
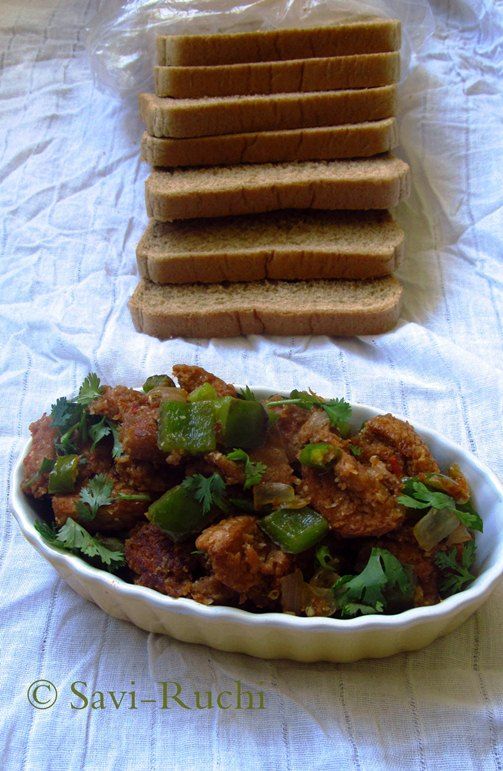
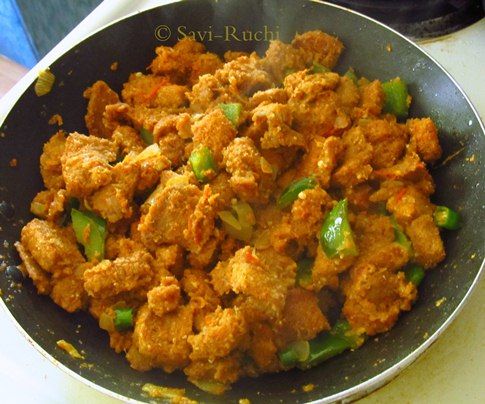
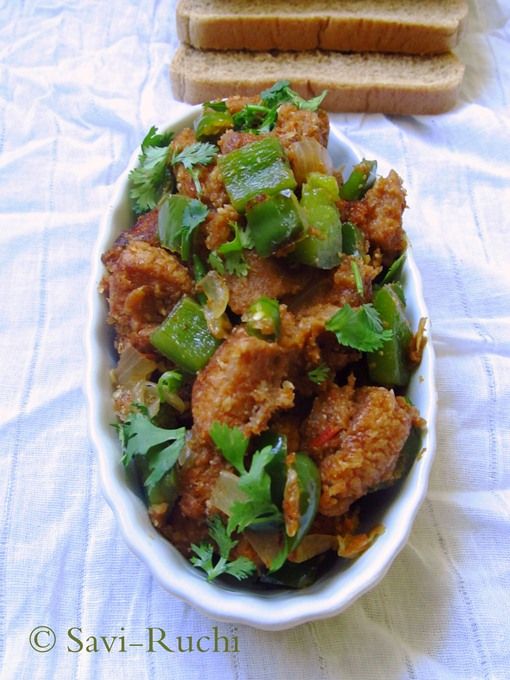
Bread Chilli in Chilli Parotta Style with step-by-step pictures!

We all know that it is not good to skip the breakfast. Even then, some of us miss it.I too was having minimal/no breakfast days. Thanks to my son's long summer holidays, I am not missing it anymore! I make elaborate breakfast for us & during one of the days, I made this bread chilli with the left over bread :)

My son coined the name bread chilli. Though he found it little spicy, he loved it to the core. He was sipping the water every other bite but never wanted to say "no" to it :)


Preparation Time: 15 mins
Cooking Time: 15 mins
Serves: Me & my six year old ;)

Recipe Source: Loosely adapted from Cookery Corner

Ingredients:
For the bread chilli:

  • Bread slices: 8 nos, I used wheat bread.
  • Capsicum: 1/4th cup, cubed
  • Onion: 1/4th cup, cubed
  • Ginger-garlic paste: 1/2 tsp
  • Green chillies: 4 nos, sliced
  • Oil: 1.5 tbsp
  • Salt: As needed


For the spice paste:

  • Oil: 1 tbsp
  • Onion: 1 , small sized (around 1/3rd cup)
  • Tomato: 1, medium sized
  • Khus-khus/Poppy seeds: 1 tsp
  • Cashew nuts: 1 tsp or 5-6 nos
  • Coriander powder: 1/2 tsp
  • Red chilli powder: 1 tsp
  • Garam masala: 1/2 tsp
  • Salt: 1/2 tsp


For the garnish:

  • Coriander leaves/cilantro: 1 tbsp, finely chopped


Method:
For the spice paste:
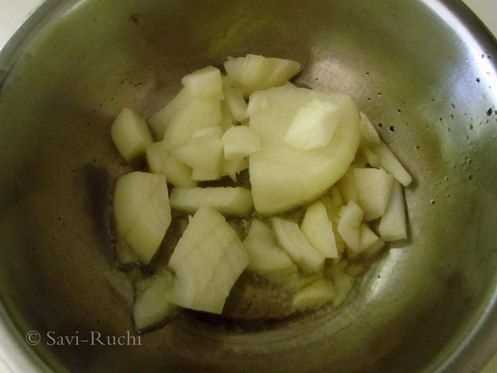
Roughly chop the onion & tomato. Keep it aside.
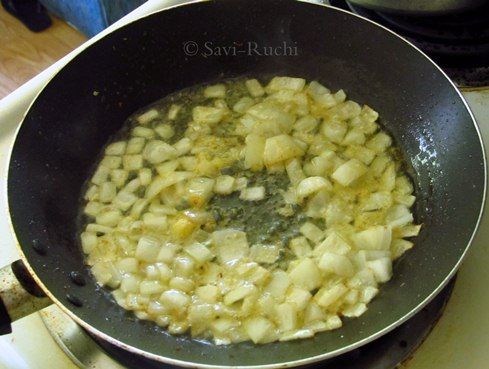
Heat oil in a medium sized pan. When oil is hot, throw in the onions.

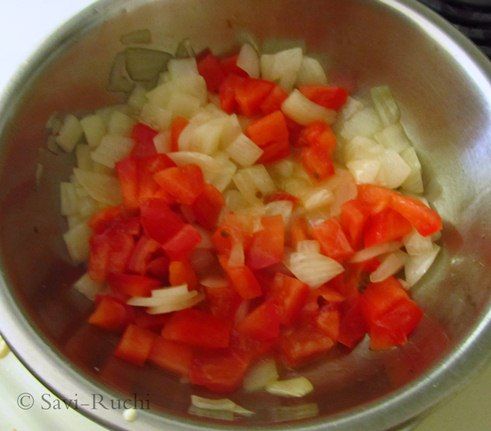
Saute till the onion become transparent. Add in the tomatoes & saute till tomatoes become soft.

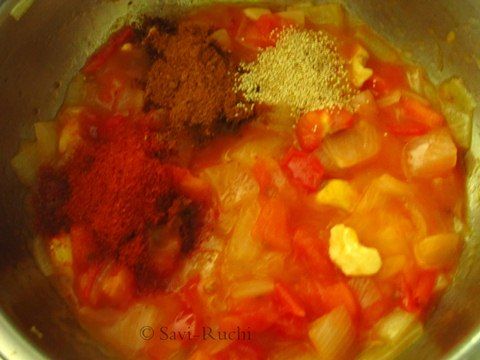
Add the poppy seeds, cashew nuts, coriander powder, red chilli powder, garam masala, salt & mix thoroughly.
 Cook on a medium heat for a couple of minutes. Let the mixture cool.
Once the mixture is cool, make a smooth paste out of it by adding couple of teaspoons of water. Scoop out the spice paste & keep it aside.

Toast the bread (either on a griddle or toaster). Cut them into 1/2 inch cubes & keep aside.

For bread chilli:
Heat oil in a broad wok. Once oil is hot, throw in the onion & ginger-garlic paste. Toss on a medium-high heat.

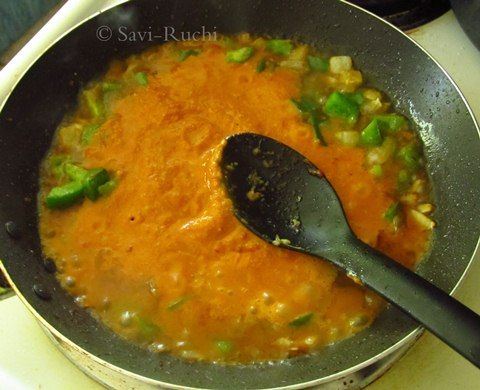
When the onion turns golden brown, add in the capsicum & green chillies. Saute on high heat.
Add in the spice paste, salt & saute again. Add couple of tablespoons of water,if needed.

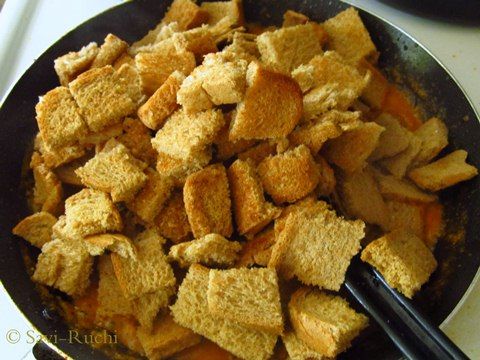
Throw in the cut bread slices & toss well. Toss the bread on medium-high for couple of minutes.
Turn off the heat, garnish with coriander leaves & enjoy!

Notes:

  • It is important to toss the onion, capsicum & bread on medium-high heat.
  • Remember we added salt while making the spice paste. So, adjust the salt accordingly.
  • This dish could be garnished with spring onion greens too. 

Tuesday, August 31, 2010

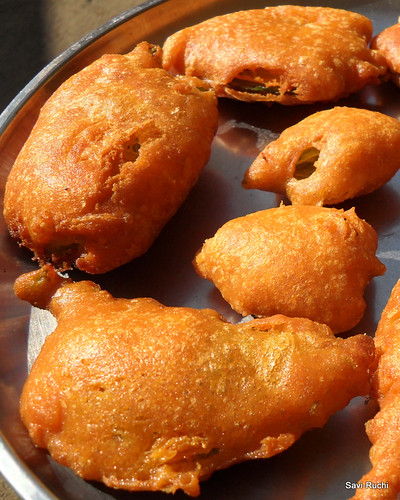
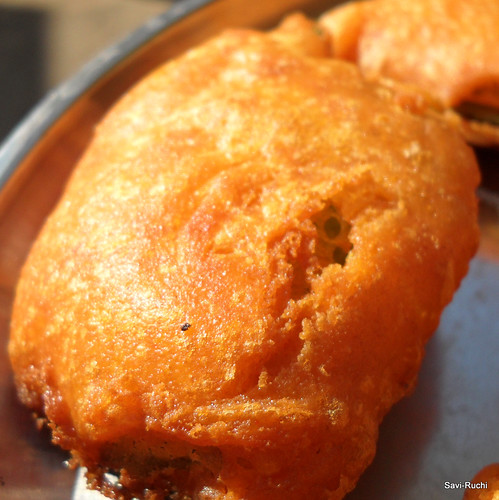
Alasande vade | Vegan Black eyed beans fritters | Lobia Pakora


How often do you all shop for vegetables, milk, bread etc? I say once a day!! I am crazy about stuffing my pantry with all the things (not) needed. I want my fridge spilling out vegetables & fruits & my cupboards filled with all flours & lentils. Same is the case with my wardrobe too.., Okay, that is a story for another day..

I always buy a big pack of black eyed beans & hardly use it. I add it with sambar, once a bluemoon make this pulao & this pasta. This is one bean that takes a backseat. It is only used during SOS. Now that we are shifting to a new home, I had to clear my pantry & hence soaked a large amount of this beans. I got beautiful sprouts too. But, didnot know what to cook. Hence, googled the recipes for black eyed beans & settled down on this vade from Shubha.

Vade was absolutely delicious, I wonder why did I not try it earlier! It is crunchy on outside & soft on the inside. It has a very distinct taste. I thought of taking step-by-step pictures & then posting it, but could not resist sharing it immediately. I tried making patties using sprouted black eyed beans & used it instead of cheese/paneer or veg patty for burger. Will post that recipe sometime.


Ingredients (For around 18 vadas/fritters)
Sprouted black eyed beans: 1 cup (Original recipe did not ask for sprouted beans)
Ginger: 1 inch
Onion: 1 medium sized (finely chopped)
Cumin seeds: 1 tsp
Rice flour: 1 tbsp (My addition to the original)
Salt: According to taste
Green chillies: 3 nos
Cilantro/Coriander leaves: 3 tbsp (finely chopped)
Oil: For deep frying

Method:

  • Wash the sprouts & drain the water(No need to pat them dry).
  • Very coarsely grind the sprouted beans, along with ginger and green chillies (just pulse it for 5-15secs). (Do not add water, the moisture in the beans is good enough)
  • Scoop out the coarse paste. Add finely chopped onions, chopped coriander leaves, cumin seeds, rice flour, salt to the paste & mix them well (Paste will be something similar to the cutlet batter). 
  • Make medium lemon sized balls. Pat each ball into 1cm thick patties.
  • Heat oil in a broad kadai/pan. When oil is hot, reduce the heat. Drop the patties carefully in the oil & cook on a low heat(This is very important!!, else it will be cooked from inside) on both sides till the vadas turn golden brown. 
  • Serve it hot/warm with a dip of your choice.


Notes:

  1. Instead of sprouted beans, soaked or canned beans could be used to. Be cautious while adding salt as canned beans might contain salt.  
  2. It is very important to deep fry the vada/fritters on low heat to ensure proper cooking of the patties.
  3. Do not add water while making a coarse paste.

Thursday, December 24, 2009

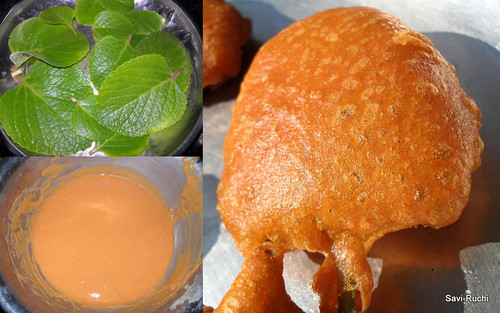
Doddapatre Bajji (Coleus aromaticus Pakora)


How are you guys? What are you planning for Christmas & New Year? I am back this monday & am all tired, sad, sick & what not!! On top of it.., I had to rush back to work on the same day.., hmmmmm..., Boring isn't it? I will write about my exciting trip to India in my coming posts. Also, will soon catch up with you guys too. I have got few recipe requests. Will try to publish them in the coming months.

I will quickly jump to the recipe & stop all the blah.., blah..
This bajji/bonda/pakoda.., huh...whatever you call it... is from my ajji(grandmom). The strong aroma of the doddapatre leaves along with the bland gram flour & the spicy chilli powder made a great match. I forgot all my diet & took 2-3servings :)

Ingredients:
Gram flour/besan/kadale hittu: 1 cup
Rice flour: 2-3tbsp
Chilli powder: 1 tsp (adjust according to your family needs)
Salt: According to taste
Baking Soda: a small pinch
Oil: 1 tbsp
Water: Around 1 cup (Sorry.., didnot have time & patience to measure it)
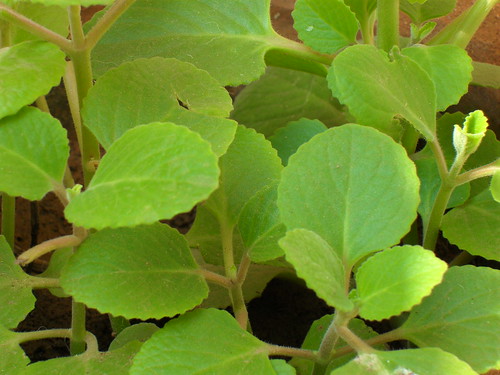
Doddapatre yele/Coleus aromaticus: 8-10 leaves
Oil: For deep frying

Method:

For the batter: Add the gram flour, rice flour, chilli powder, salt, baking soda to a bowl & gently mix them. Heat the 1 tbsp oil & when the oil is hot, add it to the gram flour mixture. Mix it again.

Now add water (little at a time) & prepare the batter. Batter should be like a thick milkshake.

Wash each doddapatre yele(leaves) carefully & allow it to dry or pat them dry.

Add sufficient oil to a deep pan & heat the oil. Dip the leaves in the batter(one leaf at a time) & put the leaves properly coated with batter to hot oil. Fry on both sides until they turn golden brown.

Drain it on an absorbent paper & enjoy the hot bajji/pakora with coffee/tea.


Notes:

1. Donot try to mix ginger, garlic, coriander leaves to the batter as it would out power the aroma of doddapatre leaves. These leaves have a great aroma (difficult to take.., if you are first time to this leafy vegetable).
2. Be very gentle while washing these leaves as they tear our easily.

Will write more about the medicinal values of doddapatre in my coming posts (One more interesting recipe using doddapatre soppu is following soon). Meantime, have a close look of the leaves.


Last but not the least....

"Merry Christmas. Enjoy your day with family & friends"

Wednesday, September 2, 2009

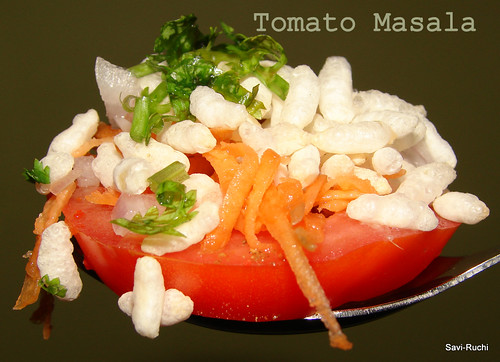
Tomato Masala


Though I prepare this tomato slice (as we call it) very often at home, I just cant resist the temptation & every-time postpone taking the pictures of them. To add to that, hubby says.., next time !! Now that I have got many requests for this tomato masala, I had to force myself to take pictures before jumping on them.

This is a street food of Mysore & a must after spicy churmuri. I'm missing those vontikoppal days (Vontikoppal is one of the locations in Mysore). Though it is available in Bangalore, the taste of tomato slice(masala) from Mysore is just mouth-watering. What say Mysooreans? If you happen to visit Mysore, dont forget to eat this chaat.For those who cannot visit Mysore, here is the recipe. Though this recipe yields you yummy tomato masala.., it cannot beat the roadside ones ;)

Ingredients:
Tomato : 1 no (big one, take ripened & firm ones)
Onion: 1
Carrot: 1 small sized
Dhania powder/Coriander powder: a pinch on each slice
Chat masala: a pinch on each slice
Salt: According to taste (I add a pinch on each slice)
Red chilli powder: a pinch on each slice
Green chilli paste: a pinch on each slice
Sev: As much as you want (Refer here for the recipe or buy from Indian supermarkets)
Puffed rice/Puri/Murmura: As much as you want (I added a tbsp on each slice)
Fried peanuts/Congress: As much as you want
Finely chopped cilantro : A big pinch on each slice
Lemon juice: 2-3 drops on each slice

Note: Please dont look for sev in the photos. I didnot have sev handy & hence skipped them.

Method:
  • Finely chop the onions, grate the carrot & keep them aside.

  • Cut the tomato into slices. Place these slices next to each other on a plate.

  • Smear the salt, red chilli powder, green chilli paste. Sprinkle chaat masala, coriander powder. Put a tsp of chopped onions & grated carrot on each slice.

  • Generously sprinkle roasted peanuts, sev & puffed rice.

  • Sprinkle some lemon juice on each of the slices & enjoy immediately.

Tip:
Salt, red chilli & green chilli paste have to be smeared/sprinkled first. This helps the tomato to absorb the salt & chilli well, making the dish salty, spicy & tangy.

Thursday, February 19, 2009

Halasina Mulka (Deep fried jackfruit sweet): A quicker version

The name mulka makes my mom-in-law nostalgic. She starts recalling past days & she brings those memories in her words to us(particularly to her daughter-in-laws). She starts something like this, my son did his high school & pre-university in Manipal & as a result he had to stay away from me. But, when we went for selection for engineering seat, I had made up my mind that my son will be with me. So, it was me who decided him to study here & he was traveling a short distance(?!) of about 40kms everyday to reach his college. Later, she starts with his favorite food & cooking under 10mins dishes.

"I used to cook godi dosa (wheat flour dosa) along with chutney, avalakki upkari (beaten rice upkari), neer dosa & simple breakfast items to him. He used to sometimes leave home as early as 6:30 to 7:00a.m. He was not carrying lunch & he used to be back only by 5:00p.m or sometimes 6:00p.m. He did not like eating rice & I used to prepare golibaje or mulka for him every day evening."I get impressed by this, everyday golibaje or mulka?? Wow!!.

She continues, "his friends used to like the coffee & mulka that I prepare & used to tell me that, they came home just to drink the coffee & mulka that I made". There ends her flashback.
I have to accept that, my mom-in-law makes amazingly nice coffee & the best ever golibaje & mulka. Later because of health problems, the frequency of golibaje & mulka preparation reduced at home. Even now, if a guest visits our home, the first option for her is golibaje, mulka & coffee.

Recently my hubby visited India. He gave me a call from his place, saying that he is enjoying the mulka prepared by his mom. Not only that, my son is also enjoying the mulka prepared by his ajji(grandmom). Now, I am the only one being deprived of mulka. Hence decided to cook here & enjoy eating.

I knew that for mulka we need wheat flour, bananas & other ingredients. I did not have bananas at home, instead had a packet of jackfruit. I had bought jackfruit to prepare Mangalore buns & post it to AFAM:Jackfruit hosted by LG. I called my mom-in-law, confirmed if I could prepare mulka with jackfruit & went ahead preparing.

The first batch sticked to the pan, it made me really sad. Later realized, it could be because of the sugar I added to it. Also, the oil was not very hot. So, I heated the oil properly & then made the next batches, it turned out good. Here ends my long & interesting (boring??) story.


Ingredients:
1 cup wheat flour/atta/godi hittu
2tbsp maida/self raising flour
½ cup pureed jackfruit
3-4 tbsp powdered jaggery (increase or decrease the amount depending on the jackfruit used)
A pinch of salt
A pinch of baking soda
½ tsp powdered cardamom
Oil for deep frying

Method:
  • Mix all the above ingredients (except oil) by adding little water. Prepare a thick batter out of it. (Batter should be of dropping consistency).
  • Let the batter soak for 30-45mins.
  • Heat oil in a broad pan, when the oil is hot, make small lemon sized balls of the batter using your fingers & drop it to oil.
  • Fry on medium flame until they turn golden brown.
  • Place them on absorbent paper & remove any excess oil.
  • Serve it hot.
This recipe goes to Asankhana’s event “ Create With Luv for Luv“ as it is my hubby’s favorite & I cooked it for him.
Along with the above recipe, I’m sending the whole bunch of jackfruit recipes at my blog to AFAM:Jackfruit hosted by LG & to Maheshwari's blog. Here goes the entries..

Wednesday, November 19, 2008

Tukudi | Shankar poli | Namak para

My mother used to usually prepare this during the summer holidays to make all the 3 or sometimes more of us happy & also during our short/long tours. Shankar poli was a must item prepared by my mom for my school trips. I used to tell her to prepare something else, but never understood why she was preparing this so many times.

I learnt the reason once I started cooking. The reason being, the preparation being so easy (her time, effort is saved), can prepare in bulk (to satisfy the entire school bus going on a vacation) & always turns out crispy & yummy.

Now, this has become an all time available evening snack at our home in Singapore. I prepare this, once a week & use it for the rest of the week.

Here is the bowl of thukudi for you, keep munching this.., & enjoy the recipe.

Ingredients:
2 cups all purpose flour/maida
1.5 tsp hot oil/ghee
1 tsp red chilli powder
1/2 tsp pepper + jeera powder
salt according to taste
oil for deep frying

Method:
  • Mix all the ingredients in a bowl (except the oil kept for deep frying).
  • Prepare a firm dough (dough should be little hard) with the ingredients using water & keep it aside for 10-15 mins.
  • Divide the dough into 4 equal portions & roll out each portion by dusting very little flour(like normal chapathi)
  • Cut the rolled out chapathi into small diamond shapes (like we cut normal barfi) & deep fry the thukkudi (cut diamond shaped) until golden brown.
  • Drain it on absorbant paper, allow it cool & store it in an air tight container. (This can be stored for upto 3 weeks)

Featured Post

Noodles and Vegetables with Honey Ginger Sauce

Am I the only one who crave for noodles when sick with cold and sore throat? I love this noodles with honey-ginger sauce and it is perfe...