Thursday, November 12, 2009

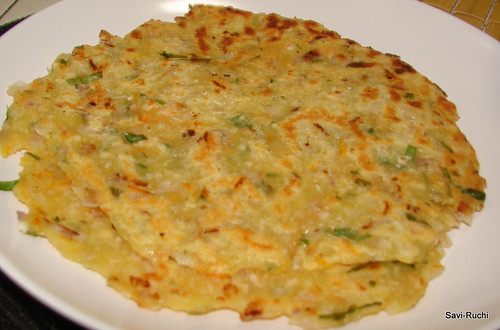
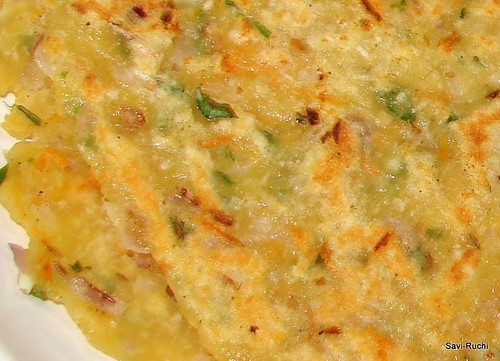
Rave rotti(Semolina Roti)

This dish is requested by a reader of mine & she wanted me to publish it as early as possible. So.., here it goes for you & also to others who want to give it a try.


Ingredients:
Chiroti rava or small rava/semolina: 3.5 cups
Akki hittu/Rice flour: 1/2 cup
Anna/Cooked rice: A fistful/ondu hidi (optional, makes the rotti soft)
Carrot: 1/2 cup grated
Erulli/Onion: 1 medium sized (finely chopped, optional but recommended as this would give a crunchy effect to the dish)
Curry leaves: as much as you want (finely chopped)
Coriander leaves: a fistful (finely chopped)
Grated coconut: 3-4 tbsp
Salt: According to taste
Jeera/Jeerige/Cumin seeds: 1 tsp
Mosaru/Curd/Yogurt: 1/2 cup (shouldn't be very sour)
Grated cucumber: 1/2 cup (this gives a totally different flavor to the rotti, but if you don't like you can discard it too)
Finely chopped green chillies: As much as you want (I normally do not add this, as my family likes it less or rather no spicy)
Oil: 1 tbsp for each rotti
Water: Roughly around 1 cup (use cucumber water as much as possible)

Method:
  • Blend the cooked rice to make a smooth paste.
  • Mix all the above ingredients mentioned. Make a dough similar to rice rotti dough.
  • Pat it on the tava or a banana leaf, cook on both sides & serve with coconut chutney.
Notes:
  1. If you want the rotti to be soft, decrease the rawa & increase the rice flour.
  2. Do not pat the rotti very thin, keep it medium like parathas.
  3. Add the oil generously as it helps in roasting the rotti better.
  4. Feel free to add leafy vegetables like methi, dill to this rotti for different flavors & nutrients.

Saturday, November 7, 2009

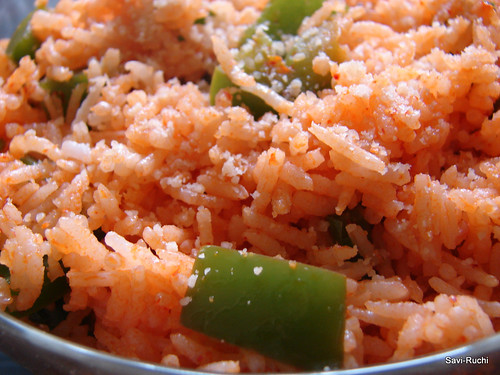
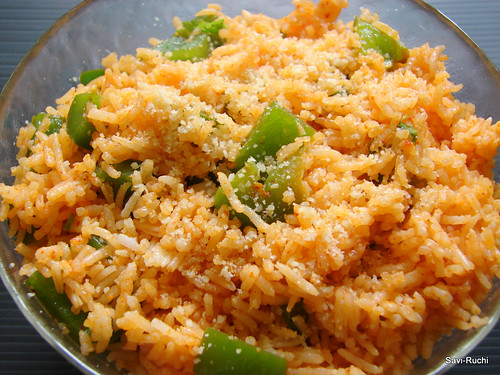
Spanish Rice: My version

I am one of those nuts who watch all cookery shows without a book & pen in hand. I just enjoy watching the show. Sometimes, few dishes attract me soo much that I start memorizing the ingredients & prepare it on the same day or the very next day. I note the ingredients in a small chit & prepare it.. One can see soo many such chits floating in my home; hubby keeps wondering as to what those chits are for!!

Spanish rice is one such dish I saw in Zee Kannada Channel. I found it to be a very simple dish. It was prepared the very next day at my home & since then this recipe is treasured in my list. Cook it & relish it to believe me. It is very tasty & filling.

Ingredients:

Long grain rice: 3 cups (I used basmati)
Water : 6 cups
Onion: 1/2 cup (finely chopped)
Capsicum: 1/2 to 3/4th cup ( chopped into 1 inch cubes)
Tomato paste: 1 tbsp
Garlic: 2 tbsp (finely chopped)
Red chilli: 8-10 (adjust according to your needs)
Cheddar cheese: 3tbsp (grated)
Butter: 1 tbsp
Cilantro: 2tbsp (finely chopped)
Lemon juice: 1 tsp (optional)
Parmesan Cheese: a big pinch (for garnishing, optional)


Method:
  1. Wash the rice 2-3 times in running water & cook it by adding 6 cups of water. Allow it to cool.
  2. After the rice is warm, spread the rice & let it cool completely.
  3. Meantime, make a fine paste of red chillies & garlic. Add a tbsp of water if required while grinding.
  4. Heat the butter in a broad pan, when butter is hot, add onions & saute till turn soft (need not wait for it to turn golden brown). Add capsicum & cook it on a medium-high heat for 2 mins.
  5. Add the chilli-garlic paste, tomato paste & saute for a minute.
  6. Add the cooked rice, salt, cheese, mix well & cook till the cheese melts.
  7. Add lemon juice, mix & garnish it with cilantro
  8. Serve it hot/warm with wafers or papad

Awards:

Asha of "Asra Ashaon Ka"has showered me with a lot of awards. Thanks a lot Asha. It means a lot. Here is a quick peek into the awards.I'll put them soon in my sidebar too.


Sunday, November 1, 2009

MTR Style Khara Bhath Recipe | How to make Hotel Style Khara Bhath


We are a big time khara bhath family. That too MTR style. I have made it many times over the years and all my friends who eat it go ga-ga over this upma/khara bhath. The specialty of this khara bhath is the addition of Udupi Rasam Powder. Do not use any other rasam powder to make this, use MTR Rasam Powder or make your own Saaru Pudi using my recipe.

Preparation Time: 10 mins
Cooking Time: 20 mins
Serves:4 to 6


Ingredients:

Upma rava/semolina/cream of wheat: 3 cups
Vegetables of your choice: 1 cup chopped, optional (I normally add carrots, french beans, peas, potato)
Tomato: 1 medium sized
Onion: 1 medium sized
Finely chopped bell pepper: 1/4 cup
Green chilli: 1 to 2 nos, refer notes
Grated ginger: 1 tsp
Water: 6 cups to 7 cups
Ghee/Clarified butter: 1 tbsp, divided use
Oil: 2-3 tbsp
Mustard seeds: 1/2 tsp
Cumin seeds: 1/2 tsp
Urad dal: 2 tsp
Cashew nut: 2 tbsp
Turmeric powder: a big pinch
Rasam powder: 1.5 tsp (MTR rasam powder would taste great too)
Curry leaves: 1 string
Grated coconut: 3 tbsp
Salt: According to taste
Sugar: 1 tbsp, refer notes (adjust according to your needs)
Lemon juice: 1 to 2 tsp (adjust according to your family needs)
Coriander leaves: 3 tbsp (finely chopped)


Method:
Heat 1 tsp ghee in a wok & when ghee is hot, add the mustard seeds, cumin seeds and urad dal. When the seeds crackle, add the cashew nuts. When the cashew nuts turn golden brown, add the rawa/semolina to it. Roast the semolina on a low/medium heat for 5-8 minutes or until the semolina turns golden & aroma fills the house. Keep the semolina aside.


Cook the mixed vegetables in a cup of water until soft & yet crunchy. (if you use the vegetables).

Meantime, boil the water.
Heat oil in a broad pan & start the tempering process. Start with curry leaves, broken green chili, followed by onion. 


Saute until onions turn translucent. 
Add the bell peppers and saute for a minute or two. 

Add tomato &  ginger. Saute again for a minute or two. 


Add the rasam powder, turmeric & mix well.

Pour in the boiling or hot water to the pan.
Add salt, sugar & allow the water to boil again. When water starts bubbling, reduce the heat.
Now carefully, add the semolina to the boiling water. Keep stirring to ensure no lumps are formed. 

(Keep the semolina in a big plate. Take the plate in one of your hands, carefully start dropping the semolina to the boiling water & keep stirring the water using the other hand). Close the lid & reduce the heat. Let the semolina get cooked on a low heat for 2-3 mins.
Open the lid & mix well.
Add the lemon juice, coriander leaves, coconut and the remaining 2 tsp ghee. Mix again & serve it hot.


Coconut chutney goes well as a accompaniment for this masala bhath.


 Notes:

  • If your family likes to eat mildly spiced khara bhath, skip the green chilies. But, never the rasam powder.
  • Jaggery could be used in place of sugar.
  • Do not use rice rawa or bansi rawa (the thicker version of the rawa) to make this khara bhath. Use the finer variety.  

Saturday, October 24, 2009

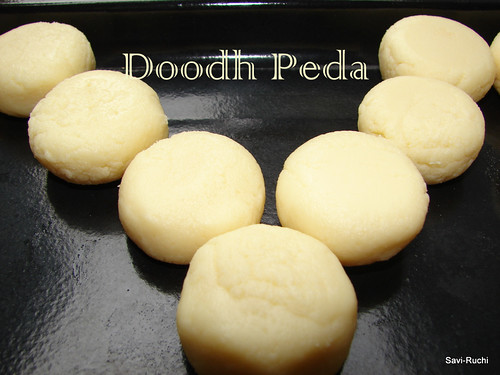
Doodh Peda/Milk Peda

This was in my draft since Krishna Janmastami & I was hoping that I atleast publish this for Deepavali. But.., again I'm late..

Anyways, better late than never. Happy Karthika Masa/Masam/Month. Diyas are lit infront of our house for this whole month & each day of the week is celebrated.


(Photo courtesy:http://www.4to40.com/egreetings/cards.asp?festivals=Diya_Traditional_Candles_of_Diwali-Diwali-127)

So, what did you guys cook at home?Did any of you buy gold/platinum/silver on the dhanteras? At my side.., nothing. No gold/silver too. We were on a short trip to Indonesia & so not much of celebrations. We were back only after Deepavali. I'm happy that I spent all the time with my kiddo & hubby, which otherwise I would have spent in the kitchen.

My version of the doodh peda is a quick & an instant one. It almost tastes like authentic one, however expert eaters can make out the difference in this version. My take is when this method is so easy, why on earth should hours be spent on the authentic way ;)

Ingredients:(Adapted from a monthly kannada magazine)
Condensed Milk: 1 tin
Full cream milk powder: 2 cups (my one cup holds 180ml water)
Unsalted butter: 1/2 cup (melted or at room temperature)


Method:
  1. Gently, mix together the condensed milk & milk powder. Ensure that there are no lumps.
  2. Add in the butter & mix again.
  3. Pour the batter to a microwave safe bowl.
  4. Heat/cook in the microwave for 3 minutes (check the temperature settings).
  5. Remove the bowl, stir well & put in the microwave again for 1 minute.
  6. Repeat the steps 4 & 5, for 2 more times. Ensure that the rawness of the milk powder is removed & it is cooked well.
  7. Allow it to cool for another 5-10minutes. When the batter is still warm, prepare small lemon sized balls & give it a nice peda shape.
  8. Cool it in the refrigirator for 1-2hours before serving.
  9. Enjoy the instant doodh peda :)


Update: Hurray!!, I won a tote bag from Foodie Blogroll. I am eagerly waiting to receive it. Thanks a lot Foodie Blogroll.

Wednesday, October 14, 2009

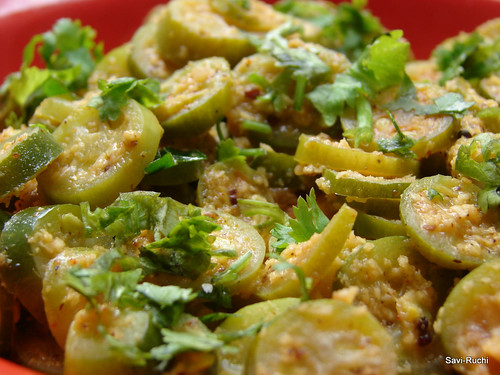
Thondekayi Palya (Ivy gourd stir-fry)

Hurray!!!, we have booked our tickets to India. I am all excited & have no mood in doing anything (of course I'm dreaming & planning about my trip to India). I'm in no mood to cook too. To add to my laziness.., my hubby is on diet. He is on some #$%^@ diet for one month. So, whom should I experiment on?!! I don't want to risk on myself ;) Hence, my kitchen is closed for experiments this month.

So, today I'm giving you a tried & tested dish that I have been cooking for many years now. A very simple & delicious 'Karnataka style' palya recipe for you all to enjoy.

Here are the ingredients & the method.


Ivy gourd/Thondekayi: 250gms
Grated coconut: 3-4 tbsp
Mustard seeds: 1 tsp
Amchur powder/Huli pudi: a big pinch
Oil: 1 tbsp
Mustard seeds: 1/4th tsp
Curry leaves: a string
Chilli powder: 1 tsp
Coriander leaves : 2 tbsp (finely chopped)

Salt: According to taste


Method:


  • Wash the ivy gourd & pat dry. Chop them into thin slices or discs.

  • Heat oil in a broad pan. When oil is hot, add mustard seeds, curry leaves & saute until mustard seeds start spluttering. Add the chopped ivy gourd & saute them well. Add 1/2 cup water & allow it to cook on a medium flame.

  • Meantime, make a coarse paste of coconut, mustard seeds & chilli powder. Add a tbsp or 2 of water if required.

  • When the vegetable is cooked & soft, add the salt, huli pudi(amchur powder) & the coconut masala. Cook for another 2-3minutes.

  • Garnish it with coriander leaves & serve it with rice or roti.

Tips:

  • The palya has to be dry & not a gravy kind of stuff.Hence, keep a watch on the amount of water added to the masala & to the vegetable.
  • For faster cooking, pressure cook the vegetable before hand & then prepare the palya as mentioned above.

Wednesday, October 7, 2009

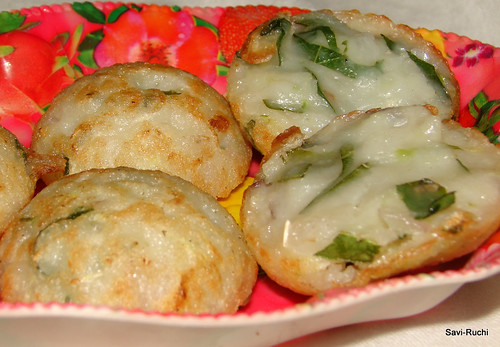
Southekayi Guliyappa (Cucumber rice balls)

Some of my friends have commented that I have reduced the number of posts/month. Sorry pals, I was busy with other activities. I hope to publish atleast once a week. Also, thanks for being regular to my blog.

Today's dish is....
Southekayi guliyappa (I know the title says it, he he)
This is a Udupi/Mangalorean delicacy. Adding vegetables to dosas, idli & paddu(guliyappa/gundpongalu/appe) is quite common in these regions. The abundant availability of cucumbers(yellow cucumbers popularly known as mangalore southe) would have made those creative ladies to come up with many dishes with cucumber as the main ingredient. You can see many versions of cucumber dosa, cucumber idli, cucumber rotti being prepared in their households. These Mangalore southe will be available with them 24/7 & on all 365 days a year. People preserve their home grown cucumbers until the next crop is ready :)

Southekayi guliyappa is a very simple breakfast/tiffin/snack item that doesn't need any fermentation & also no side dish to go along with. There are sweet & savory version of the cucumber guliyappa. I prefer a savory one & hence giving you the recipe of the same ;) Sweet version is also equally tasty & loved by the sweet toothed people (not my type...)

Ingredients:
Raw rice: 3 cups (preferably use sona masoori or ponni rice)
Grated cucumber: Around 1.5 cups (remove the seeds if the cucumber is ripened)
(I use normal green cucumbers as I dont get yellow cucumbers here. It tastes good with green ones too)Grated coconut: 1 tbsp (fresh or frozen, optional)
Finely chopped onion: 1/2 cup (1 medium onion)
Curry leaves: 3 tbsp (finely chopped)
Green chilli: 3 no (finely chopped)
Salt: According to taste
Coriander leaves : 2 tbsp (finely chopped)


Method:


  • Soak the rice in water for about 4-5hours.
  • Drain the water & prepare a smooth paste out of it. Donot add much water as the grated cucumber oozes out water.
  • Squeeze out the water from the grated cucumber.
  • Add all the above mentioned ingredients(including grated cucumber) to the rice paste. Mix it well. Adjust the batter by adding the cucumber water. (Batter should be of dropping consistency & not pouring)
  • Heat the appe/guliyappa pan. Add few drops of oil to each mould. Add 2 tbsp of the batter to each mould & cook it on a low heat for 2-3minutes. Turn the guliyappa & cook on the other side too.
  • Serve it straight from the pan drizzled with some home made ghee.


Tips:


  1. Rub the ends of the cucumber well. Also, it is better to taste the cucumber before adding it to the batter. Some cucumbers will be bitter. If the cucumber is bitter, then discard them & use another cucumber.
  2. Ensure the batter is of normal idli batter consistency.
  3. Eat these appe/guliyappa hot or atleast warm. If this guliyappa is consumed after it reaches room temperature, it becomes chewy.
  4. Use tender cucumber for better results.

Tuesday, September 29, 2009

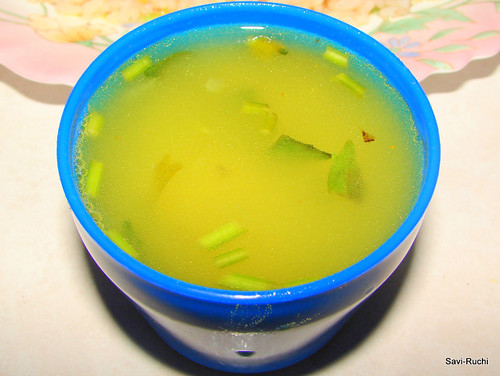
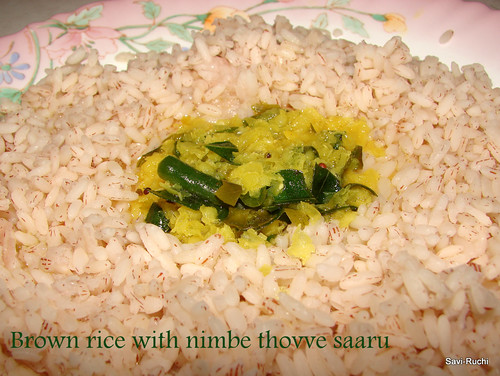
Nimbe Thovve Saaru (Lemon Lentil Rasam/soup)

Needless to mention, during my parents & in-laws stay, they prepared soo many simple & quick rasams that my maid requested them to teach it to me & her. There used to be a fight to decide who shall cook for the day. My mom-in-law would unanimously win most of the times :D. During their stay.., nimbe saaru is one of the many recipes learnt from my MIL. If you keep this rasam thick.., it is named thovve (dal).

Here is what my mom-in-law uses to prepare this
: (Serves 3-4)
Yellow moong dal/Split & deskinned green gram/hesaru bele: a fistful
Water : Around 1 litre.
Curry leaves:2 strings (leaves separated & chopped)
Turmeric: a big pinch
Coriander leaves: 2 tbsp (finely chopped for the garnish)
Green chillies: 2-3 no
Asafetida: 1 big pinches
Mustard seeds: 1/4 tsp
Cumin seeds: 1/4 tsp
Pepper powder: a pinch (optional)
Coconut oil: 1 tbsp (use any oil of your choice)
Salt: According to taste
Lemon juice: 2-3 tbsp (we like it tangy)

Method:
  • Pressure cook the moong dal & allow it to cool (2-3 whistles or 15minutes must be sufficient for the dal to be soft).
  • Mash the dal gently & add the mashed dal, water to a broad pan. Add turmeric, half of the chopped green chillies, pepper powder, salt & cook on a low heat until water starts to boil. Once dal starts boiling, turn off the heat.
  • Prepare the tadka/tempering/oggarane. Heat oil in a small sauce pan. When oil is hot, add mustard & cumin seeds. When mustard seeds crackle, add the remaining green chillies, curry leaves, asafetida & pour the tempering to the rasam.
  • Add the lemon juice, coriander leaves & mix well.
  • Serve the hot rasam with piping hot rice, pickle & papad.

Tip:
  • Reduce the amount of oil & drink it as a soup too.
  • This rasam is helpful to beat the cold as it is rich in Vitamin C.
  • Add a pinch of pepper powder to take double advantage for fighting against cold.

Featured Post

Noodles and Vegetables with Honey Ginger Sauce

Am I the only one who crave for noodles when sick with cold and sore throat? I love this noodles with honey-ginger sauce and it is perfe...