I have memories of my teenage days attached with this dish. No, I was neither born & brought up in Mumbai nor spent even a month in Mumbai. To set the record straight, I have not even tasted Pav Bhaji on the streets of Mumbai!
During my high school & Pre University days, I and my cousins used to eat masala puri, paani puri, pav bhaji at my town. I did not know how authentic it used to be but honestly never bothered about it! One blue moon day when I went to grocery shopping with my father, I noticed pav bhaji masala. I persuaded my father to buy it for me. He double checked the ingredients (as my mom, grandmom, father are " no" to garlic too!) & finally bought it for me. So, pav bhaji might be my first experiment in the kitchen during my late high school days (of course after maggi!).
I used to follow the pav bhaji recipe as found on the side of pav bhaji masala packet. Later, I started fine tuning it according to our tastes. I have been making pav bhaji from almost 15 years now. Now, I feel I can make a decent pav bhaji. I am still not sure whether it is an authentic recipe or not :)

Preparation Time: 20 mins
Cooking Time: 45 mins
Ingredients: (Serves 5-6)
For the bhaji:
Potatoes: 2 nos, medium sized
Cauliflower: 250 gms
Green peas: A fistful
Carrot: 1 small
Tomato puree: About 2 to 2.5 cups
Onion: 2 tbsp, finely chopped
Capsicum: 2-3 tbsp, finely chopped
Ginger garlic paste: 1.5 tsp
Green chillies: 2 nos, finely chopped
Chilli powder: 1 to 1.5 tsp
Pav bhaji masala: 2 tbsp
Turmeric powder: a big pinch
Oil: 1 tbsp
Butter: 1 tbsp
Salt: According to taste
For the garnish:
Coriander leaves: 3 tbsp, finely chopped
Lemon juice: 1 tbsp
For serving:
Pav/Dinner rolls: 12-16 nos
Lemon wedges
Finely chopped onion
a blob of butter
coriander leaves

Method
For the bhaji:
Roughly chop the potatoes, cauliflower, & carrot. Add half a cup of water & 1/2 tsp of salt to the potatoes, cauliflower, carrot and peas. Pressure cook the veggies for 2 whistles.
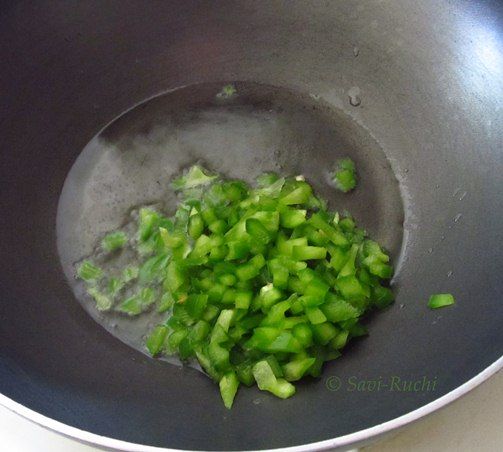
Meantime, take a broad pan. Heat oil in the pan. When the oil is hot, throw in the capsicum & saute for a minute.

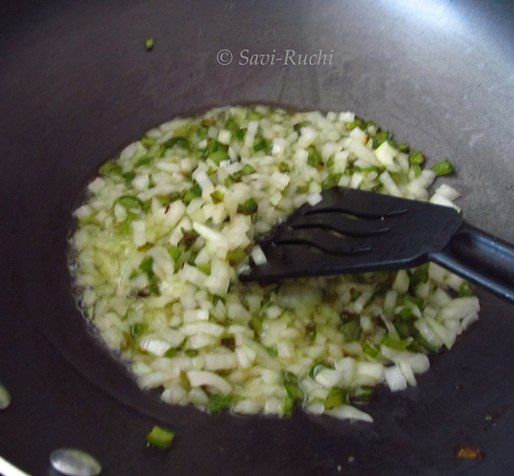
Add the onions & saute until the onions are soft.

Add the ginger-garlic paste, green chillies & saute till the raw smell of the paste is gone (about a couple of minutes).

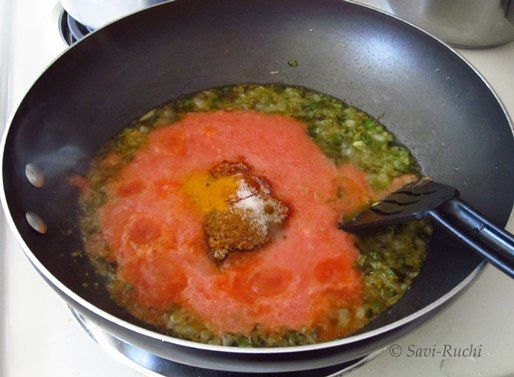
Add the tomato puree, turmeric, salt & red chilli powder. Allow it to boil for about 5 minutes on medium heat. The mixture starts spluttering, so keep a lid 3/4th covered.

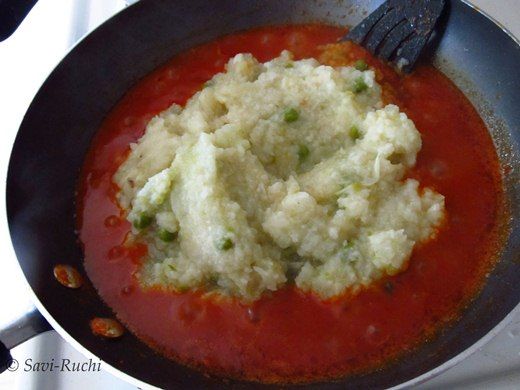
Meantime, thoroughly mash the vegetables cooked in the pressure cooker.

Add the mashed vegetables, pav bhaji masala, half a cup of water & continue mashing, cooking & stirring it. The mixture keeps spluttering all over. So, it is better you handle it with a mitt.

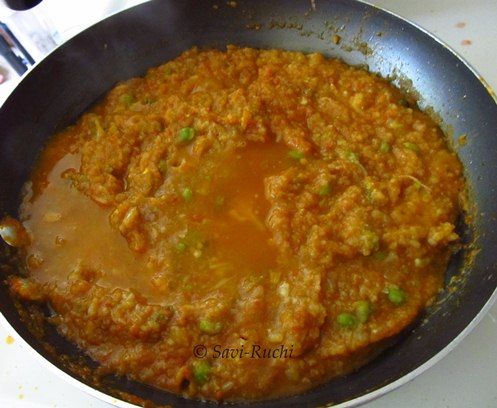
Add the butter & keep mashing the mixture.

Finally add coriander leaves, lemon juice & mash it for another couple of minutes.
Heating the pav/dinner rolls:
Cut the pav in half.
Add a teaspoon of butter onto a griddle. Srinkle some pav bhaji masala, coriander leaves on the butter.
Place the pav on the butter & let it get roasted for 30 secs. Flip the pav & roast the other side too.
Serving:
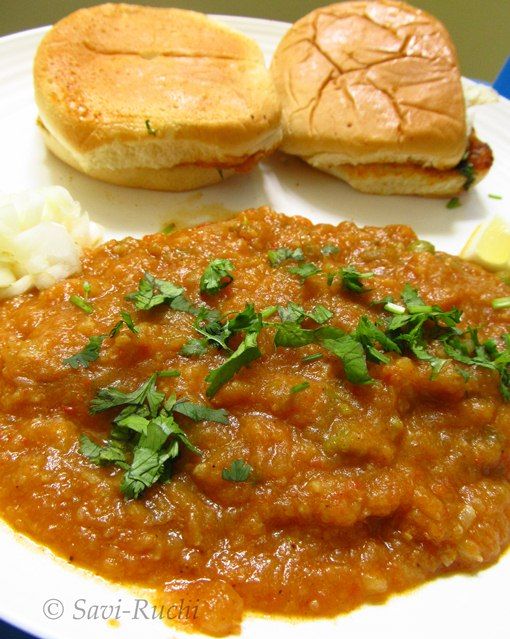
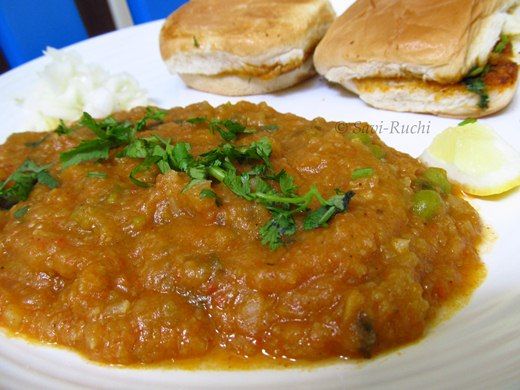
Pour around 1/4th cup or more of bhaji on a plate. Sprinkle coriander leaves on the bhaji. A blob of butter on the bhaji.
Put around a tablespoon or more of finely chopped onion onto the serving plate. Place a lemon wedge.
Finally add the buttered & hot pav to the plate & dig in!

Notes:
During my high school & Pre University days, I and my cousins used to eat masala puri, paani puri, pav bhaji at my town. I did not know how authentic it used to be but honestly never bothered about it! One blue moon day when I went to grocery shopping with my father, I noticed pav bhaji masala. I persuaded my father to buy it for me. He double checked the ingredients (as my mom, grandmom, father are " no" to garlic too!) & finally bought it for me. So, pav bhaji might be my first experiment in the kitchen during my late high school days (of course after maggi!).
I used to follow the pav bhaji recipe as found on the side of pav bhaji masala packet. Later, I started fine tuning it according to our tastes. I have been making pav bhaji from almost 15 years now. Now, I feel I can make a decent pav bhaji. I am still not sure whether it is an authentic recipe or not :)
Preparation Time: 20 mins
Cooking Time: 45 mins
Ingredients: (Serves 5-6)
For the bhaji:
Potatoes: 2 nos, medium sized
Cauliflower: 250 gms
Green peas: A fistful
Carrot: 1 small
Tomato puree: About 2 to 2.5 cups
Onion: 2 tbsp, finely chopped
Capsicum: 2-3 tbsp, finely chopped
Ginger garlic paste: 1.5 tsp
Green chillies: 2 nos, finely chopped
Chilli powder: 1 to 1.5 tsp
Pav bhaji masala: 2 tbsp
Turmeric powder: a big pinch
Oil: 1 tbsp
Butter: 1 tbsp
Salt: According to taste
For the garnish:
Coriander leaves: 3 tbsp, finely chopped
Lemon juice: 1 tbsp
For serving:
Pav/Dinner rolls: 12-16 nos
Lemon wedges
Finely chopped onion
a blob of butter
coriander leaves
Method
For the bhaji:
Roughly chop the potatoes, cauliflower, & carrot. Add half a cup of water & 1/2 tsp of salt to the potatoes, cauliflower, carrot and peas. Pressure cook the veggies for 2 whistles.
Meantime, take a broad pan. Heat oil in the pan. When the oil is hot, throw in the capsicum & saute for a minute.
Add the onions & saute until the onions are soft.

Add the tomato puree, turmeric, salt & red chilli powder. Allow it to boil for about 5 minutes on medium heat. The mixture starts spluttering, so keep a lid 3/4th covered.
Meantime, thoroughly mash the vegetables cooked in the pressure cooker.

Add the mashed vegetables, pav bhaji masala, half a cup of water & continue mashing, cooking & stirring it. The mixture keeps spluttering all over. So, it is better you handle it with a mitt.
Add the butter & keep mashing the mixture.
Finally add coriander leaves, lemon juice & mash it for another couple of minutes.
Heating the pav/dinner rolls:
Cut the pav in half.
Add a teaspoon of butter onto a griddle. Srinkle some pav bhaji masala, coriander leaves on the butter.
Place the pav on the butter & let it get roasted for 30 secs. Flip the pav & roast the other side too.
Serving:
Pour around 1/4th cup or more of bhaji on a plate. Sprinkle coriander leaves on the bhaji. A blob of butter on the bhaji.
Put around a tablespoon or more of finely chopped onion onto the serving plate. Place a lemon wedge.
Finally add the buttered & hot pav to the plate & dig in!

Notes:
- One should not be able to find the vegetables that go in the bhaji. It needs to be thoroughly mashed.
- Be ready to clean the kitchen counter after the bhaji is done, since the bhaji splutters a lot. Be careful while mashing the bhaji too.
- The bhaji needs to be spicy, tangy & buttery!
- I have not added any food color to this. So, this is the color you get after cooking the bhaji :)

looks perfect and delicious...
ReplyDeleteYum bhaji. Nice step by step version
ReplyDeletePavbhaji is all time favorite. Looks yummy!
ReplyDeleteSuper like, drooling rite now here.
ReplyDeleteIrresistible pav bhaji..
ReplyDeletelooks super delicious loaded with all the veges..my son's favourite!!
ReplyDeleteThe word pav bhaji makes my mouth water..looks delicious n yummmm
ReplyDeleteTempting and yummy pavbhaji. beautifully explained too
ReplyDeleteHi I am from Mumbai !!Ur recipe is almost perfect.just for yr info the way we do it at home is
ReplyDeletepressure cook all the veggies carrot cauliflower potato in the cooker with a lil salt n haldi.
meanwhile finely chop 3-4 onions saute till pink then add in 3-4 chpd tomatoes again saute till done add in salt then ginger garlic paste then the pav bhaji masala and then u add in the mashed veggies minus the water mix it in well then add enough of the water residue and then let it cook simm a while sprinkle chped kothmir and a blob of butter.meanwhile u serve again with buttered pav and finely choped onions .
thats it try his also more of less the same
some people add in colour some add in tomato pureed.
Looks yummy! Will try it soon.
ReplyDelete