Tuesday, February 23, 2010

Saarina Pudi (Rasam Powder:Udupi Style)

Udupi dishes use curry leaves & coconut in abundance. I may not be exaggerating when I say, there are very scanty dishes that do not call for these two. Udupi rasam powder recipe is no exception for it.

(This recipe was requested long time back by one of my readers. It was lying in my drafts for a long time. Sorry!!)

Ingredients:

Dhania/Coriander seeds: 1 cup
Jeera/Cumin seeds: 1/2 cup
Dry red chilli: a fistful (10-15) (adjust according to your family needs)
Methi/Fenugreek seeds: 1 tsp
Black pepper/Kalimirch: 1 tsp
Curry leaves: a fistful (20-30 leaves)
Asafoetida: a big pinch

Method:
  • Dry roast all the above ingredients(except asafoetida) one at a time until the raw smell disappears & a nice aroma is filled in the kitchen. Ensure not to burn any of the spices. Do not roast until the spice turn brown. Remove it from the flame as soon as they slightly change the color.
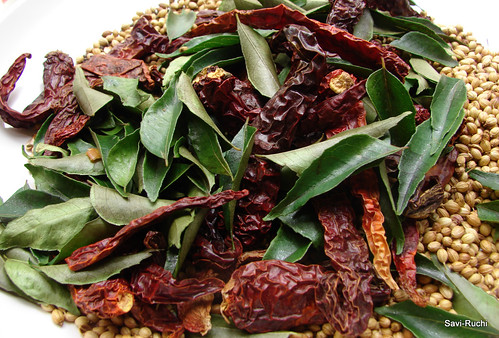

  • Be very cautious while dry roasting the curry leaves. Curry leaves can be dry roasted under the sun. It takes around 3-4 days under the sun for the curry leaves to get dry roasted properly. Keeping it in the microwave is also a good option (I haven't tried it, but read about it in few other blogs). Curry leaves should become crisp (Crush the leaves using your finger, if the curry leaves gets crushed without any moisture, then the curry leaves are crisp to be used for the rasam powder).
  • Allow the spices to cool down. Add asafoetida & powder it in a small mixer jar.
  • Spread the rasam powder on a paper & allow it to cool. Once the powder reaches room temperature, store it in an air tight container & use as required.

Thursday, February 18, 2010

Doddapatre Tambuli (Coleus aromaticus in yogurt sauce)

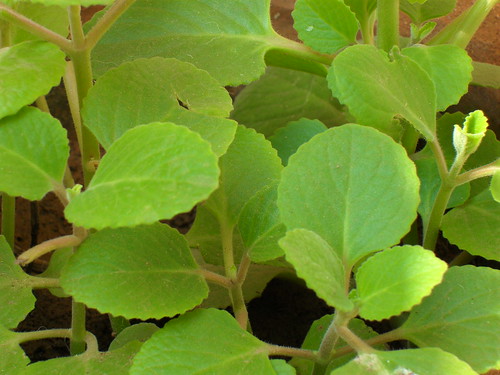
I feel doddapatre leaves (they look like this ) are underrated considering the medicinal values. Also, visit this link for language translations. BTW, tambuli is part of Udupi cuisine and its loose translation is yogurt coconut sauce.

Some of the home-remedies using doddapatre leaves are as follows:
1. It has a cooling effect when mixed with yogurt/curd. Hence, this tambuli cools your body.
2. It helps get rid of common cold. These leaves must be heated on a griddle & when they start oozing out the juice, remove it from the griddle & squeeze the juice from these leaves. Mix this juice with equal amount of ginger juice + few drops of honey. Give to infants ( more than 6 months old) or young children. It is a very effective medicine.
3. It reduces the phlegm in young children. Follow the same procedure as above, but do not add ginger juice, just the doddapatre leaves juice + honey.
4. It works wonders for constipation & acidity. Consume the doddapatre chutney/tambuli three times a day for 2 days & notice the change. For treating acidity, don't add green chilli while preparing the tambuli or chutney. Avoid coconut too. Prepare a chutney/tambuli with loads of doddapatre leaves.
5. Read in a newspaper that, doddapatre juice is consumed and applied externally against measles.
6. Doddapatre juice helps to cleanse our system.

Ingredients:
Doddapatre leaves: 30-40nos
Black Pepper: 1/2 tsp
Green chilli: 1 no (optional, I normally don't add this)
Cumin seeds: 1/4 tsp
Grated coconut: 3 tbsp
Curd/Yogurt: 2 cups
Salt: According to taste
Oil: 1/2 tsp

For tempering:

Oil: 1 tsp
Mustard seeds: 1/4 tsp
Curry leaves: a string (optional)
Red chilli: 1 no (broken)
Asafoetida: a pinch


Method:
  • Wash the leaves thoroughly & chop them.
  • Heat oil in a small wok. When oil is hot, add cumin seeds. When cumin seeds turn golden, add pepper & saute for 10secs. Add the doddapatre leaves & saute them till the leaves wilt. Turn off the heat & allow it to cool.
  • Transfer the leaves, coconut to a mixer jar & pulse it until a smooth paste is formed.
  • Scoop out the paste & pulse the yogurt with water for 2-3secs.
  • Add the diluted yogurt/buttermilk, salt to the paste & mix well.
  • Prepare the tempering. Heat oil in a pan. When oil is hot, add mustard seeds, when mustard seeds splutter, add curry leaves, broken red chilli, asafoetida & pour this tempering to the prepared yogurt mixture.
  • Tambuli is ready to be served with steaming hot rice & papad/fritters.


I happened to update the picture of bittergourd chips. Have a look at the same here.

Friday, February 12, 2010

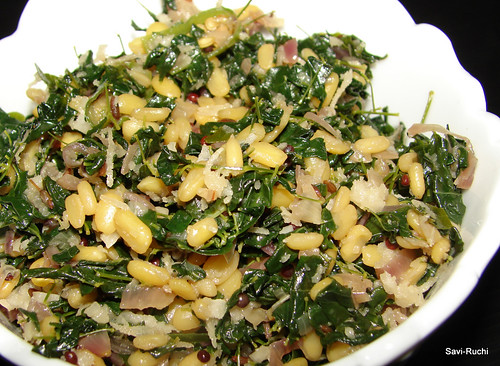
Nugge soppu palya (Drumstick leaves stir-fry)

Happy Shivaratri. May Lord Shiva bless us all.

Some of my friends here in Singapore had requested me to learn & post some drumstick leaves recipes. These are exceptionally nutritious and moreover, are available in abundance here. :)

Some nutritional information about drumstick leaves:
1. It is given to lactating mothers as it is said to enhance the milk production (rich in calcium).
2. Given to pregnant women, growing children & anemic patients as it is rich in iron.
3. Builds the immunity system of the body as it is rich in vitamin C.
4. It helps overcome malnutrition.
You can find more information about drumstick leaves
here & here.


(Photo courtesy: http://www.treesforlife.org/our-work/our-initiatives/moringa)

Hence, this time when I visited India, I noted down 2-3 recipes using drumstick leaves. This is one of them.

Ingredients:
Drumstick leaves/Nugge soppu: 1 bunch (around 250gms)
Yellow moong dal/hesaru bele: 3 tbsp
Water: 1-2 tbsp
Salt: According to taste
Sugar: a pinch (optional)
For tempering:
Oil: 1 tbsp
Mustard seeds: 1/2 tsp
Shallot onion: 3 nos (finely chopped)
Green chilli: 2-3nos (finely chopped)
Curry leaves: a string
For garnishing
:
Grated coconut: 1-2 tbsp
Lemon juice: 1 tsp (optional, but recommended)


Method:
  • Take out the leaves carefully (this takes the maximum time). Though the stem looks sleek, they are not tender, hence it is a must to take out only the leaves. Wash them thoroughly.
  • Soak the dal/lentil in warm water for 30mins.
  • Heat oil in a broad pan, when oil is hot, add mustard seeds. When mustard seeds splutter, add onion & saute till onion becomes soft. Now add, green chillies, curry leaves & saute for 10-20secs.
  • Add the dal & mix well. Sprinkle water. Cook on a medium heat for 2-3mins
  • Throw in the leaves, mix well. Add 1-2 tbsp water & cook it on a medium flame until the leaves & the lentils are soft yet firm.
  • Add salt, sugar & mix them well. Cook for another 1-2mins.
  • Add the grated coconut, lemon juice. Mix the stir-fry & serve it hot. Goes well as a side dish for rice.


    Notes:
    Drumstick leaves give out a pungent odour while cooking in water. Hence, if your are new to drumstick leaves, add very little water to cook this stir-fry.
    These leaves are a tad bitter, so addition of sugar & lemon to the stir-fry is recommended.

    Last note, though I was a bit skeptical about cooking these leaves in a large quantity (because of the odour), we both liked this stir-fry (I cannot say we absolutely loved it). But, I'm planning to prepare this dish more often to get adapted to this wonderful green leafy vegetable.

    Other recipes using drumstick leaves at Savi-Ruchi
    Drumstick leaves chapathi (this is awesome, as there is no pungent odour while cooking this)
    Drumstick leaves rice roti (same as above)
    Drumstick leaves dal (Good)

Tuesday, February 2, 2010

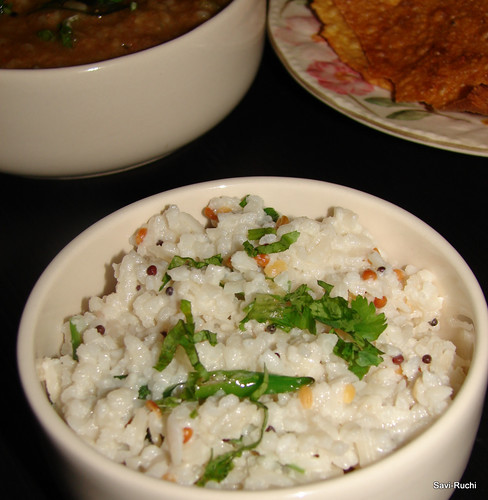
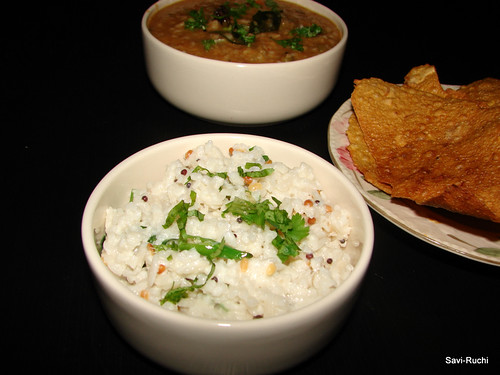
Mosaru Avalakki (Beaten rice in yogurt)

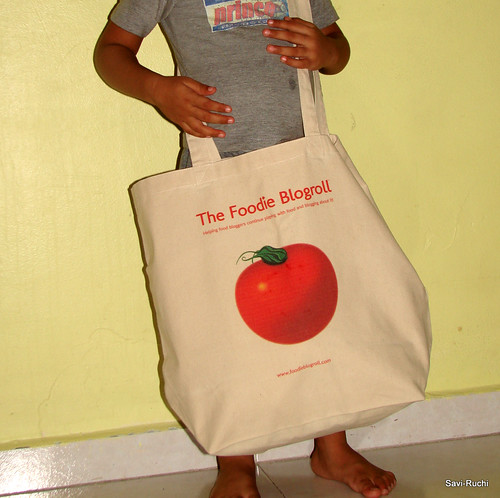
This came as a total surprise.I did neither register for a poll nor vote for winning this Tote Bag. I was randomly chosen from the list of registered blogs at Foodie blogroll. This is the first gift Savi-Ruchi has received so far. I’m really happy & thankful to them.

(My son exhibiting Foodie blogroll's tote bag)

Thanks Asha for the wonderful TOFA (Token OF Appreciation). I have already written about myself here.

When I published this recipe using beaten rice, few friends of mine requested me to post mosaru avalakki(Beaten Rice in Yogurt) too. So, this recipe is for them & for all others who are interested. This dish is a “must to-do” on Krishna Janmastami as it is Lord Krishna’s favorite food.


Language Translations for beaten rice:
Kannada: Avalakki
Tulu: Bajeel/Bajil
Hindi: Poha
Tamil/Malayalam: Aval
Konkani: Phovu
Marathi: Pohe
Telugu: Atukulu
For other languages: refer here

Ingredients:
Beaten rice (Thicker version): 2 cups
Yogurt/Curd: 1 cup
Salt: According to taste
For tempering:
Oil: 1.5 tsp
Mustard Seeds: ½ tsp
Urad dal: 1 tsp (optional)
Green chilli : 1 (chopped)
Curry leaves: 4-5
For garnishing:
Grated coconut: 1 tbsp
Coriander leaves/cilantro: 1 tsp (finely chopped)

Method:

  • Wash the beaten rice in water 2-3 times. Soak the beaten rice in water for 5-8minutes.
    Drain the water. Add yogurt to the beaten rice & let it soak for another 10-15minutes. By now, beaten rice will become soft & spongy (firm yet).

  • Prepare the tempering, heat oil in a small wok. When oil is hot, add mustard seeds. When mustard seeds splutter, add urad dal & sauté till the dal turns golden.Add curry leaves, green chillies & sauté for another 10secs. Turn off the heat & pour this tempering to the beaten rice-yogurt mixture.

  • Add salt, coconut, coriander leaves & mix well. Chill if needed.

  • Serve it with pickle or papad.

(In the above picture, top most: Avalakki bhath(Beaten rice bhath), right most: Halasina Happala (Raw jackfruit papad/fritters), Down: Mosaru avalakki)

Notes:

  • To make it more healthy, add some grated carrots, cucumbers or pomegranate seeds.

  • Some people also add, fried onions to this. However I refrain from adding them as I prepare this mostly on Ekadashi (11th lunar day of Krishna & Shukla Paksha of every month in the Hindu Calender)

Monday, January 25, 2010

Kusubalakki Guliyappa/Gundponglu/Paddu (Boiled rice Balls)

Two things that have made me happy in 2010, so far.
1. I have won a Tote bag from Foodieblogroll. Yes!, I won. This is the first gift my blog has received.I will take a photo & display it in my next post.
2. TOFA from Ashkuku. Thanks a lot Asha. I will write about it too, in my next post.


Some usual conversations again(Not again!)
Scene 1:
Me: Atthe, yestond dina admele bartha iddira, yen thindi madli ?(Mom-in-law, you are visiting us after a long time. What shall I cook for breakfast?)
Mom-in-law: You prepare guliyappa very well, why don't you prepare that?

Scene 2:
Me: Aunty, what shall I prepare for tomorrow's evening snack?
Aunty: If you could prepare guliyappa, we all will be very happy.

After many such conversations, I have now realized that kusubalakki guliyappa is my signature dish. Be it my granny, my in-laws, my friends or my hubby's friends, everybody likes to eat this particular version of guliyappa(rice balls). This dish doesnot call for more than two ingredients (yes you read it right.., no more than 2.., ofcourse excluding salt) & tastes heaven. This recipe gives you some of the most soft guliyappas, you have tasted ever. Try it to believe!!

Ingredients:
Boiled rice/Kusubalakki: 4 cups
Whole urad dal/Uddina kalu(without the skin): 1 cup
Salt: According to taste


Other ingredients:
Oil: few drops on each mould.


Special utensil:
Aebliskever pan


Method:
Batter preparation:
  • Soak the rice & dal in double the amount of water for 6-8hours.
  • Grind the rice-dal mixture in the blender & prepare a smooth batter. Batter should be like a thick milkshake. Let the batter ferment over-night or for about 8-10hours. Batter would be doubled by then.
Guliyappa/Paddu/Rice balls/Gundponglu preparation:
  • Add salt to the batter & mix well.
  • Heat the guliyappa pan/aebliskever pan. When the pan is hot, add few drops of oil to each mould. Pour 2 tbsps(approximately) of batter to each mould & cook it on a medium heat for a minute. Turn the balls & cook on the other side too.
  • Serve it hot with a chutney/curry of your choice.


    Note:
    • If boiled rice is not available, parboiled idli rice can also be used.
    • As soon as the rice balls turn golden & slightly brown, remove it from the pan. Ensure to cook the rice balls on a medium heat. Donot use high flame as the guliyappa may not be cooked from inside.

    Friday, January 15, 2010

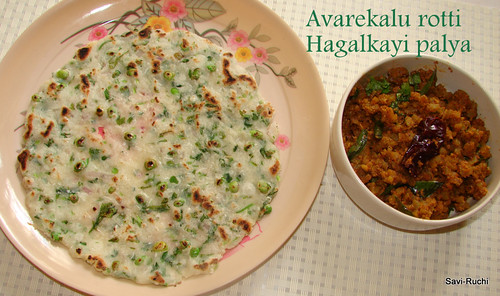
    Avarekayi-Menthya soppu rotti (Fenugreek leaves-Flat beans Roti)

    During my recent visit to India, the initial days were tough for me & my son. We reached Bangalore at midnight & the next day morning, we were all set to travel to Mangalore via Chikmagalur. Boy!!, it was a long & tiring journey. We were traveling for more than 24 hours with a short break of 4 hours at my native :(

    We had to pass through Charmadi Ghats (curvy roads on the western ghats) & my son puked at almost all the curves. He got so frustrated seeing the car that he was weeping & saying, " amma car beda amma" (mummy, no car please). But, after we reached this place, he slowly settled down & was happy to play with the other kids.

    I thoroughly relished South Canara food as we attended 2 weddings & also spent some good time with hubby's relatives. We also took blessings from Sringeri Sharadambe, Kateel DurgaparameshwariKelamata Venugopalaswamy, Someshwar Ganapathi, Durga (I have spoken about that here) & safely reached my native. Will continue later on this.

    It was raining avrekayi during my visit to India this time. Now that my mom & mom-in-law knows that we do not get avrekayi here, they drenched us with this. I had avrekayi upma, avrekayi rotti (flat bread), avrekayi palya (stir fry) & what not!!


    In this post, I will be talking about avrekayi rotti (Flat beans Indian bread). Just dive in !!

    Ingredients: (Makes around 8-10 rottis)

    Rice flour: 3-4 cups
    Avrekayi/Surtipapdi/Flat beans: 1 cup (choose very tender & small ones)
    Fenugreek leaves/methi/menthya soppu: 1 cup (finely chopped)
    Onion: 1/3rd cup (finely chopped, optional)
    Grated coconut: 2 tbsp (optional)
    Green chilli paste: 1 tsp (optional)
    Water: 1.5 to 2 cups
    Salt: According to taste

    Oil: 1 tsp for each roti

    Method:

    • Mix all the above ingredients (except water). Add little water at a time & prepare soft & smooth dough.
    • Make equal sized balls & pat them on the griddle or a plastic sheet & transfer it to the griddle. (refer here for step-by step procedure). Wet your hands with water to ease the patting. Add oil around the rotti & also few drops on top of the rotti.
    • Cook on a medium-high heat on both sides & serve it hot with a side dish of your choice.
    Note:
    • If the flat beans is not tender enough, pressure-cook them for one or two whistles and then use it.
    • You can substitute fenugreek leaves with any other leafy vegetables.

    Wednesday, January 6, 2010

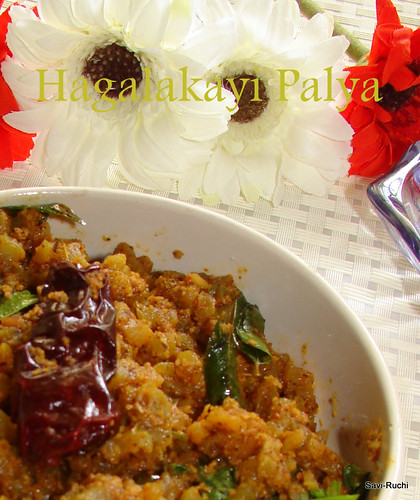
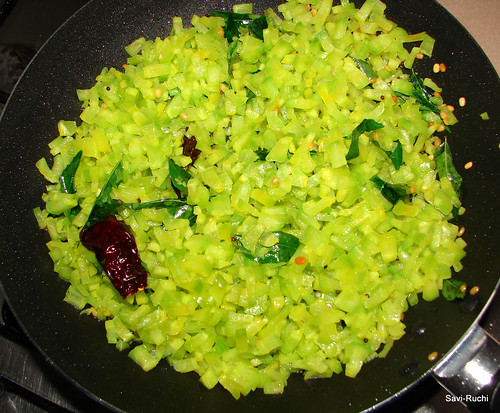
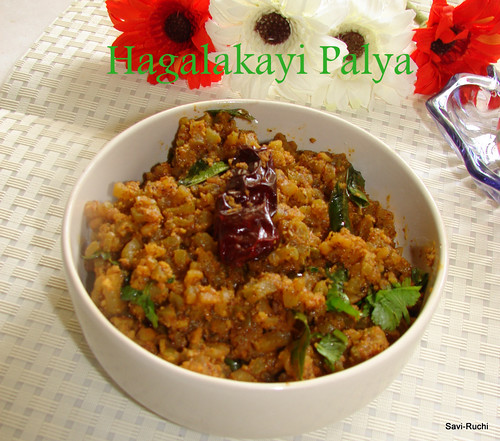
    Hagalkayi Palya (Bittermelon stirfry)

    HAPPY NEW YEAR ..

     I am starting the new year with a bitter dish to balance out the cakes/pastries ate during new year and Christmas celebrations :) . BTW, I always try Chinese bitter gourd or bitter melon as they are comparatively less bitter than Indian ones ;)

    Ingredients:
    For coarse spice powder:
    Grated coconut: 3 tbsp
    Rasam powder: 1 tbsp

    For stir-fry
    Bittergourd: 2 cups (deseeded & finely chopped)
    Turmeric: 2 big pinches
    Oil: 1.5 tbsp
    Tamarind powder or very thick tamarind paste: 1 tbsp
    Jaggery/Brown Sugar: 1 tbsp
    Curry leaves: a sting
    Mustard seeds: 1/2 tsp
    Urad dal: 1 tsp (optional)
    Asafetida: a pinch
    Broken red chilli: 1
    Salt: According to taste
    Cilantro: 2 tbsp


    Method:
    • Mix a tsp of salt & turmeric to the bitter gourd pieces & allow it to leave water for 20-30mins. 
    • Squeeze the water from th bittergourd &discard the water. This procedure is said to reduce the bitterness in the gourd.
    • Heat a broad pan, add oil. When oil is hot, add mustard seeds. When mustard seeds crackle, add curry leaves, asafetida, urad dal, broken red chilli & saute for 10secs. 
    • Add the bitter gourd & mix well. Allow the bitter gourd to get cooked for 5mins. 

    • Meantime, make a coarse powder of the coconut & the rasam powder(Do not add water).
    • Once the bitter gourd is half cooked, add the tamarind powder, salt (note salt is added before too), jaggery, the prepared coarse powder & mix well. Cook for another 5-7mins.
    • Turn off the flame, garnesh with coriander leaves/cilantro & serve with rice or roti.

    Notes:
    1. Chinese bittermelon oozes out a lot of water while cooking. Hence, there is no need to add water while cooking. However, Indian bittergourd might need few teaspoons of water.
    2. The palya is supposed to be dry. So, donot make the tamarind paste or spice paste/powder watery.

      Featured Post

      Noodles and Vegetables with Honey Ginger Sauce

      Am I the only one who crave for noodles when sick with cold and sore throat? I love this noodles with honey-ginger sauce and it is perfe...