Tuesday, June 30, 2009

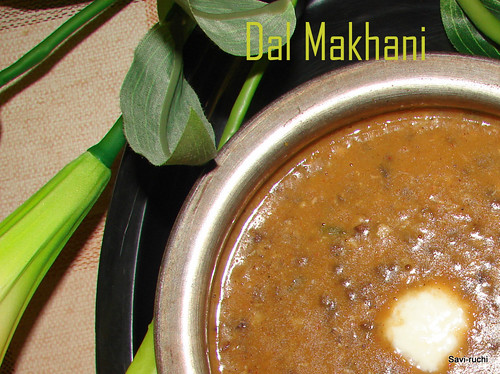
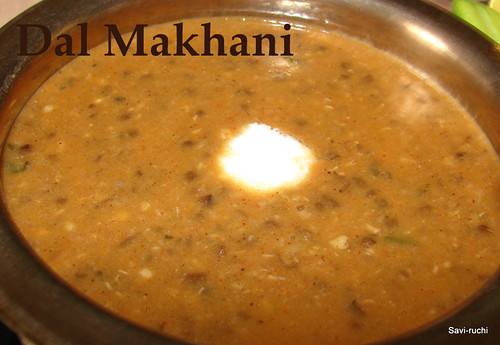
Dal Makhani


During wedding preparations they normally say, we can compromise on anything, but not on food. People remember your wedding by the food that was served & not by the jewelry, decoration or any other thing for that matter (there may be exceptions though!!). I am one among those people who remember occasions, weddings, parties by the food served. It always happens that I fall in love with one or the other dish served during such celebrations & it becomes a memorable one for me :)

The dishes adorned during some celebrations have become a part of our lunch/dinner menu now. I must say, dal makhani is one such dish. I was not fascinated about this dish, but I feel I have developed the liking for it & now I love this “black lentils cooked on a low heat with loads of butter & spices”.

Ingredients:

Whole urad dal with skin/black lentils: 1 cup

Rajma/Kidney Beans: 1/4th cup

Ginger-garlic paste: 1tsp

Green chillies: 2 nos

Salt: according to taste

Cashew nuts: 8-10 soaked in water/milk

Plain Yogurt: 2-3tbsp (thick yogurt)

Savory water: ½ cup (optional)

Red chilli powder: 1 tsp

Amchur powder: 1 tsp (optional)

Garam masala: 1/2 tsp

Butter: 5tbsp

Kasoori Methi(Dried fenugreek leaves): 1 tbsp

Garlic paste: 1 tsp

Tomatoes: 3 nos (instead use 1 cup tomato puree)

Oil: 3 tbsp

Salt: According to taste

Cilantro/coriander leaves: 1 tbsp finely chopped for garnishing


Method:

  • Wash the rajma & black lentils thoroughly & soak them in water overnight or for 8-10hours. Drain completely.
  • Add 4 cups of water, ginger-garlic paste, green chillies to the soaked dals & pressure cook for 4-5 whistles. Keep the heat on medium for the first 2 whistles & reduce the heat for the remaining.
  • Meantime, soak the cashewnuts in milk/water & prepare a smooth paste out of it.
  • Blanch the tomatoes & chop it finely or prepare a puree out of it.
  • Heat oil in a thick bottomed pan, add oil to it. When oil is hot, add garlic & saute till garlic turns golden brown. Add tomato paste or finely chopped tomatoes & cook on a medium flame.
  • Crush the kasoori methi & add it to the pan. Cook until the tomatoes ooze out oil & changes its color.
  • Drain the water from the cooked lentils/dals & mash them gently.
  • Add the savory water, 1/2 cup water, salt & cooked dals to the pan. Add red chilli powder, amchur powder, cashew paste. Cook the dal on a low heat for 20-30mins. (Keep adding 2-3tbsp water if required).
  • Add yogurt, butter, garam masala & cook for another 5 minutes.
  • Garnish it with cilantro & serve hot with rotis/naans or plain parathas.

Monday, June 22, 2009

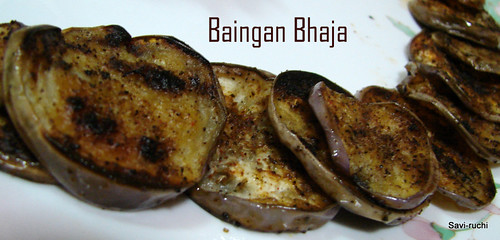
Baingan Bhaja | Begun Bhaja | Spicy Roasted Eggplants : Vegan Dish


The wait is over. My parents & in-laws landed here last week & all of them are enjoying in their own way. I cooked many new dishes to impress my mom-in-law, but failed in each attempt. As I am not used to cooking for 8 people at a time, I used to always go wrong while adding salt or tamarind. My MIL, being an excellent cook used to find the dishes not that tasty. My mom used to praise me (as expected, she is happy that I'm cooking so many new dishes). I kept on waiting for an opportunity to impress my MIL. She is not that fond of North Indian dishes & I have not yet mastered Udupi(South Canara) cuisine that she loves to eat.
Just as any other day, I decided to cook a bengali dish, Baingan Bhaja along with Punarpuli Saaru/Rasam. I had not seen her prepare punarpuli/kokum rasam & was almost sure that she would be captivated. When I presented the dish, the expression was ulta(opposite). All of them thoroughly enjoyed eating baingan bhaja. I cooked baingan bhaja using long purple eggplants & all of them relished that. Finally, I impressed all of them with this bhaja & especially my mom-in-law. (he he, I thought I would impress her with rasam but did with bhaja, whatever it be, I'm happy that I impressed them)
I have asked her the authentic recipe for punarpuli rasam & she is cooking the rasam tonite for all of us :) You guys have to wait for my coming posts for the authentic MIL's punarpuli saaru.

Ingredients for baingan bhaja
Long Purple eggplants or big rounded eggplants : 2 nos
Oil: 1 tbsp for each brinjal
Salt: According to taste
Chilli Powder: 1 tsp
Amchur Powder: 1/2 tsp
Chiroti rawa/small rawa or rice flour: 3 tbsp


Method:
  • Slice the eggplants & soak them in water for 15-20minutes.
  • Meantime, mix all the spice powders(amchur powder, chilli powder) including rawa or rice flour & salt.
  • Remove the slices from water & pat them dry.
  • Heat a griddle. When hot, add few drops of oil.
  • Dip both the sides of the eggplant slices in the spice powder mixture. Place these slices on the griddle, add few drops of oil to each slice & cook both sides on a medium heat for about 3-5 mins. Flip the slices and repeat
  • Serve it as a side dish for rice or roti. We love to eat our bhaja with khichdi
Notes:
(Updated on 17th May 2016). Instead of eggplants, you can use zucchini to make spicy roasted zucchini. It tastes awesome. 
Spicy Roasted Zucchini 

Tuesday, June 16, 2009

Break, News & Bombay Saagu

Many of the fellow bloggers are taking a break as few of them are visiting India, others because of their parents' or in-laws visits. I was also thinking about the same, should I take a break or is it sufficient if I'm slow & steady? I personally do not want to take a break. Let us see how time & things make my way to blog during the coming weeks.

Now, enough of suspense, I do not want to keep your fingers crossed (really?? Was that a suspense??). My parents & in-laws are coming together for a visit. All 4 of them are landing here this week & I'm all excited !! We are currently settling in our new place (did I mention before that we moved to a new place??, if not.., here is that news too .., he he). At office, we also have an important release this month. So many things to do but so little time. I plan to be slow in publishing new recipes, reply to your mails & also, my visit to all the loved blogs would be limited :( There ends my news & task list for the current month.

Coming to the bombay saagu recipe. I donot know why it is named so?Please let me know, if you have an answer. I have seen this saagu in most of the food joints along with the very famous rawa idli or sometimes with poori. This saagu goes well with anything, be it.., plain rice, chapathi, poori, dosa, idli or roti.


Ingredients:
Potatoes: 2 nos
Onion: 1 medium sized
Tomato: 1 medium sized
Green peas: 1/4th cup (optional)
Green chillies : 2-3
Water: 1.5 cups (around 300ml)
Gram flour/besan: 1 tbsp
Salt: According to taste
Oil: 1 tbsp
Mustard Seeds: 1/2 tsp
Urad dal: 1 tsp
Channa dal: 1 tsp
Turmeric: 1 pinch
Curry leaves: 6-8
Lemon Juice: 1 tbsp (adjust according to your family needs)
Cilantro: for garneshing

Method:
  • Boil & mash the potatoes roughly. Finely chop the onion & tomato.
  • In a broad pan, heat oil. When oil is hot, add mustard seeds, followed by urad dal, channa dal. When dals turn golden brown, add green chilli, curry leaves & saute for 10secs. Add onion & saute till onion turns golden brown. Add tomato & saute till tomatoes are soft & yet firm.
  • Add water & cook the tomatoes till soft. Add mashed potato, turmeric, salt & cook on a slow flame for 2-4mins.
  • Add 4 tbsps water to the gram flour & prepare a paste out of it. Ensure there are no lumps.
  • Add the gram flour paste to the pan & mix it thoroughly. The curry becomes thick in a minute or so.
  • Turn off the heat, add lemon juice & cilantro. Mix & serve with idli, poori, chapathi, dosa or rice.

Thursday, June 11, 2009

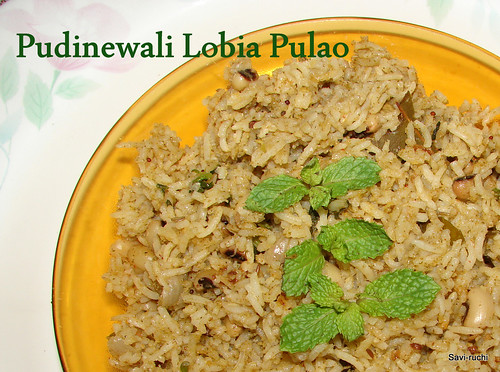
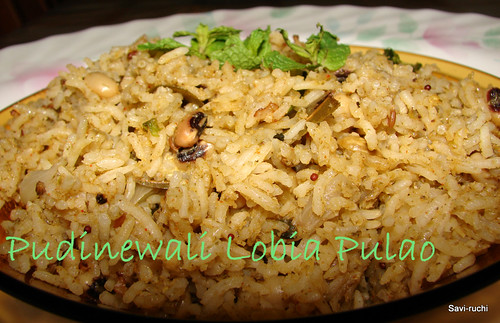
Pudinewale Lobia Pulao (Rice & Black eyed peas in Mint Sauce)


Couple of weeks before, we had to move to a new locality & during the move I decided not to buy any grocery; as moving the grocery along with the other stuffs would be a labor intensive activity. Everyday, when I happened to open the kitchen cabinet, a bag full of black eyed peas used to stare at me. I avoided it for many days as the only thing I used to cook using black eyed peas was huLi(sambar or curry). Finally a day arrived when my kitchen had nothing other than black eyed bean.

Stubborn, adamant, anti-social are the right words(according to me; black eyed peas lovers, please dont get offended) for black eyed peas/lobia/alasande kalu. Put in soup, sambar, pasta or in pulao, it stands apart & doesnot absorb the spices easily. I have seen few fellow bloggers using black eyed peas in pulao. I was little skeptical about the usage of this particular legume/grain as I personally feel that black eyed peas stand apart in most of the dishes it is put in. It doesnot absorb the spices easily unless skillfully cooked.So, I thought of defeating the black eyed beans with some very strong flavored spice/vegetable. The first thing that striked me was " Mint(Pudina)" followed by "Dill (Sabsige Soppu) leaves", "Garlic" & list went on. As mint was handy, I went ahead & prepared the pulao. Mint to a most extent succeeded to defeat the black eyed peas & wore the crown for that day. Three cheers to mint, he he..


Ingredients:

Mint leaves/Pudina: 1 cup (tightly packed)
Black eyed peas: 1 cup
Basmati Rice: 2.5 cups
Onion: 2 nos (1 finely chopped & the other coarsely chopped)
Cinnamon: 2 inch stick
Cardamom: 2 nos
Poppy seeds/Khus khus/gasagase: 1/2 tsp
Grated coconut: 3 tbsp
Ginger: 1 inch
Green chilli: 3 nos
Salt: According to taste
Water: 5 cups
Yogurt/Curd: 1/4th cup
Oil: 2 tbsp
Mustard Seeds: 1/2 tsp
Cumin Seeds: 1/2 tsp
Red chilli powder: 1/2 tsp (optional)
Lemon Juice: 1 tbsp (optional)

Procedure:
  • Soak the black eyed peas in water for 8-10 hours.
  • Make a smooth paste of mint, cinnamon, cardamom, coconut, poppy seeds, green chilli, ginger, onion by adding sufficient water.
  • Heat a broad pan & add oil to it. When oil is hot, add mustard & cumin seeds.
  • When seeds crackle; add finely chopped onions & saute till onions turn golden brown.
  • Add the masala paste to the pan & fry till the raw smell of masala disappears (around 2-3 mins).
  • Add soaked black eyed peas, 1/2 cup of water & cook on a medium flame until the black eyed beans are almost cooked (it should still be firm & soft). It took a little more than 30 minutes for me to get the black eyed peas cooked.
  • Meantime, wash the rice in running water & soak it for 15-20 mins.
  • Add the remaining water, rice, salt, chilli powder to the same pan & cook it on a medium heat until rice is 90% cooked (Best indicator is : grains would be bigger & little soft. One needs to apply a little pressure between the fingers to press the rice). During this stage, add yogurt, gently mix & cook it covered on a low heat for another 7-10minutes.
  • Open the lid only when you need to serve the pulao. Add lemon juice, gently mix & serve it hot/warm with a raitha of your choice.

Notes:

  1. I would pressure cook the mint sauce with black eyed peas next time when I prepare this dish. I feel, this would reduce the cooking time of this pulao to a great extent.
  2. I have not added garlic in this recipe as I try to avoid it whenever possible. Feel free to use according to your choice.
  3. Adding yogurt at the final stage & cooking the pulao on a low heat gives the pulao a slight biryani touch & tastes great.

Saturday, June 6, 2009

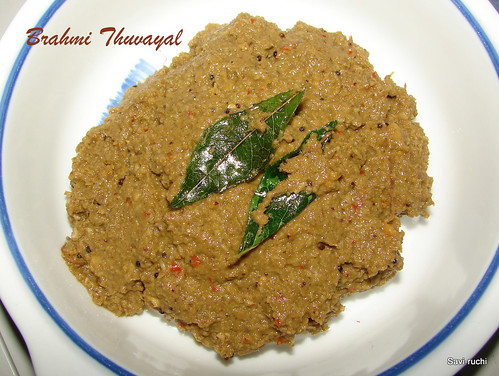
Brahmi Thuvayal

My mom-in-law’s native is a small village near Hebri, Karnataka, India. I feel, she has lived her life as a princess there with 7 brothers & 4 sisters. Yes, you read it right; my hubby’s maternal grandparents had 12 children. That village belongs to the Kudremukh National Park & is amazingly beautiful.

Their house is a small palace with greenery & stream surrounding it. One can hear the water flowing in the stream while cooking in the kitchen, isn’t that bliss? Here is the view of the stream from kitchen.

This is the land that introduced me to a lot of herbs/vegetables like Brahmi, Punarpuli, Vaatehuli etc. I am a crazy fan of Brahmi(popularly known as Gotu Kola) since then. I keep exploring for more & more Brahmi dishes. This herb never disappoints me in whatever dish I put it in. I have used this to garnish my stir-fry too.

Coming to this brahmi recipe, this recipe is from my friend. She passed this recipe during one of our usual chatting sessions, however I have made some changes to it (as expected, my hands start itching if I don’t make modifications to the original).

Ingredients:
Brahmi leaves: 2 cups (I used 6 cubes of frozen Brahmi).
Urad dal: 1 tbsp
Red chilli: 2
Tamarind: 1 big grape sized
Grated coconut: 2 tbsp (optional, this was not in the original recipe)
Jaggery: a pinch (optional, this was not in the original recipe)
Oil: 1 tsp
For tempering:
Oil: 1 tsp
Curry leaves: 1 string (6-8 leaves)
Mustard Seeds: ¼ tsp
Asafetida: a big pinch

Method:


  • Wash the brahmi leaves & pat them dry.

  • Heat oil in a broad pan, when oil is hot, add udal dal, when urad dal turns golden brown, add red chillies & fry for 20-30secs. Follow, red chillies by brahmi leaves & saute until soft (becomes dark green).

  • Allow the leaves to cool completely. Once cooled, grind the leaves together with coconut, tamarind, jaggery & salt without adding much water (add few drops of water only)

  • Heat oil in a pan, when oil is hot, add mustard seeds, followed by curry leaves & asafetida. Then add the paste prepared & saute till all water is absorbed (3-5 minutes).

  • Allow the chutney to cool & this can be stored in the refrigirator for 3-5 days. Goes well with curd rice, akki rotti & dosas.

This thuvayal & brahmi tambli goes to "SWC: Cooking with Greens" hosted by Sowmya of Creative Saga & to Lakshmi who is the creator of the event.

Sunday, May 31, 2009

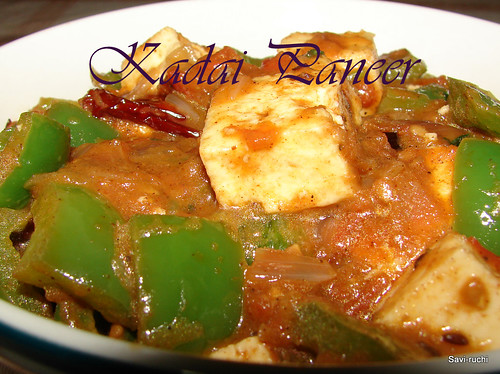
Kadai Paneer

This dish is a must entry in the menu card of most of the restaurants serving Indian food(Not sure about their kitchen though!!).The question is how many restaurants serve the authentic kadai paneer? Can we recall a restaurant where we can proudly say, I had the best kadai paneer there. The sad note is, restaurants quoting “Authentic Punjabi Food” also fail to give tastier kadai paneer. As I understood from a friend of mine, kadai paneer is prepared by adding freshly powdered green cardamom, bay leaf, coriander seeds, and red chillies to get an authentic taste. But, most of the restaurants seem to use the same creamy gravy (oily!) prepared for other dishes & just throw in vegetables required.
What I want to say all kadai paneer lovers is, “Don’t go by the name, by the ingredients or by the fancy name”. This dish does not require any special ingredient & is very easy to cook. So, cook it at home & enjoy the dish. It tastes so authentic that you can fool people by saying you put hours together to prepare this delicious dish. Same happened to me few years before. I prepared it during my hubby’s relative’s visit & it was a big hit at our family. Many of my aunties, cousins took the recipe from me & all started cooking it. It had become my signature dish for couple of months. The highlight of Kadai Paneer is “the crunchiness of capsicum & softness of cottage cheese with lightly infused gravy”


Ingredients:
Indian Cottage Cheese: 200gms (Cut into ½ inch sized cubes)
Green Capsicum: 2 nos (Cut into ½ inch sized squares)
Tomatoes: 3 nos
Onion Paste: 2tbsp (I added finely chopped onions here)
Garlic: 3 pods (minced)
Coriander Seeds: 1tbsp
Coriander powder: 1 tsp
Red Chillies: 2 nos
Red chilli powder: ½ tsp
Garam Masala: ½ tsp (optional)
Bay leaf: 1 no
Green cardamom: 2 nos
Oil: 2 tbsp
Butter: 1 tbsp
Cumin Seeds: ½ tsp
Salt: According to taste

Method:
  • Blanch the tomatoes & chop them into small pieces.
  • Make a coarse powder coriander seeds & red chillies.
  • Heat oil in a broad pan, when oil is hot, add cumin seeds, followed by coarse powder of coriander & red chillies. Saute it for 30secs. Add onion paste & garlic. Saute till garlic turns golden brown. Add the tomatoes, little salt, red chilli powder, bay leaf & cook the tomatoes on a low heat for 15-20 mins.
  • Meantime, heat the butter in another pan, when butter is hot, add coriander seeds powder followed by paneer cubes, sauté the cubes for 1-2 minutes. Then add capsicum & sauté on a medium flame for 3-5 until the capsicum is cooked & yet maintain its crispness.
  • When the tomatoes start leaving out oil & are cooked till soft, add whole cardamom & garam masala. Saute for another 3-5 minutes on low heat.
  • Remove the bay leaf, cardamom from the gravy before serving. Add the sautéed capsicum & paneer 10 minutes before serving the dish for paneer to absorb the gravy.
PS:

  • The main idea is to keep the capsicum crisp & paneer firm. Hence, donot keep capsicum & paneer in gravy for a long time. The paneer gets crumbled & capsicum becomes soft.
  • Do not try to skip, the addition of whole cardamom as it adds a nice flavor to the dish.

Blog Events: Goes to "MFT:Cheese" event hosted by Poornima Nair of Tasty Treats & to Bindiya who originally started the event.

Thursday, May 28, 2009

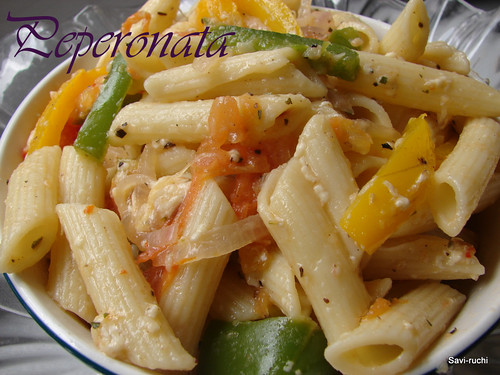
Peperonata: Pasta in Sugary-Peppery Sauce

Once upon a time, the name pasta was enough for me to skip the office party, as I used to hate it. May be I never felt like giving a try because of the ‘not so usual’ shapes of pasta & also because I tasted it at a wrong place first time. My first experience with pasta was in one of the restaurants in Central Mall, MG Road, Bangalore. It was pathetic. After that, I avoided all pasta parties. I repent my decision now after tasting delicious pastas here. I see a whole lot of change in myself within a year. I have not only started eating pastas, but started experimenting at home too.

All food bloggers love to blog hop. I’m not an exception to that; however my blog hopping is limited. My hubby takes control over my blog hopping & does not let me do it for more than 10 minutes. So, I always forget to bookmark the wonderful dishes that I dream to cook someday. One such recipe that I wanted to try from sometime was this pepperanata. I found this simple & delicious recipe at Madhuram’s place. I made few modifications to suit my needs & cooked it couple of weeks before. The sugary-peppery sauce with cheese makes you crave for third & fourth helping too. Thanks a lot for the nice recipe Madhuram.


Ingredients: (Serves 3)
Pasta: 250gms (I used whole wheat penne)
Yellow capsicum: 1 cup (cut into strips)
Green capsicum: 1cup (cut into strips)
Onion: 1 medium to big sized (sliced)
Green chilli: 2 nos (slit into 2)(Original recipe didnot have this)
Garlic: 4 pods (minced & finely chopped)
Sugar: 1 tbsp
Salt: According to taste
Pepper powder: 1tbsp
Parmesan cheese: 4 tbsp
Tomato: 2 nos (discard seeds, pulp & cut into strips) (Original Recipe didnot have this)
Water: 1/4th cup
Pasta Herbs: 1 tbsp
Olive Oil: 2 tbsp


Method:
  • Cook the pasta until soft by following the package instructions.
  • Add oil & salt while cooking. Drain the water & preserve some water to be used while sautéing the vegetables.
  • Heat a broad pan, add oil to it. When oil is hot, add minced garlic, and fry till it turns golden brown.
  • Add, onion, capsicum, water & cook it on a high flame for 2-3 minutes.
  • Reduce the flame, add sugar, pasta herbs & cook the capsicum, onions on a medium to low flame for 10-15 minutes.
  • Throw in the tomatoes & cook again on high flame for 1 minute only.
  • Add cooked pasta, salt, pepper powder, cheese & toss them well. Serve it hot/warm with a bread of your choice.

PS:
  • If available, use cherry tomatoes instead of tomato strips.
  • I followed Madhuram’s suggestion & did not skip the sugar. She was right, addition of sugar takes this pasta to a different level altogether.
  • I strongly recommend you to add cheese (this was not in the original recipe) as it blends quite well with the “sugary-peppery” sauce. However, you can be flexible on the quantity of cheese.

Update: Goes to MFT:Cheese hosted by Poornima Nair of tasty treats & started by Bindiya.

Featured Post

Noodles and Vegetables with Honey Ginger Sauce

Am I the only one who crave for noodles when sick with cold and sore throat? I love this noodles with honey-ginger sauce and it is perfe...